
Hello! crafty friends
I am back with this months #PABD product projects. This months at #PABD we have beautiful dies,stamp sets and also enamel dots.
To check Peek-a-boo products please check HERE
MY FIRST PROJECT : BIRTHDAY BANNER ( This is a picture heavy post) :)

This month its my son's birthday so I have made a BIRTHDAY BANNER...using Fishtail banner die.
1. I have used 5 pieces of fishtail banner diecuts using biggest size die
2. Then did layering with one size smaller diecuts in pattern paper.
3. This way I have prepared all the 5 pieces of banners using alternate pattern paper designs.
4. Then I did tiny circle punch on both right n left top corners of each banners to pass thread to hold all pieces of banner....using single hole punch machine.
5. Then I threaded a long burlap twin through all the 5 pieces of banner ,and fixed each piece at the back with sticky tape so that they don't move and stay in its place...keeping a gap of almost 1'' between each banners.
6. Used washi tape in the middle of each banners.

7. For center middle banner -I have used #PABD HAPPY BIRTHDAY TO ALL stamp set . It is such a pretty ,big bold sentiment that I don't need any thing extra to decorate my middle banner.Only used few mulberry flowers in blue n ivory and its ready.

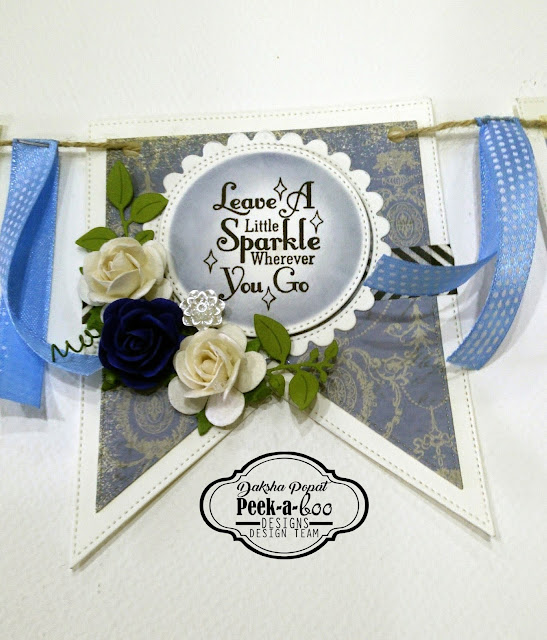
8. For the side two banners from the middle..I have used # PABD scalloped circle double stitched die cuts, which I have distress with chipped sapphire when diecut was inside the die.. then stamped the center with # PABD stamp sentiments...Finally decorated with blue and ivory mulberry flowers ,charms and leaves


9. For further last two side banners I have made a rosette from same pattern paper and used..........to cover the center of rosette I have used scalloped circle punch cutout in 1''. On that I have used decorative black buttons with hot glue gun....also
used LOVE and LIVE mdf pieces ( which is a gift from a friend)
When my banner got ready I felt that I was missing touch of ribbons ...So finally I have used blue polka dotted ribbon to decorate my banner , used plastic bow charms on last two banners with ribbon bows....


Supplies used
My second project - card

For this card I have used negative cutout from my first banner project ..
1. First I have stamped the birdie image on Canson water colour paper and did water colouring using my new Gansai Tambi water colours ( this is my first try and I loved using it )..
2. Then did layering with negative cutout from fishtail banner die cut.
3. Used happy birthday sentiment ,masking rest of the stamp part. Did stamping on vellum paper ,gave finishing touches using enamel dots , glossy accent and glitter rock candy on flowers.
Thats all for today ......thank you all for stopping by ...see you soon with next project
Love n hugs
DAKSHA


