Showing posts with label handmade cards. Show all posts

Monday, December 18, 2017

Colorful cards with Washi Tapes!


Hello and good morning dear friends!
I’m Halak and today I have a set of 3 super colorful cards to share that were created using PABD Washi Tapes.

All those who are familiar with my work would know that I am a huge fan of these tapes. I use them often and have quite a collection. (Sometimes though, I feel that the reason for loving washi tapes so much is because I am a lazy crafter and these come adhesive backed! lol.)

Anyway, let me not ramble on, let’s get to the projects!

Card #1


I’ve used washi tapes with a bit of stenciling (Arrow Stencil by PABD) here and teamed it up with a die-cut sentiment (Word – Celebrate Die by PABD).

Washis used: Chevron Delight & Colorful Polka

Tip: Don’t hesitate to experiment with washis. They look great with stenciled backgrounds. Only one thing to keep in mind, use a couple of those colors that are on the washi as your stenciled background base and your project will look beautifully coordinated.

Card #2


In this project I have layered the washi tapes and die-cut them using the versatile Dual Stitched Hexagon Die by PABD. The sentiment is a sticker.

Washis used: Chevron Delight, Colorful Polka, Colorful Oasis, Funky Geometry & Rainbow Hues

Tip: Die-cut shapes, sentiments etc. by stacking up washis for a fun look.

Card #3


Last but not the least, in this project I have used the washi tapes as-is. Stacked them up and added the dreamy Word - Dream die by PABD. The sentiment is colored using distress oxides.

Washis used: Chevron Delight, Colorful Polka, Colorful Oasis, Funky Geometry & Rainbow Hues 

Tip: Color co-ordinate your washi tapes when you plan to stack them. Rainbow colored ones never fail!

Closeups:


This brings us to an end of my post. I hope you liked my projects and were inspired to try some washi tapes out! (Give it a go, they're super fun!)

To shop for products, just click >> HERE

Images of products used: 


Monday, November 14, 2016

Card and Tags


Hello and good afternoon dear friends! ^__^

I'm Halak and today I have a card with a couple of tags to share, using some fantastic products from the prior releases of Peek-a-boo Designs (PABD)!

Let's start with the card.

Usually we use ribbon at the top / bottom of the card but in this layout I thought of using it in the central portion of my card.
 
I've used the Leafy Delight stencil along with tiny pieces of die-cuts from the Dual Leaf cutting die. (That die really compliments the stencil design beautifully, what say?)

Finished it off with the gorgeous (and one of my favorites) Word Die - Dream and a couple of rhinestones.

Tip : When you are using a ribbon in the center, you can either embellish towards the edges of the card like I have done or leave the sides completely blank. Either way, it will look good!

Here's my second project :


In this project, I've used the Chrysanthemum stamp with circles from the Scalloped Circle cutting die to create circular tags.

Watercolored the blooms and colored the backgrounds using distress inks.
Stenciled a little onto the background using the same distress inks with the Leafy Delight stencil and added some flat white sequins.

Here's the list of PABD products used in today's projects :


Hope you liked the projects! I'd love to know what you think.

Thank you so much for stopping by! *Hugs*

Thursday, October 27, 2016

Inspirations for October release #PABD

Hello! crafty friends
All must be busy with festivities and its preparations. I will not take much of your time ...this is my last post for this month using October release products from #PABD

My First Project : Thank You card


1.For the background I have used #PABD thank you stamp set,then used #PABD october release stencil ...colors used- tumbled glass,mustard seed and evergreen bough.
2.used 1'' white CS strip for the sentiment...on that used black circle diecut from double stitched  scalloped circle die from #PABD..
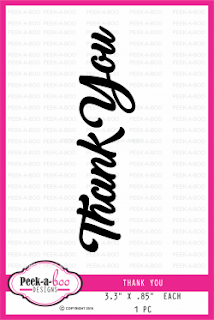
3.finally embellished with distressed doodled butterfly #PABD and THANK YOU die cut from #PABD ...using three layers of diecuts...used Spectrum noir clear glitter pen on butterfly to highlight it .and wired pollens for butterfly's antenna.

MY SECOND PROJECT : doodled butterfly card


1. For the background I have used doodled butterfly #PABD stamp on red CS , I stamped with versamark and heat embossed with superfine clear embossing powder (Rangers).
2. Stamped doodle butterfly with versafine black ink on white CS and heat embossed with Ranger's clear embossing powder. Then used Spectrum noir clear glitter pen to highlight it ... fussy cutted it..and used in the center of my background . 
3. For the sentiment I did same heat embossing....used #PABD doodled butterfly sentiment and gave wave banner shape...used burlap thread at the bottom of this sentiment banner
4. Finally highlighted with few black sequences, did matting with black CS and used white folded  card base.

MY THIRD PROJECT :Feathers card


1. On the canson watercolor paper I did smoshing technique using distress inks, acetate sheet and water mister..did black splatters with black distress ink and water.
2. For feathers I stamped #PABD feathers stamp on watercolor paper with versamark and heat embossed using gold embossing powder ....colored the images with Zig water color pens... then fussy cutted...used three feathers on water colored background ...used burlap thread  bow and a wooden  button.
3. For the sentiment I have used black CS and gold heat embossing...used enamel dots.
4. Finally did matting with gold CS and used white folded card base.
      
  Thank you all for stopping by....HAPPY DIWALI AND PROSPEROUS NEW YEAR TO ALL ...in advance
LOVE
DAKSHA

 SUPPLIES USED :


Sunday, August 14, 2016

CAS Sunday with Nadiya Bilovodenko

Hi crafty friend! Happy Sunday to everyone!!! Hope you have fun today )))) Ok))) Nadiya Bilovodenko is at the PABD blog today wiht you. I have some CAS cards. They are simly and beautiful.
The first card for today:
 Halftones muted ..... ..... and some mysterious ...
 Miraculous inscriptions were the impetus.
 Heart Jewellery handmade. I made for you a quick tutorial.
The second a project is a card too.
 Oh, and I liked the  bubbles  stencil )))
 And the last a project for today:
 
Truly a true an inscription ...
 Close up...

I propose a quick step by step tutorial.

1. Take a set of stamps. We need hearts.
 2. Gray in ink stamps do the. Add glossy. Sprinkle the glitter. 
3. After drying simply cut the heart.
4. With distress ink and stencil  bubbles make the background.
5. Add the major inscriptions.

Your CAS projects are ready. Enjoy your creativity with PABD!


In my projects I have used:

Bubbles stencil 
Solid Shapes
Positive Vibes
Magical Fairies


Saturday, August 6, 2016

Colour inspiration challenge # 9 with Daksha

Hello! crafty friends
  Today its me Daksha Popat at Peek-a-boo Designs blog with my inspiration for Challenge #9 - colour inspiration...,you can choose any three colours from there and do your project..For prevoius inspirational project from our fellow DT's you can see HERE


I have two project to share...

Here is my 1st project using ink smooshing technique...


Its a  5'' * 7'' card . I took rangers water colour paper and using ink smooshing technique I have  prepared my background. Then misted with Perfect pearl mister to get that shiny pearly effect. Then stamped the butterflies on a smooth card stock using Black Archival ink,fussy cut them ,applied glossy accent and glitter rock candy.Placing all the butterflies roughly , I stamped the sentiment using MISTI tool . I stamped twice to get proper dark sentiment. Then did the layering using dark red card stock. Finally arranged all the butterflies and stuck with glossy accent

My second project using all five colours from colour inspiration board


This card is a single layer card..For the card base I took Iris paper which I distressed with peeled paint in the center ,then misted with water to get that beautiful water droplet effect.I stamped that ice candy on water colour paper with black Archival ink, then coloured the images using zig real brush  pens , fussy cut them ,used glossy accent and glitter rock candy ....arranged on my card center and directly glued...Finally stamped the sentiment and gave boarder lines using black marker

Hope you like my projects for today ...Waiting to see your work for this month challenge
Thank you 
Love n Hugs
                                                                            DAKSHA

Supplies used