Wednesday, August 31, 2016

A FLOWER SELECTION OF CARDS

Hello crafty friends, Martha Lucia here to share with you a complete selection of cards created with flowers. All of these are flowers from our stamp sets and you can combine, cut and edit these to create your own designs. Let me show you my first card:


For this card I used the stamp set Humming Blossom and a watercolor technique. Creating this was very easy:
1. Cut a layer of watercolor paper. 
2. Ink an acrylic blog with four different colors of classic Ink. I used Wild Wasabi and Pear Pizzaz for the upper part and Blue Sky and Pool Party for the lower part. 
3. Spray the block with water and put the watercolor paper over the acrylic block.
4. Remove the paper and let it dry. If you want to speed up the process, you can use the heat tool.
5. Take the branch flower image from the stamp set Humming Blossom and ink it with markers. I used the colors Crushed Curry, Garden Green and Rose Red.
6. Spray the stamp with water and stamp over the watercolor background. Let it dry.
7. Stamp your sentiment with Paris Dusk Memento Tuxedo Ink.
8. Decorate with a die cut from the Funky Shapes Die Set. I used gold glimmer paper for this purpose.
9. Cut the base of your card and assemble it.


My second card is a Clean and Simple model that I made using the Dahlias Layered stamps and coordinating die cuts. These flowers are totally gorgeous and this is definitely one of my favorites sets.


Creating this card was very easy. This is a one layer card created in Whisper White card stock.

1. Stamp the solid images of dahlias, large and small, using Sky Blue and Bermuda Bay Classic Ink.
2. Use Stamp-a-magic to stamp over some dahlias from the previous step to make some corresponding flower with lines using Night of Navy Classic Ink.
3. In another piece of card stock, stamp the solid image of the dahlias using Pool Party Classic Ink, and the detailed images with Night of Navy and Island Indigo Classic Ink.
4. Cut the flowers stamped in the previous step using the corresponding die cut and paste over the stamped background using dimensionals or zapdots.
5. Stamp the sentiment from the stamp set Fiends Forever using Night of Navy Classic Ink.
6. Finalize the decoration by adding some silver sequins.


My last card is a combination of elements: decorated paper, word die cut and a little flower. This flower is from the stamp set Flower in a Jar. Take a look at my card:


The base of this card is Rose Red and the second layer is Whisper White. Creating this was very fun:
1. Cut the second layer using whisper white card stock and stamp the rose from the stamp set Flower in a Jar several times in diagonal lines using three different colors of Memento Ink. I used Grape Jelly, Lilac Posies and Lulu Lavender. 
2. Cut the third layer using decorated paper and create a diagonal angle. 
3. Match the border and cover it with a tiny piece of rose red card stock.
4. Tie several loops of natural twine and create a bow.
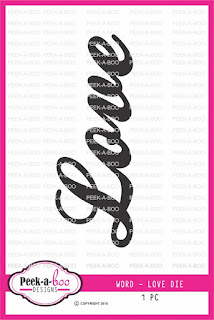
5. Cut the Love die word in a coordinating color and paste over the tiny border.


These are the products that I used in today's creations:


All of these are available in our store in you will find a lot of more to use these ideas in your own way!

See you soon with our new release!

Tuesday, August 30, 2016

More friends joining in !!

Hi every one,
Its Vidushi here.. Hope every one is doing good. Its been a while since I have meet all my crafty friends at the Peek-a-boo Designs blog .. Im here to introduce you to two beautiful crafters who are joining us from September .. Without much of wait let me introduce them to you


Neha Tulsyan


" I'm Neha Tulsyan from India, residing in Chesterfield, MO with my husband Ashish. I'm an artist and I love to teach what I have learned..  I started painting at a very early age and learnt loads of art forms. And when I came across paper crafting, I kind of got stuck... 


As they say Sky is the limit, well, my passion for crafts knows NO limits."

Few of her creations :


Stay tuned on our blog from September onwards to see their inspiring projects !! 

Till then happy crafting !!

Loves and Hugs 
Vidushi 

Monday, August 29, 2016

2 Cards and a Tag

Hello everyone, it's Juhi. Today I'm sharing 2 cards and a tag I made for August's challenge Challenge #9 Color Inspiration. In case you haven't already, there is still time to play. This month's challenge is a color inspiration. You can find all the details and enter here.
Aren't those colors just yummy :), well now onto my projects....
Project 1:
Negative Die Cutting with Peek-a-boo Designs Dies
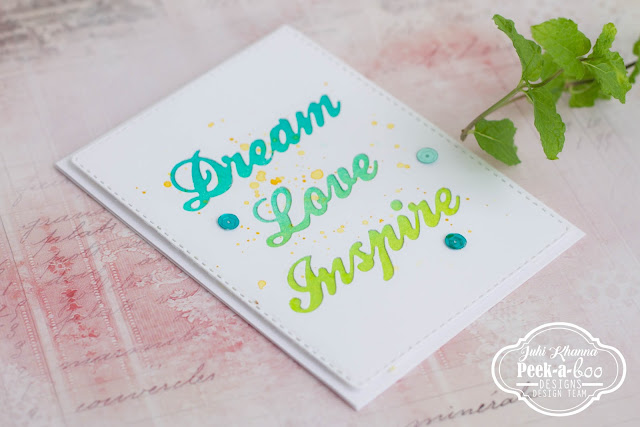
Negative diecutting is the focus of this card. This is my first attempt at negative diecutting and I love the results. I die cut the words "Inspire", "Love" and "Dream" on a piece of white cardstock and retained the negative of the die. Backed it with a piece of ink blended watercolor paper. I also added some splatters of paint and sequins to finish the card.
Negative Die Cutting with Peek-a-boo Designs Dies

Project 2:
Humming Blossom from Peek-a-boo designs
I've used the left over die-cut from my previous tutorial post on this card. You can check out how I used the negative pieces of the Graceful Lattice die-cut in this post.
The humming bird and flowers are stamped on watercolor paper and colored with watercolor markers and then fussy cut.
It's not visible in the photo but I added some clear shimmer on the humming bird.
Humming Blossom from Peek-a-boo designs

Project 3:

My 3rd project is a tag. I created an ink blended background using the colors from the color inspiration.
And then stamped the Fairy silhouettes and added some chunky glitter.
I hope you liked my projects and are inspired to created something for the August Challenge!
Thanks for visiting and have a great week!

Supplies Used:


Sunday, August 28, 2016

Crafty sunday with Daksha popat

Hello ! crafty Friends,
Hope you all must be doing very well!...Today I, Daksha Popat, am sharing three projects with you ,keeping in mind this month's challenge...Colour Ispiration! Hope you all will like it and hope to see more and more of your entries for this month's challenge.To see more inspirations  and challenge post HERE..

MY FIRST PROJECT : CARD


 Its an oval diecut card,made using oval dual stictched die #PABD . For the top layer I have used Oval frame which I have cut  using oval dual stitched die. In the window of the oval frame I have used Graceful lattice die cut .Bottom of that window frame I have used oval piece of diecut which I have distressed with distress inks -Squeezed lemonade and rusty hinge...Finally used #PABD sentiment die INSPIRE and decorated with liquid pearls.
Flowers I have coloured with Altenew ink cosmos red and highlighted with wink of stella, For the leaves used cheerylynn leaf die cuts, which I have painted with peeled paint reinker n then used crackle paint

SUPPLIES USED :


MY SECOND PROJECT : CARD


For this card after cutting cardstock for my 1st project ,negative part of diecut left.,..I have used  that left out negative piece from my 2nd project.

SUPPLIES USED :


MY THIRD PROJECT : BOOK MARKS


These cute little bookmarks can be ideal gift for Teacher's Day!.Its very east to make . Used jumbo metal paper clips for these bookmarks . To stick two scallops circles diecuts I have used double sided foam tapes and hot glue gun (you can used red tacky tape also ). Stamped images are either stamped on pattern paper n fussy cutted and others stamped n coloured and then fussy cutted

SUPPLIES USED:


Thank you so much for stopping by...
Love n hugs 
Daksha

Friday, August 26, 2016

Time for clear cards with Ria

Hi crafty people, 

With all the my love for transparent cards or clear cards and all the queries for the procedure of the same, I am (Ria) back with a couple of clear cards to share!

Without wasting much time I will jump into the steps to make one:


Following are some easy steps for making of this card:


Stamp some floral bunches fromFlower in a Jar set with gold and color it, here I have used distress inks, fussy cut them and adhere them on a patterned paper.


Using the first panel as a base, draw the outline on a separate blank card stock. I have avoided the buds as I dont want them to stick to the card, hence giving a 3D look.


Draw the outlines on two more pieces but this time not the floral outlines, only the arc.


Stamp any background design on an OHP or acetate sheet, here I have used Quilted Love and have embossed it with Enchanted gold from Ranger. Stick the floral base cut out on it with any glue.


As you see, the glue can be visible from the other side as the card base here is a transparent OHP sheet! So, this look is a total No No!!


Stick the copy of the first base cut out on the other side to cover any visible traces of glue.

Stick the other two arc shaped card stocks to the other side of the transparent sheet. and its done!
Take a look


Remember the card I had done last month! the same process for this also.


I have done an extra one to show it to you people about myriad possibilities with the concept of clear cards!!


Supplies used:


Isn't it so much fun! I hope to see your creations too and do not forget to post your creations to https://www.facebook.com/groups/peek.a.boo.designs.india/

Hope you like this post. 
Happy crafting
with love
Ria