Wednesday, November 30, 2016

2 cards with Distressed background - Swapna

Hi.. Friends..
Its been a long time i posted here. I have 2 cards for you today. I wanted to make a shaker card from past few days. So i have one shaker card.

Card #1

* The panel I used for both cards is same.
* I gold heat embossed the floral bloom image on a white CS and applied distress inks.
* I die cut the panel with stitched scallop rectangle  dies (used both on same panel).
* Glued frames together and used doubled foam tape to create my shaker well.
* Heat embossed sentiment from Birdie stamp set.
* Used different coloured sequins and secured the frame on card base.

Here is the card


Closer look at sentiment and sparkling sequins


Card #2

This was very easy to put together as most elements were ready.

* I used remainders of frame for this card.
* I glued both pieces on an acetate.
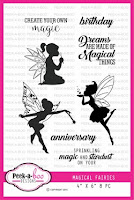
* Heat embossed image and sentiment from magical fairies on vellum.
* Glued the vellum on the panel and the whole panel was mounted on card base with foam tape.

** Only reason to use acetate was to avoid cutting thin strips of foam tape.

Here is my card


Here is the closer look at the panel and sentiment.


Supplies


 Hope you liked them..

See you soon..

Suggestions are always appreciated..


Tuesday, November 29, 2016

Mixed media LO and Freestyle album by Bilovodenko Nadiya

Hi PABD fans! Today me Nadiya Bilovodenko is here on the fabulous Peek-a-boo Designs  blog with my inspirations projects! and today I did two projects for you. Make yourself a coffee or tea, please, and let's look closer.  Today I want to show you how versatile is the stamps for scrapbooking.
The first project is miŃ…ed media LO.


At the mixed media projects stamps complement the overall picture.

It often happens that the scrap paper is too light, that's when we take the background stamps and do accents.


My second project - an album. All the photos in it is very personal, it is my closest people.

This is a gift for my mom. She loves the blue color, she loves my granddaughters, my daughter loves to draw, I love scrapbooking. ))))) 

All this I has connected in the album. ))))

 Stamps I have as accents. It is always possible string any all of that you have. After all, we are the fairies, is not it? )))

I suggest you to watch the video inspiration.

Also I have a little tutorial for you.
Let's do a simple card.
I take a set of stamps and using watercolors to paint the leaves. I need a lot of leaves. And cut them.
Then I draw a circle, and glue the leaves in a circle.

Then I with watercolors to paint flowers and collect the composition together.
Some close up


AT my projects i'm used:
Bold Butterflies

Humming blossom
Monstrous
Keys and Locks
Magical Fairies

Solid Shapes
Tangerine

Mandala
Layered Dahlias
Bold Hugs and Love

Monday, November 28, 2016

CAS INSPIRATION WITH STENCILS AND BUTTERFLIES

Hello dear friends, Martha Lucia here to share with you a selection of CAS cards that I made using stencils and butterflies. I love to combine die cuts and stamps in my cards, and Peek a Boo has all these elements in our store.

My first card is a Christmas card that I made using a masking technique with stencils.


I used the Grid Stencil and created three pines on it with masking tape. I inked it over the card stock using different colors of Classic Ink. I used Old Olive, Wild Wasabi and Garden Green.


To complement the decoration of the card I cut the Celebrate word on the same color of the card base, real red card stock  and tied two loops of natural Thick Twine with a red button on top. Then I pasted the decorated layer over the card base using dimensionals.

On  my second card I used the same stencil, the Grid with Gold Texture Paste.


The base of the card is Real Red and the decorated layer is Very Vanilla. I cut the Heart Butterfly in textured red card stock and paste over the gold grid. Then I stamped one of the sentiments included on the Doodle Buttefly stamp set using Versafine Onix.


The third card is using distress ink and Versafine ink with the stamp set Doodle Butterfly.


The base of this card is Melon Mambo and the stamped layer is Whisper White. I created an angle area to ink this with three different colors of distress ink and stamped partially the bold butterfly included on the stamp Doodle Butterfly.


The colors of distress ink that I used were Twisted Citron, Picked Raspberry and Peacock Feathers. The butterflies and sentiment were stamped with Versafine Onix and I just added a few details of Crystal Drops  in color Apple Green.

The size of all my cards is 4-1/4"x11" with score in 5-1/2".

These are the products that I used on today cards:


All these product available HERE!!!

Thank you for stopping by and see you soon with something special. 

Friday, November 25, 2016

A summery set of cards

I know it's almost winter in a lot of places but it's always summer here in Singapore! So why not make some fun summer themed cards? I've used the awesome "Summer Cooler" Stamp Set to create 3 bright and summery cards today.
Water Color Background with Ken Oliver Color Bursts and Peek-a-boo designs stamps
I created the watercolor backgrounds for all the cards with Ken Oliver Color Burst powders. I first sprinkled a little yellow, orange and crimson pigment powders on a piece watercolor paper and then sprinkled water on it. Following this I placed the second piece of watercolor paper on top of the first to pick up color from the first piece. This creates a beautiful smooshed effect.
I stamped the images onto watercolor paper, colored them with Zig Clean Color Real Brush Markers and fussy cut them.
I finally finished the cards by adding sentiments appropriate for the stamps. The sentiments in this set are so witty and go perfectly with the images. Don't you think so?
Thanks so much for stopping by today!

Supplies Used: