
Hello Everyone!
I hope you must have all loved the MAY 2016 Peek-A-Boo Designs release. This is a real treat to eyes and I'm sure everyone would be having their own favorites from this release!!!
We have a new challenge, well that's kind of a ritual with the beginning of a new month, right!! this time the challenge is all about drawing inspirations from the DT's. Find everything about the challenge here
Do remember to read the guidelines carefully for participating in this months challenge!
Now for the new release, well, like I mentioned before that this month's release offers a whole lot of varieties for each and everyone!!! This month has travel, super awesome sentiments, monsters, summer cooler, mango and soo much of fun with the stamps!!!
I have a tutorial here today!! I totally loved the MONSTROUS stamp set and literally had to snatch away this stamp set from being used by my fellow DT's. I really really really wanted to work with this set and somehow, I managed to register this set against my name for this month!! now once this was done, since I'm really smitten by these cute yumm creatures (now who says monster's as yumm -- that's me) I really had to think hard as to how to make a good use of this stamp set, and then I stumbled upon the idea of making a calendar with this stamp set. Who would not love to have a monstrous calendar!!!
Here's what I made!

Here's the stamp set I used to make this calendar

This set is designed by one of our very own DT Vijaylaxmi Siyal and I'm totally in awe of these itty bitty cuties!
Sit back, relax coz I have a tutorial on how I made this calendar
1. Take cardstock panels measuring 6.5*5 inches. I took 12 to make for a month each, but then later I decided to ditch half and make use of 6 panels for 12 months.
I distressed each panel with a few of my favorite distress inks! That Fossilized Amber is the newest one in my collection and I totally love this cool color!

2. Once the panels were distressed, I opted for grass like appearance on the panels and cutted out some green colored cardstock in two different shades to give some depth! These are then given a free hand shape and are then struck to the panel with some double sided tape to give dimension.

3. Here comes my most favorite part. I stamped the monster images onto a cardstock and then coloured them using the Nirmal watercolors(These were sent over by another Dear Friend, Tejal and yes, I totally love these colors, these are much like the peerless watercolors and are very smooth and rich to work with ) Once done and dried, these are then fussy cut! Here's a little monster party!

4. A major portion of the calender is complete!! Now I made a little holder for the same.
I took cardboard and cutted it out in a little bigger size than my panels.

Here's how I'm ,making the base to which the panels will be attached together.

Stick in properly with the tacky tape and make incision points at the edged of the cardboard pieces. ! Now you can make the two ends meet and mark the openings for the binder rings to slide in!

So this makes the base for the panels!
Here's my completed calendar!
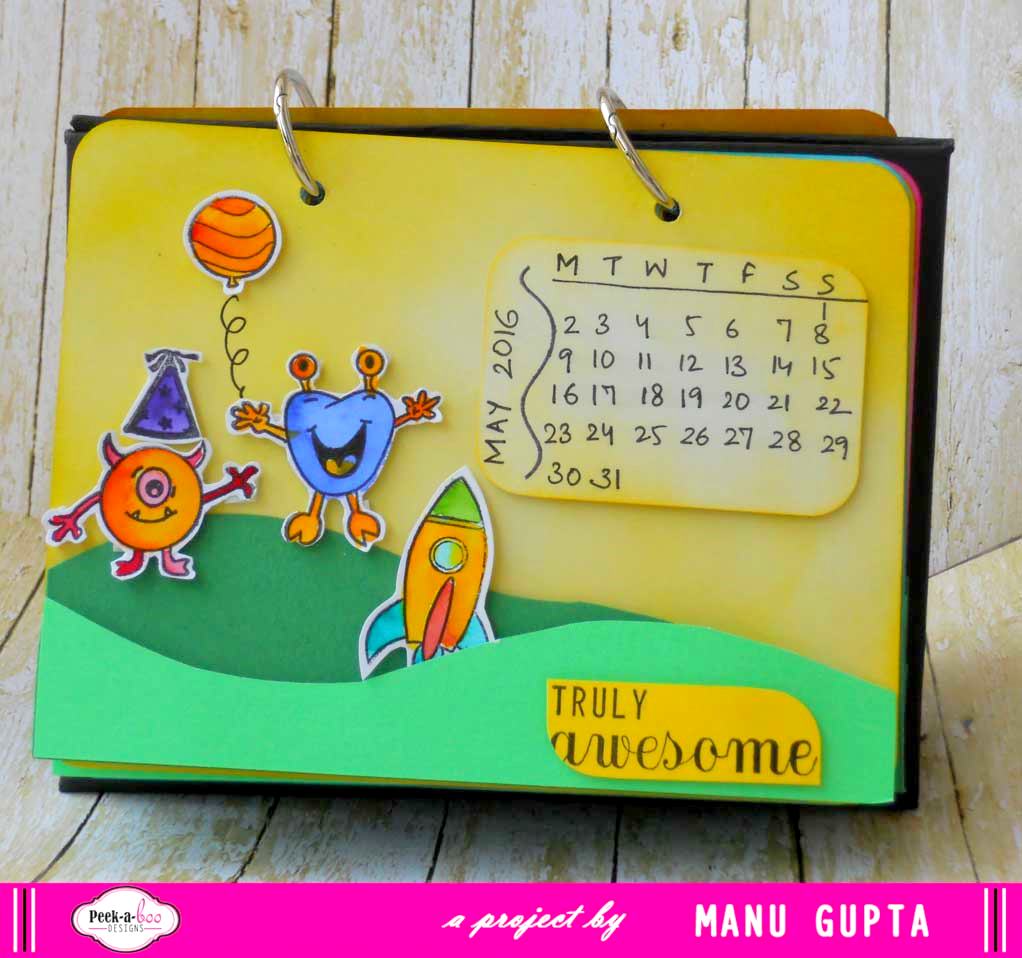


I'm so in love with this cute little monster calendar!! Ohh yes, I did use the sentiments from another of the May 2016 release!

These word cluster stamp sets are very much versatile and I have made all my sentiments using the same stamp set!
Here are a couple of more monster pics!
I had a super duper time making these little creatures!!!


I hope you liked the calender! Do remember to link up your entries for this month's challenge !
Happy Crafting!
Manu
What an awesome take on cute monsters stamp set, love your fun calendar!
ReplyDeleteThank you Vinita! glad that you liked it!
DeleteWoowwww!! They are really too cute!! I really wanna own one of your creations Manu!! :) Thank you so much for the detailed tutorial! :)
ReplyDeleteOhh my, that is one of the best compliments that I can get!! I would love to, send me your addy girl :) I'm glad that you liked the tutorial! :)
DeleteAww that is so sweet of you! :) I'll drop you a msg on FB :)
DeleteWow..a truly awesome calender..
ReplyDeleteThank you Deepti!! Glad that you liked the calendar!
DeleteAww...these monsters are looking super cute ...love the idea of monster calendar ..very unique 😍😍
ReplyDeleteThanks Shalu!! Glad that you liked it!!
DeleteAww...these monsters are looking super cute ...love the idea of monster calendar ..very unique 😍😍
ReplyDeleteStunning, awesome.....love that cute monsters
ReplyDeleteThank you!!!
DeleteGlad that you liked it!!
loved the happy monsters calendar Manu!!
ReplyDeleteThank you Seemaa!! Glad that you liked it!!
DeleteSuper cute! Love those little happy monsters stamps, just great fun Karen
ReplyDeleteThank you Karen!!! Glad that you liked it!!
DeleteWhat a cute calender to have :) lovely project Manu <3
ReplyDeleteThank you Girl!!! Glad that you liked it!!
DeleteThis is absolutely gorgeous Manu! ^__^ I love how you used the monstrous set! <3 Thank you so much for the detailed tutorial!
ReplyDeleteThanks girl!!
Delete