
Hey There..!
Today I'm sharing an article about some Note Cards with a Card Holder which I've created using PABD ( Peek-a-Boo Designs ) new release. You can check all the new products HERE & HERE
Here is the pic of my project...
Here is the pic of my project...
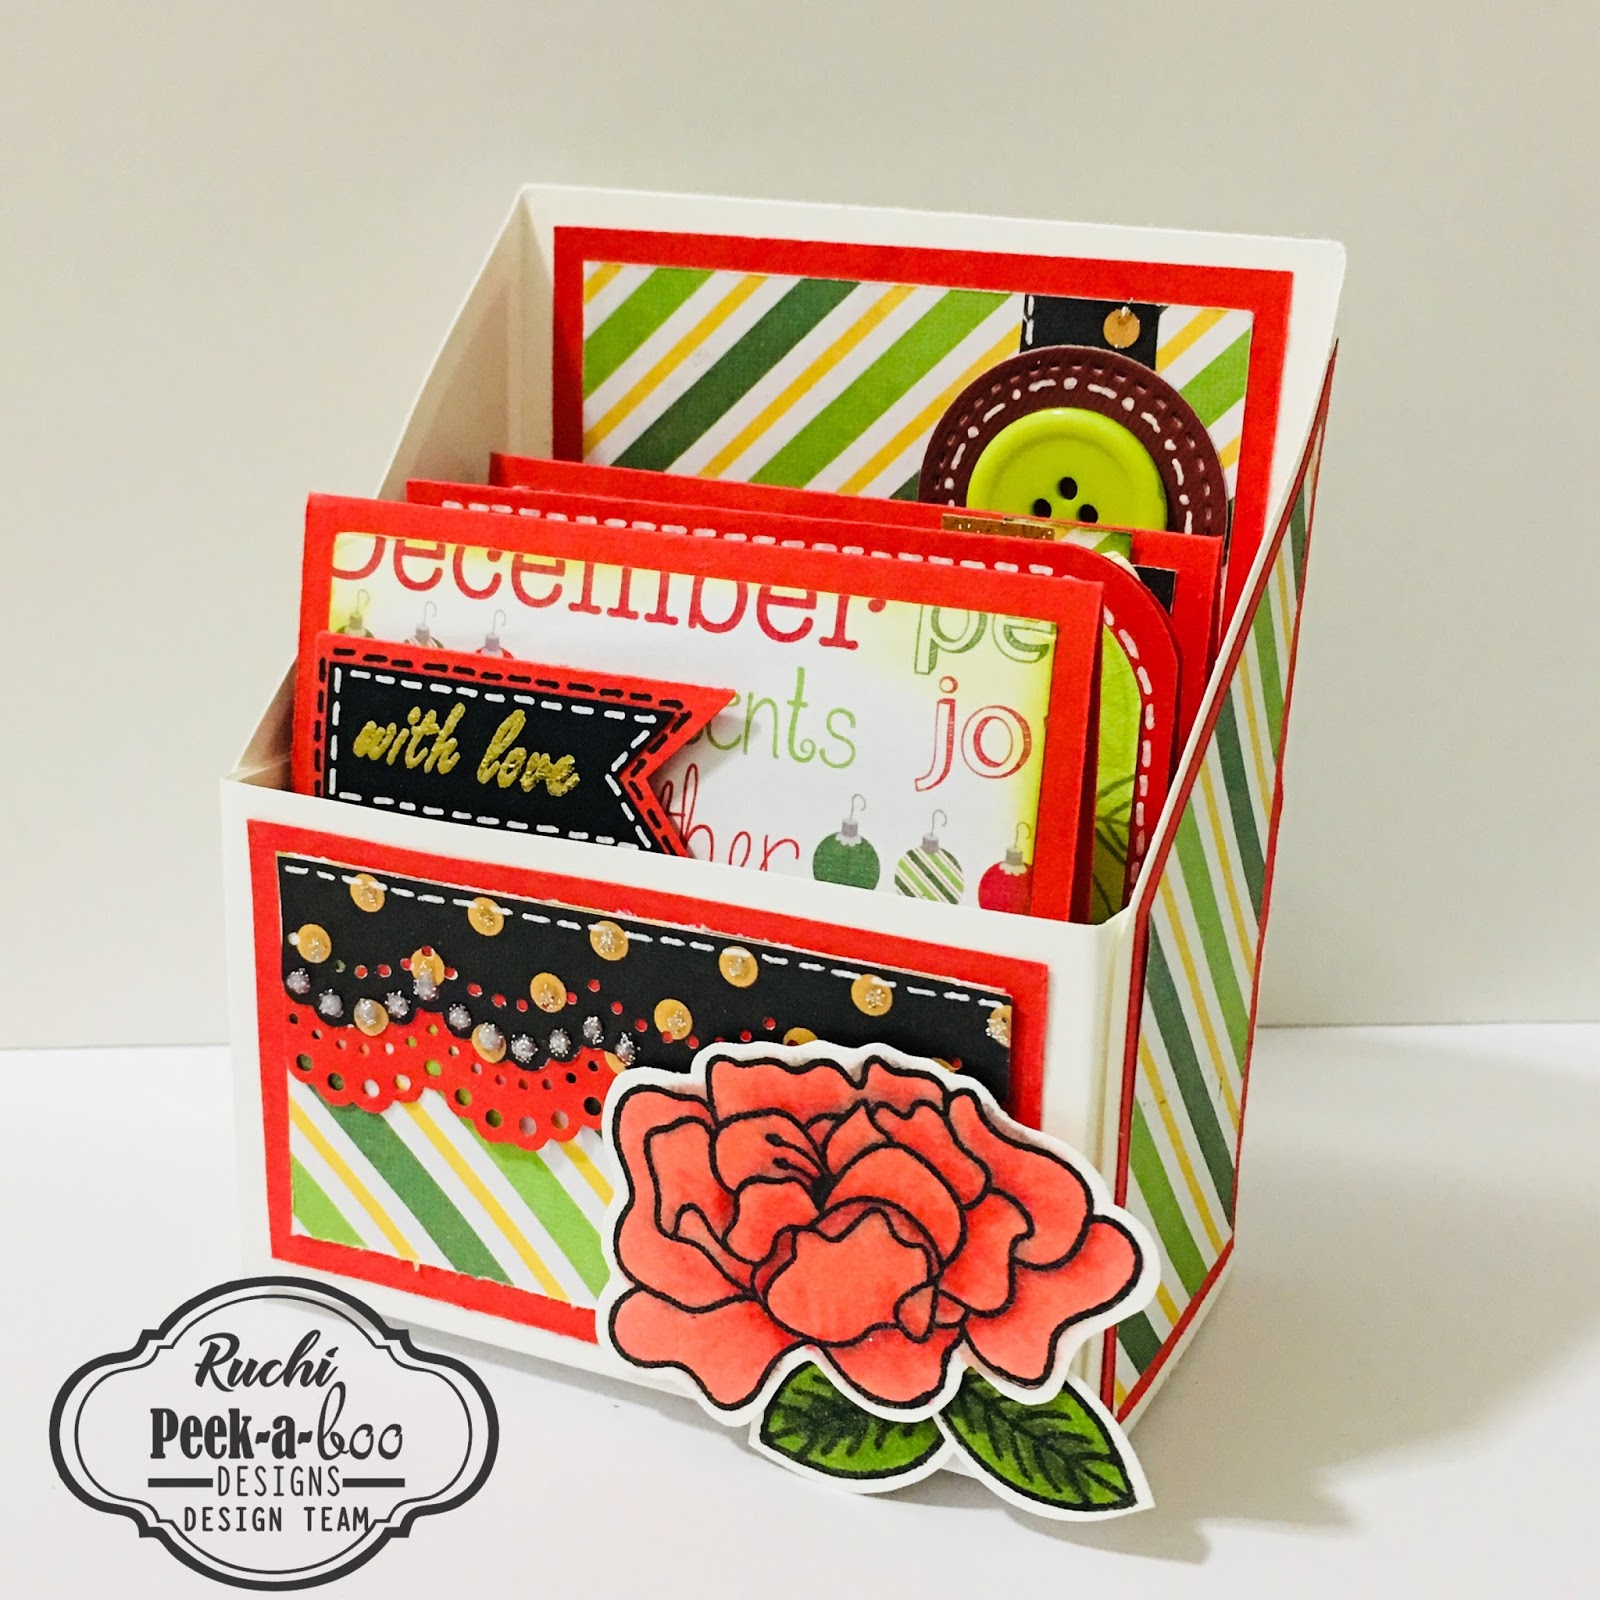
Christmas is all around so I chose some Christmas colors for my project. I have step by step procedure and one fun video too. But before that enjoy all the pics..

This cute green button is from my stash and that maroon circle behind the button has created using Circle Die form PABD.


These Note Cards are 3"x3" in size. Used CS, PPs, embellishments, washi tape n many more materials for creating them. :)
Here are individual pic of all three note cards..


I've used PABD- Colorful Polka washi tape in the first note card and sentiment is from PABD- Veined Daisy stamp set. In the second green card, created my own background using big n small leaves from PABD- Pretty Roses stamp set along with Memento inks. Sentiment is from same stamp set and heat embossed in white. In the third card used pattern paper and added this sequin flower. Sentiment is heat embossed in gold n again from PABD- Pretty Roses stamp set.
A close up pic of this flower which is from PABD- Pretty Roses stamp set. Colored it using Altenew Markers and added that shine using Wink of Stella.
A close up pic of this flower which is from PABD- Pretty Roses stamp set. Colored it using Altenew Markers and added that shine using Wink of Stella.

And now it's tutorial time! Here are the pics of all step by step procedure. I'm explaining all the steps too with every pic..


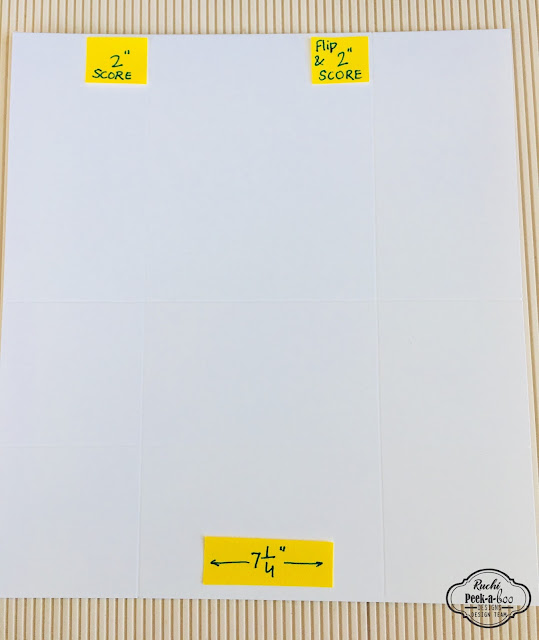 Step 3- Score at 2" at the length of 7-1/4" and flip the Cardstock and again score at 2"
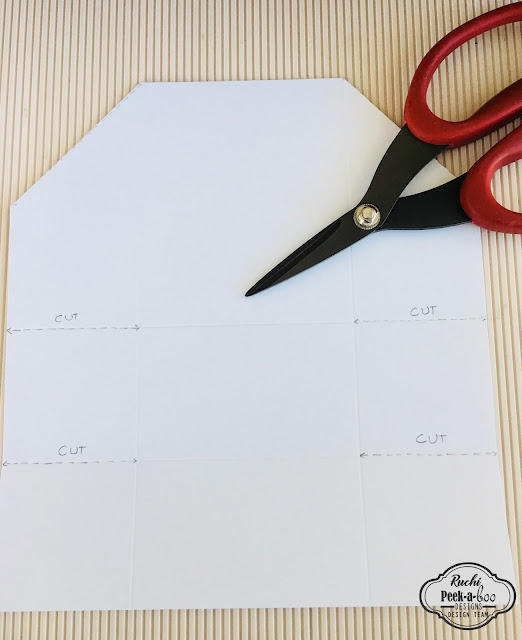
 Step 4- Now make a mark at 2" on the top of the cardstock both the sides and make mark diagonally.
 Step 6- Look at the pic. It's all about the mesurements for decorating your Card Holder. First 2 pieces are for sides. Third piece measuring 1-3/4"x3" is for yor card holder base and the last big piece is for inside decoration.
 Step 7- Take your choice of Cardstock measuring 3"x3" for your Note Cards and PPs are in 2-3/4" x 2-3/4" in size.

Step 1- Take a cardstock measuring 8"x7-1/4" I've chosen Neenah Bright White cardstock.

Step 2- Score at 2" n 4" using your score board at the length of 8"


Step 5- Cut those mark lines and make 2" mark on the both side of your score lines horizontally. You have to make total 4 marks and cut it out.


Now enjoy the video which is all about craeting and assembling this project. You can check the video HERE


You can shop all the products HERE
Our current challenge is going on. Theme is 'Anything but Card'. You can find more details about challenge HERE
Hope you like my crafty work today. I'll come up with more fun projects soon. Thanks for stopping by!
Happy Crafting!
Ruchi..
I love the placement of pretty rose, great designing with awesome and so clear steps, love it!
ReplyDeleteThank you so much Vinita! And you have designed this Pretty Roses stamp set so beautifully. :)
DeleteGorgeous note cards..will surely try it..thank you for sharing tutorial
ReplyDeleteThanks for your lovely words Mugdha! 😊
DeleteAwesome :) loved the tutorial
ReplyDeleteHugs
Preeti
Thank you so much Preeti ! 😊
Delete