Showing posts with label feathers. Show all posts

Friday, November 11, 2016

CHALLENGE #12 - COLOR INSPIRATION By Bilovodenko Nadiya

Hi PABD fun's))) Today Nadiya Bilovodenko is here.Our's Challenge 12 is so incredibly inspiring!!!
I did a series of three cards. 

Let's take a closer look.
The first project

 Technique hot embossing white powder and  background with distress ink.
 The set Feather simply magical

The second project - the card.
 Simple background - I did distress ink and water. Feathers I made hot embosing and distress, and then I cut them.
 I wanted lightness and weightlessness......
 The third project.
 I think the magic around us is ....... enough to pick up a set of stamps amazing ...

 And all three projects together.
 I hope you enjoyed my inspiration, right? I look forward to your projects in our Challenge.


 In my projects i used:

Enamel dots Rose Quartz


Feather
Messy Lines

Thursday, October 27, 2016

Inspirations for October release #PABD

Hello! crafty friends
All must be busy with festivities and its preparations. I will not take much of your time ...this is my last post for this month using October release products from #PABD

My First Project : Thank You card


1.For the background I have used #PABD thank you stamp set,then used #PABD october release stencil ...colors used- tumbled glass,mustard seed and evergreen bough.
2.used 1'' white CS strip for the sentiment...on that used black circle diecut from double stitched  scalloped circle die from #PABD..
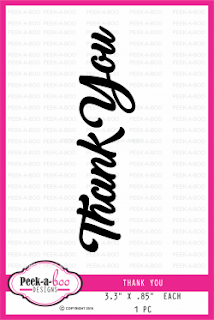
3.finally embellished with distressed doodled butterfly #PABD and THANK YOU die cut from #PABD ...using three layers of diecuts...used Spectrum noir clear glitter pen on butterfly to highlight it .and wired pollens for butterfly's antenna.

MY SECOND PROJECT : doodled butterfly card


1. For the background I have used doodled butterfly #PABD stamp on red CS , I stamped with versamark and heat embossed with superfine clear embossing powder (Rangers).
2. Stamped doodle butterfly with versafine black ink on white CS and heat embossed with Ranger's clear embossing powder. Then used Spectrum noir clear glitter pen to highlight it ... fussy cutted it..and used in the center of my background . 
3. For the sentiment I did same heat embossing....used #PABD doodled butterfly sentiment and gave wave banner shape...used burlap thread at the bottom of this sentiment banner
4. Finally highlighted with few black sequences, did matting with black CS and used white folded  card base.

MY THIRD PROJECT :Feathers card


1. On the canson watercolor paper I did smoshing technique using distress inks, acetate sheet and water mister..did black splatters with black distress ink and water.
2. For feathers I stamped #PABD feathers stamp on watercolor paper with versamark and heat embossed using gold embossing powder ....colored the images with Zig water color pens... then fussy cutted...used three feathers on water colored background ...used burlap thread  bow and a wooden  button.
3. For the sentiment I have used black CS and gold heat embossing...used enamel dots.
4. Finally did matting with gold CS and used white folded card base.
      
  Thank you all for stopping by....HAPPY DIWALI AND PROSPEROUS NEW YEAR TO ALL ...in advance
LOVE
DAKSHA

 SUPPLIES USED :


Wednesday, October 12, 2016

BUTTERFLIES, FEATHERS, DIE CUTS AND MORE

Hello crafty friends, Martha Lucia here to share with you three cards crated with different products released this month on the Peek a boo Store that I loved. One of my favorite combinations is stamps and die cuts, but today I am very happy playing with stencils too! Oh My God, you need to visit the Peek a Boo store to get crazy like me! Take a look at my cards:

My first card is one of my favorites this month because I used watercolor paper and distress ink to create the background and, when I use these two products, the result is always different. I love the color combination on this.


Creating this was very simple:
  1. Cut the base using Very Vanilla card stock. The size is 4-1/4"x11" with score in 5-1/2"
  2. Cut a second layer in watercolor paper. The size is 4-1/8"x5-3/8"
  3. Watercolor the right side using distress in four different colors. I used Abandoned Coral, Spiced Marmalade, Twisted Citron and Blueprint Sketch.
  4. Cut two butterflies using the new Heart Butterfly die cut. Don't forget to recycle the hearts to use in other project!
  5. Stamp the sentiment from the stamp set Doodle Butterfly using Memento Tuxedo Black Ink.
  6. Paste the butterflies using glue dots.
  7. Paste the decorated layer using a hard snail adhesive.

My second card is created with Very Vanilla card stock too.... it may be my favorite color for the season? Normally I use Whisper White...LOL! On this card I have my perfect combination: Die Cuts, stamps, stencils, techniques and a few embellishments.


Creating this was easy and simple too:
  1. Cut the base of the card using Very Vanilla card stock. The size is 4-1/2"x11".
  2. Cut a second layer using Very Vanilla card stock. The size is 4-1/4"5-1/2.
  3. Take the stencil Abstract Triangle Stencil and secure it over the second layer. Apply three different colors of ink over the open areas using a brush or sponge. I used a clarity brush and the colors of ink Soft Suede, Tangelo Twist and Bermuda Bay of Classic Ink. If you want you can play with the position of your stencil.
  4. Take one of the die cuts of the Dual Stitched Fishtail Banner Collection and cut it over the stenciled layer.
  5. Place the second layer temporarily over the card base and stamp the sentiment inside the die cut space. I used a message from the stamp set Happy Birthday to All with VersaFine and Clear Embossing Powder that I melted with the heat tool.
  6. Stamp the complimentary message over the second layer using the same ink and embossing.
  7. Paste the second permanently over the card base.
  8. Finalize the decoration by adding two tiny bows in natural twine.

For my last card I used a combination of card stock to break the tradition! I used Sahara Sand for the base and Whisper White for the second layer. I am definitely a fan of the neutral colors, don't you think?


Making this was a great time because I love this stamp set. It is called Feathers and, let me tell you that it is simply amazing and their messages are perfect!
  1. Cut the base using Sahara Sand card stock. The size is 4-1/4"x11" with score in 5-1/2"
  2. Cut the second layer using Whisper White card stock. The size is 4"x5-1/4".
  3. Stamp the feathers in three different colors of ink. From the bottom to top I used Pool Party, Sahara Sand and Peach Parfait Classic Ink.
  4. Stamp the sentiment using Sahara Sand Classic Ink.
  5. Add some enamel dots from the Pastel Collection.
  6. Paste the decorated layer over the card base.

These are the products that I used to create these cards. You can find these on Peek a Boo store.


Hope you submitte your entry to our October challenge . If not, do it soon, there are only a few days left to win the Gift voucher.

Thank you for stopping by and see you soon with something special and new because, for me, new release is new inspiration!

Saturday, October 1, 2016

Challenge #11 - RECIPE

Hello lovely friends, Welcome to October Challenge, we are so happy to have you here and share with you a great Sketch Selection created but our talented Design Team!

The theme of the month is one Recipe and you can use this for your creation!


Main Ingredients :
1/4 cup of the color red
1/4 of gold as well 
Number 1 - Since we celebrate our first birthday in October

Garnishing (the twist ) : 
Use atleast one of the the following
stenciling
3d Layered projects
Make your own background with stamps
dash of glitter

Directions :
Make a delicious project using all the ingredients above and adding at least one garnish (the twist) of your choice.
Participants with a project with an Indian touch since we celebrate Diwali and other festivals in this month will get some bonus points.

All the winners from September Challenge will be announced on October 10th, 2016.

Today we have these cards for your inspiration:


Now is your turn to create and participate with us. You have the entire month of October to make your project.

Here are the General Rules : 
  • Be a follower of our blog.
  • Using at least ONE Peek-a-boo Designs product is a MUST.
  • Create a new project for the challenge. No back links please.
  • Altered art, ATCs, cards, scrapbook pages, or any other craft projects are acceptable as long as they adhere to the month’s challenge.
  • You may enter as many projects as you like USING THE SKETCH.
  • Please link to the exact post on your blog - not the home page URL of your blog - using the inlinkz icon at the bottom of the challenge.
  • You MUST mention our blog in your post AND link back to our blog or your entry will not be counted.
  • You may enter a card, a page layout, an altered item, a mixed media item, a mini album.. anything that fits the challenge, unless the challenge states that a specific type of project must be created.
  • Please, no 100% digital projects. A part of the project can be digital. No restriction on the number of challenges you can take part in - As long as your project matches our challenge, you may "pile on" the other challenges to your heart's content. 
  • We will accept a maximum of three entries per person. Please add -2 and -3 next to your name for subsequent entries. A Winner will be chosen on their merits so submit your most creative projects. And that's all there is to it!
  • International Crafters are welcome to participate in our challenges but their prizes would only be sent to an Indian address due to high shipping cost or the International Crafters could bear shipping cost.Winners  receive Rs. 500 Gift voucher each, which is redeemable at our site www.thepeekaboodesigns.com   

We hope our DT's inspiring you and see you soon with your amazing creations!

Martha Lucia