Showing posts with label Happy birthday to all. Show all posts

Sunday, November 13, 2016

Birthday Cards with me Swapna

Hi..
Friends.. Hope you all are back from Festival mode.
I am sure you are playing along with our November Challenge which is colour inspiration. If not then you can any time. Please read guidelines before linking your project. Today I am with two simple birthday cards. Hope you like them.

Card 1

* I selected distress inks which matches our November challenge theme and applied on white panel.
* Then I stamped one of the butterfly from Doodled butterfly set and clear heat embossed them.
* Then applied darker distress ink on it.
* Trimmed the panel and glued on yellow card base.
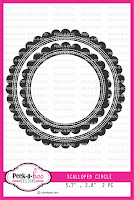
* I glued two scallop circles for interest and foam mounted sentiment strip.


Card 2

* Its a very simple card. I heat embossed one of the fairy from Magical fairies.
* Used zig markers to colour wings.
* I embossed the edges of card base with spellbinder dies.
* Foam mounted the fairy on top flap of card base.
* Heat embossed sentiment inside.


Supplies


 Thank you for stopping by..
 

Wednesday, October 12, 2016

BUTTERFLIES, FEATHERS, DIE CUTS AND MORE

Hello crafty friends, Martha Lucia here to share with you three cards crated with different products released this month on the Peek a boo Store that I loved. One of my favorite combinations is stamps and die cuts, but today I am very happy playing with stencils too! Oh My God, you need to visit the Peek a Boo store to get crazy like me! Take a look at my cards:

My first card is one of my favorites this month because I used watercolor paper and distress ink to create the background and, when I use these two products, the result is always different. I love the color combination on this.


Creating this was very simple:
  1. Cut the base using Very Vanilla card stock. The size is 4-1/4"x11" with score in 5-1/2"
  2. Cut a second layer in watercolor paper. The size is 4-1/8"x5-3/8"
  3. Watercolor the right side using distress in four different colors. I used Abandoned Coral, Spiced Marmalade, Twisted Citron and Blueprint Sketch.
  4. Cut two butterflies using the new Heart Butterfly die cut. Don't forget to recycle the hearts to use in other project!
  5. Stamp the sentiment from the stamp set Doodle Butterfly using Memento Tuxedo Black Ink.
  6. Paste the butterflies using glue dots.
  7. Paste the decorated layer using a hard snail adhesive.

My second card is created with Very Vanilla card stock too.... it may be my favorite color for the season? Normally I use Whisper White...LOL! On this card I have my perfect combination: Die Cuts, stamps, stencils, techniques and a few embellishments.


Creating this was easy and simple too:
  1. Cut the base of the card using Very Vanilla card stock. The size is 4-1/2"x11".
  2. Cut a second layer using Very Vanilla card stock. The size is 4-1/4"5-1/2.
  3. Take the stencil Abstract Triangle Stencil and secure it over the second layer. Apply three different colors of ink over the open areas using a brush or sponge. I used a clarity brush and the colors of ink Soft Suede, Tangelo Twist and Bermuda Bay of Classic Ink. If you want you can play with the position of your stencil.
  4. Take one of the die cuts of the Dual Stitched Fishtail Banner Collection and cut it over the stenciled layer.
  5. Place the second layer temporarily over the card base and stamp the sentiment inside the die cut space. I used a message from the stamp set Happy Birthday to All with VersaFine and Clear Embossing Powder that I melted with the heat tool.
  6. Stamp the complimentary message over the second layer using the same ink and embossing.
  7. Paste the second permanently over the card base.
  8. Finalize the decoration by adding two tiny bows in natural twine.

For my last card I used a combination of card stock to break the tradition! I used Sahara Sand for the base and Whisper White for the second layer. I am definitely a fan of the neutral colors, don't you think?


Making this was a great time because I love this stamp set. It is called Feathers and, let me tell you that it is simply amazing and their messages are perfect!
  1. Cut the base using Sahara Sand card stock. The size is 4-1/4"x11" with score in 5-1/2"
  2. Cut the second layer using Whisper White card stock. The size is 4"x5-1/4".
  3. Stamp the feathers in three different colors of ink. From the bottom to top I used Pool Party, Sahara Sand and Peach Parfait Classic Ink.
  4. Stamp the sentiment using Sahara Sand Classic Ink.
  5. Add some enamel dots from the Pastel Collection.
  6. Paste the decorated layer over the card base.

These are the products that I used to create these cards. You can find these on Peek a Boo store.


Hope you submitte your entry to our October challenge . If not, do it soon, there are only a few days left to win the Gift voucher.

Thank you for stopping by and see you soon with something special and new because, for me, new release is new inspiration!

Thursday, September 29, 2016

CARD INSPIRATION WITH MARTHA LUCIA

Hello crafty friends, Martha Lucia here to share with you a bunch of cards that I created using some of the products released this month. I love to combine stencils and die cuts in my creations and in today's card I used some of these.


My first card is following our Challenge of the month. As you may remember, this month we have a wonderful sketch to  recreate and I decided to use the Grid Stencil to create the background and the Scalloped Circle Die Cuts to create the Focal Point. Take a look at my card.


In this card I created the background with distress ink using the colors Ground Espresso, Abandoned Coral, Picked Raspberry and Spiced Marmalade and VersaFine Onix to stamp the sentiment from the stamp set Happy Birthday to All. To finalize the decoration I added some enamel dots from the Pastel and Smoky Quartz Collections.


My second card was created in Very Vanilla card stock accents in Peacock Metal Sheets. I cut the second layer using the larger die cut from the Dual Stitched Rounded Rectangle and pasted it directly over the base.


Then I cut and embossed a third layer using an embossing folder with leaves and pasted over the layer. I stamped the sentiment With Deepest Sympathy with VersaMark and Gold Embossing Powder and created a banner and paste over the embossed layer using dimensionals.


To finalize the decoration I cut the Dual Leaf die cuts using Peacock metal sheet and pasted it on the left side of the banner with a large pearl.

My third card has a base in Watermelon Wonder card stock and the next layers in very vanilla. I cut these layers using the new Scallop Rectangle Die Cuts. I pasted the border directly over the base and stamped the images over the center piece.


In this card I used one of the images included on the stamp set Indian Motif stamped in three different colors of ink: Watermelon Wonder, Daffodil Delight and Tip Top Taupe. I also edited one of the sentiments included on the stamp set Sympathy to create two lines that I stamped on the right corner.


I pasted this layer over the base using dimensionals and added some enamel dots from the Smoky Quartz Collection.

My last card was created using the Beaded Stencil with white craft ink and tangelo twist ink to create a special shadow.


I used a decorated paper on the lower part to create a diagonal angle. I covered the union with a tiny embossed white border and added the word Celebrate die cut to finalize the decoration.


As a final touch I added a cute white bow to complement the sentiment and party look.

These are the products that I used in my creations


Hope you entered your entry to our September challenge . If not do it soon, few more days are left to win Gift voucher.

Thank you for stopping by and see you soon with something special and new because for me new release is new inspiration!

Monday, September 12, 2016

Stretch your dies - By Swapna

Hi... Crafty friends...

I am Swapna from The Dream Pages.

Here I am with my detailed post for this month. I had made Stretch your stamps last month , you can check that post Here.  I made these 3 cards using one die as focal element. Last week was bit hard for me as I was not at all in creative mood. Hope I did justice with my supply.

Card #1

This is somewhat simple card. When I loose my MOJO I make simple monochrome cards. They boost my confidence a bit, as I need not to make any colour combination.

* Its a top-folding 7x5" landscape card.
* I took another panel, ran through an embossing folder.
* I die cut leaves and panel for the sentiment (I used small scalloped rectangle die partially to make smaller panel which can fit my sentiment).
* Heat embossed the sentiment (Partial stamping) and edges of embossed panel, leaves and scalloped rectangle with gold embossing powder (I have fallen in love with this embossing powder).
* The embossed panel is mounted on card base with foam sheet, glued scalloped rectangle flat with liquid glue and sentiment panel with foam tape. Then glued leaves beneath rectangle frame.

Here is the card


Card #2

* I die cut several leaves from white CS.
* Blended distress inks on another panel and spritz with pearlised on the panel.
* Glued all leaves on the panel randomly to fill the area and trimmed the edges.
* Die cut the sentiment with metallic CS.
* Glued the panel on the top folding 5x7" card base and the sentiment strip.
* Added few sequins.

Here is the card


Card #3

This is my last card for the day.
I had never heard of dream catcher. But few days back had seen so many posts on FB about it. So thats the inspiration for my next card.
* I used Scalloped circle die and die cut twice. Except the outed scalloped circle i glued other diecuts on top of each other.
* Stamped the sentiment and heat embossed.
* Then stacked 3 die cuts on each other to make the hangings.
* I glued the circles first on each other, then tied leaves with green embroidery floss and glued another end beneath the last circle.
* Added few green sequins.

Here is the card


Supplies used


Distress inks
Wow Embossing powder


 We are having FREE SHIPPING, offer ends on 14the September. So what are you waiting for? Grab the opportunity, visit PABD site Here.


Hope you are playing along with our September challenge. Go through Guidelines before linking your projects..


Thank you for visiting...
Do let me know your views about my post..
See you in my next post with few more cards..