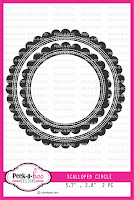
Showing posts with label Stitched Scallop Circle Die. Show all posts

Tuesday, December 6, 2016

Challenge Inspiration - Swapna

Hi.. Friends...
I am here with two cards for our challenge inspiration.

Our November challenge is beeing extended to December end so you have some more days to play along our colour pallet. Hope to see your wonderful creations.


Card #1
* I used the Arrow stencil, I placed the stencil on strip of white CS and applied distress inks.
* I trimmed it to a strip, glued it on another black strip.
* Foam mounted it on a top folding card base.
* Stamped sentiment in black onyx ink.
* Scattered few sequins.


Card #2
* I stamped flowers and images and fussy cut them out.
* I placed scalloped rectangle die (bigger one) and scalloped circle (smaller one) on a card panel and die cut them.
* Foam mounted this panel on top-folding card base.
* Stamped sentiment and arranged flowers and leaves.


Supplies


Dont forget to link your creations..

Thank you for your time..

Sunday, November 13, 2016

Birthday Cards with me Swapna

Hi..
Friends.. Hope you all are back from Festival mode.
I am sure you are playing along with our November Challenge which is colour inspiration. If not then you can any time. Please read guidelines before linking your project. Today I am with two simple birthday cards. Hope you like them.

Card 1

* I selected distress inks which matches our November challenge theme and applied on white panel.
* Then I stamped one of the butterfly from Doodled butterfly set and clear heat embossed them.
* Then applied darker distress ink on it.
* Trimmed the panel and glued on yellow card base.
* I glued two scallop circles for interest and foam mounted sentiment strip.


Card 2

* Its a very simple card. I heat embossed one of the fairy from Magical fairies.
* Used zig markers to colour wings.
* I embossed the edges of card base with spellbinder dies.
* Foam mounted the fairy on top flap of card base.
* Heat embossed sentiment inside.


Supplies


 Thank you for stopping by..
 

Thursday, October 13, 2016

October challenge inspiration with Swapna

Hi.. Crafty friends..

Swapna here, today I have 3 cards to share using October release. The release is just awesome. It has product for everyone. Hope you are playing along with our fun filled October challenge. My cards are based on the October challenge theme. Lets just dive in my post.

Card #1

** Used number die cuts n made the background by gluing them in random pattern on a black card panel. 
** Die cut number 1 & st with red glitter foam. 
** Heat embossed sentiment with white embossing powder. 
** Foam mounted panel towards top of card base. 
** Glued glitter foam pieces in place to finish the card. 


Here is close up of glitter foam the number background. 


Card #2

** This is my first attempt in colouring on vellum. 
** I stamped & gold heat embossed the image on vellum. 
** Used few copics to colour it on back (many have said that colouring directly on heat embossed image will damage copic nibs). 
** I didn't feel like taking risk with glueing vellum on card front. So i left 1/2" towards top so that i can fold and glue it behind. 
** Heat embossed sentiment with gold embossing powder. 
** Added few enamel dots to the card.


Here is close up sentiment and the the coloured flowers.


Card #3

** This was the card which i made when i was struggling with ideas. 
** I secured card base n stencil and applied embossing paste.  Left it to dry of its own. 
** Sprayed gold shimmer mist from ranger. 
** Gold heat embossed two butter flies and fussy cut them out.
** Coloured one butterfly with copics (carefully) and few strokes with gold marker. Glued it on other plain butterfly.  
** Heat embossed sentiment on vellum n sandwiched it between two scalloped circles. 
** Placed sentiment n butterfly with liquid glue. 
** To finish the card added few clear stones towards top n 3 more on butterfly's body.


Here is closeup of butterfly n gold shimmer mist.


Supplies


I hope you are playing along with our October challenge.
Please read Guidelines carefully before linking. This is our Birthday month so keep visiting this place for more information.

Thank you for visiting.. 
Your valuable suggestions are always welcome..

Tuesday, September 27, 2016

Deepavali Cards with Peek-a-boo designs

Hi... Crafty friends..

Swapna here with few cards for upcoming Deepavali festival. I made these cards with Peek-a-boo designs September release. Do check them out Here.

Card #1

* Stamped the image and coloured with Staedtler water colour pencils and used wink of stella to blend colours.
* Die cut image with scalloped circle die, used bigger die.
* Glued the circle pieces on a circle card base.
* Used sentiment inside as the main image says everything.

Its depicting young girls making Rangoli during festival.


Card #2

This is continuation of my previous post which you can find Here.

* I die cut leaves from craft foam twice.
* Die cut leaves from a scrap acetate to make my own stencil.
* Used few dye inks to blend through leaf stencil.
* Then stamped detail of leaf on the ink blended leaves.
* Wrapped green embroidery floss towards top and tied a small bow.
* Glued two leaves die cut in white and added a green sequin.
* Stamped sentiment and foam mounted on the panel.
* The whole panel was foam mounted on green card base.

This card is depiction of  Torana (Mango leaves we use during any festival to decorate the entrance of house and temple) .


Card #3

* Secured card base to work surface.
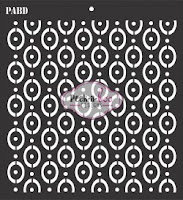
* Placed stencil and secured it.
* Used ranger spray in gold and sprayed few times from 1 feet above to get smaller droplets.
* Heat embossed sentiment in gold on a vellum piece.
* To add little interest I tore edges of vellum.

Its depiction of Light over darkness. That is what Deepavali is all about.


____________________________

Supplies


____________________________

Hope you entered your entry to our September challenge . If not do it soon, few more days are left to win Gift voucher.

Hope you liked..
Your valuable suggestions are welcome..
Thank you for your visit...

Monday, September 12, 2016

Stretch your dies - By Swapna

Hi... Crafty friends...
I am Swapna from The Dream Pages.

Here I am with my detailed post for this month. I had made Stretch your stamps last month , you can check that post Here.  I made these 3 cards using one die as focal element. Last week was bit hard for me as I was not at all in creative mood. Hope I did justice with my supply.

Card #1

This is somewhat simple card. When I loose my MOJO I make simple monochrome cards. They boost my confidence a bit, as I need not to make any colour combination.

* Its a top-folding 7x5" landscape card.
* I took another panel, ran through an embossing folder.
* I die cut leaves and panel for the sentiment (I used small scalloped rectangle die partially to make smaller panel which can fit my sentiment).
* Heat embossed the sentiment (Partial stamping) and edges of embossed panel, leaves and scalloped rectangle with gold embossing powder (I have fallen in love with this embossing powder).
* The embossed panel is mounted on card base with foam sheet, glued scalloped rectangle flat with liquid glue and sentiment panel with foam tape. Then glued leaves beneath rectangle frame.

Here is the card


Card #2

* I die cut several leaves from white CS.
* Blended distress inks on another panel and spritz with pearlised on the panel.
* Glued all leaves on the panel randomly to fill the area and trimmed the edges.
* Die cut the sentiment with metallic CS.
* Glued the panel on the top folding 5x7" card base and the sentiment strip.
* Added few sequins.

Here is the card


Card #3

This is my last card for the day.
I had never heard of dream catcher. But few days back had seen so many posts on FB about it. So thats the inspiration for my next card.
* I used Scalloped circle die and die cut twice. Except the outed scalloped circle i glued other diecuts on top of each other.
* Stamped the sentiment and heat embossed.
* Then stacked 3 die cuts on each other to make the hangings.
* I glued the circles first on each other, then tied leaves with green embroidery floss and glued another end beneath the last circle.
* Added few green sequins.

Here is the card


Supplies used


Distress inks
Wow Embossing powder


 We are having FREE SHIPPING, offer ends on 14the September. So what are you waiting for? Grab the opportunity, visit PABD site Here.


Hope you are playing along with our September challenge. Go through Guidelines before linking your projects..


Thank you for visiting...
Do let me know your views about my post..
See you in my next post with few more cards..