Showing posts with label Arrows stencil. Show all posts

Wednesday, December 20, 2017

Sunila and Aditi- GDT Part 2

Hello everyone,

Sunila and Aditi here and we're back with a few more projects to inspire you all :)!

Today for our first project, we've created a set of two Artist Trading Cards. Here's a look at them. We really had fun creating these. We first die cut two pieces of cardstock with the ticket die. Next, we stamped a few images with black ink from the Blotchy Stamp Set. We then used a stencil and went around with Versamark Ink, and heat embossed it. Next, we used another stencil with lighter tones of distress inks. We then stamped the blotchy flower for our focal image and layers it with gauge, flowers and pollen. We completed the cards with some motivational words.


Our second project is a CAS Card. We used washi tape for the border. Die cut the smallest ticket die, and stamped our sentiment, and our focal element is watercoloured with distress inks. We layered it all and completed it with some enamel dots. 


Our last project is a two-page journal spread. We had fun playing in our journal clearly and worked on our background the most. We've used Washi, stamps, Stencils and just played around! 


We hope that we've inspired you and got your creative juices flowing!
Thank you Vidushi for this opportunity, we've had fun creating these projects!

Happy Crafting!

Supplies used


Tuesday, December 6, 2016

Challenge Inspiration - Swapna

Hi.. Friends...
I am here with two cards for our challenge inspiration.

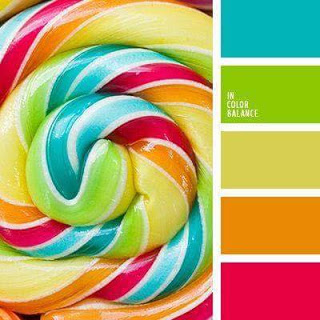
Our November challenge is beeing extended to December end so you have some more days to play along our colour pallet. Hope to see your wonderful creations.


Card #1
* I used the Arrow stencil, I placed the stencil on strip of white CS and applied distress inks.
* I trimmed it to a strip, glued it on another black strip.
* Foam mounted it on a top folding card base.
* Stamped sentiment in black onyx ink.
* Scattered few sequins.


Card #2
* I stamped flowers and images and fussy cut them out.
* I placed scalloped rectangle die (bigger one) and scalloped circle (smaller one) on a card panel and die cut them.
* Foam mounted this panel on top-folding card base.
* Stamped sentiment and arranged flowers and leaves.


Supplies


Dont forget to link your creations..

Thank you for your time..

Sunday, October 2, 2016

Stenciling and die-cutting

Hello and good afternoon dear friends!

I'm Halak and today I have a three projects to share with you.

Project #1

Taking the Messy Background stamp as my inspiration, I hand-drew and colored the background using Sakura pens.

The sentiment is the gorgeous Thank You die from the recently launched October release.

Apart from this die, I also used my favorite, the Rounded Rectangle Dual Stitched Die from an earlier release.

Now, an exciting piece of news.... you must have seen the gorgeous 11 cutting dies that were released by Peek-a-boo Designs (PABD) yesterday.

In actuality, there were not 11 but 12 cutting dies!

Due to a tech. glitch the die #12 which is a beautiful word die that spells the word Celebrate, could not be uploaded.

What does it look like you ask?

Well here are the pics, check it out!

Project #2

Here I've used the brand new Celebrate Word Die with the Arrows Stencil and die-cut the rectangle using the Rounded Rectangle Dual Stitched Die.

Project #3

For this project, I have once again used the Celebrate die and the Rounded Rectangle dual stitched die with the BOX-tacular Stencil.

I've looped a golden strand of thread on top and paired it with a black bow. I think the combination of black and gold really gives this project an extra special touch, what say? ^__^

Here are a list of PABD products that I've used in these projects :

I'd love to hear what you think! Thank you so much for stopping by! *Hugs*


Posted via Blogaway

Friday, August 5, 2016

Color insperations and tutorial by Nadiya Bilovodenko

Hi PABD fans! Today me Nadiya Bilovodenko is here on the fabulous Peek-a-boo Designs  blog with my inspirations for  #9 Color challenge. The wide palette makes it possible to create miŃ…ed media projects and I made a tag. Hop on along with me to see what I have made.


 My tag is large. And I played with stamps and stencils.


 And some close up:


And now my master class:

1. Get your tag, stamps, watercolor paints, stencils.


2. In random order, apply watercolor paint on the tag. Once dry apply the stamps.


3. Put distress ink through a stencil.


 4. Apply any medium of your choice through some other stencil.


5. Cut the stamped mandala.


 6. Assemble the composition. Apply randomly stamps. Add splashes of white and black gesso.
 

Thank you for staying along with me !!


 Do hop one to our new Challenge #9 Color


In my projects I have used:
Arrow stencil 
Bold Butterflies
Bubbles stencil
Mandala
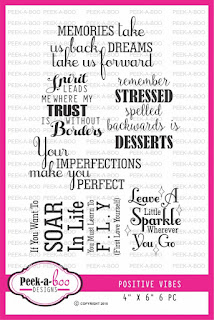
 Positive Vibes