Showing posts with label Peek-a-Boo Designs Stamp India. Show all posts

Wednesday, November 22, 2017

Floral Inspirations by Piyu

Hello friends!
Piyu here. How have you been? Did you check our latest PABD release? If not, check it here.
The theme for my today's post is floral. And PABD has awesome floral stamps. So if you love florals just like me, then do take the advantage of the Black Friday sale (15% Discount) at PABD store and add some gorgeous floral stamps to your craft stash.

Without further delay, let me share today's cards with you.
Card 1

Steps:
1. I stamped the floral image from the Rococo stamp set on a cardstock.
2. I colored it using Copic markers
3.I layered the stamped the sentiment,
4. I added the baker's twine across the colored image and adhered the sentiment,  also from the Rococo stamp set on it.
5. I added black stripes on sides of the cardstock and mounted the entire panel on a A2 size card.
6. Finally I added some glitter at the center of the leaves.

Card 2

Steps:
1. I die cut 2 flowers using the Chloe die and sentiment using the Hello die.
2. I stamped the horizontal blue lines using stamp from the Blotchy stamp set.
3. On a A2 size card, I added the Graceful Hydrengea washi tape on left side and added a black strip.
4. Finally I then adhered the die cuts and mounted the panel on the card.

Card 3

Steps:
1. I stamped the floral image from the Sunshine stamp set from latest release.
2. I colored it using copic markers
3. I die the floral panel using Dome tower dies
4. I layered it on green, black and white card stocks.
5. I added the sentiment from the daisy stamp set.

Card 4

Steps:
1. I stamped the images from the Veined Daisy stamp set on an A2 card
2. I stamped the sentiment from the same set.
3. I colored the images using Copic markers.
4. I fussy cut the border of the card around the image.
5. Finally I adhered a black card stock behind.

Hope you liked these cards.
Here is is list of PABD supplies used. You can buy the supplies PABD store-

Rococo


Chloe


Hello


Graceful Hydrengea


Sunshine


Dome Tower


Daisy


Veined Daisy

Sunday, October 30, 2016

Happy Diwali with challenge reminder!

Hello and good afternoon dear friends!

Here's wishing you all a very happy and prosperous Diwali from the entire Peek-a-boo Designs team!

I'm Halak and I'm here to remind you amidst the festivities that we have Challenge #11 - Recipe running wherein you can participate for a chance to win a voucher which you can use to pick up some PABD awesomeness!

Here are the challenge guidelines :

Main Ingredients :
1/4 cup of the color red
1/4 of gold as well
Number 1 - Since we celebrate our first birthday in October

Garnishing (the twist ) :
Use atleast one of the the following :
stenciling
3d Layered projects
Make your own background with stamps
dash of glitter

Directions :
Make a delicious project using all the ingredients above and adding at least one garnish (the twist) of your choice.
Participants with a project with an Indian touch since we celebrate Diwali and other festivals in this month will get some bonus points.

PABD cutting dies are very versatile and can be used to make some fantastic projects!

You can create fun cards, scrapbooks, invites.. the list is endless!

Today I'm sharing a card I created as per Challenge #11 specifications to welcome the new year.

Tip : Buying a number die is a great investment because you can use it to create custom birthday cards, new year greetings, save the date invites etc.!

For my project, the background was created using the abstract triangle stencil. Once I stenciled it in pink, I offset the stencil and stenciled it in yellow to give it that two-toned effect.

The dies that were used are :
Rounded rectangle dual stitched die
Numbers die and
Celebrate word die.

Apart from this, I used the gorgeous Rose Gold cardstock from PABD. (Seriously guys, this cardstock is a must. Absolutely gorgeous!)

So, what are you waiting for! Read the recipe of Challenge #11 and cook up a fun crafty project!

Last day to enter is 31st October 2016, so... hurry!

To participate, click >>> HERE

List of Peek-a-boo Designs (PABD) products used :

Thank you so much for stopping by! *Hugs*


Posted via Blogaway

Sunday, October 2, 2016

Stenciling and die-cutting

Hello and good afternoon dear friends!

I'm Halak and today I have a three projects to share with you.

Project #1

Taking the Messy Background stamp as my inspiration, I hand-drew and colored the background using Sakura pens.

The sentiment is the gorgeous Thank You die from the recently launched October release.

Apart from this die, I also used my favorite, the Rounded Rectangle Dual Stitched Die from an earlier release.

Now, an exciting piece of news.... you must have seen the gorgeous 11 cutting dies that were released by Peek-a-boo Designs (PABD) yesterday.

In actuality, there were not 11 but 12 cutting dies!

Due to a tech. glitch the die #12 which is a beautiful word die that spells the word Celebrate, could not be uploaded.

What does it look like you ask?

Well here are the pics, check it out!

Project #2

Here I've used the brand new Celebrate Word Die with the Arrows Stencil and die-cut the rectangle using the Rounded Rectangle Dual Stitched Die.

Project #3

For this project, I have once again used the Celebrate die and the Rounded Rectangle dual stitched die with the BOX-tacular Stencil.

I've looped a golden strand of thread on top and paired it with a black bow. I think the combination of black and gold really gives this project an extra special touch, what say? ^__^

Here are a list of PABD products that I've used in these projects :

I'd love to hear what you think! Thank you so much for stopping by! *Hugs*


Posted via Blogaway

Sunday, September 25, 2016

A card and an ATC with tips!

Hello and good morning dear friends!

I'm Halak and today I'll be showing you two vastly different projects.

How are they different?
They're different in the sense that they depict two different moods.

Let's begin with the card. (Project #1)

To be honest, I dislike making sympathy cards. They make me sad. This is my second sympathy card till date.

But, there are times in life when the inevitable happens and you need to make a sympathy card. v_v

The Peek-a-boo Designs Sympathy stamp is perfect for sympathy cards and projects.

It's got a sentiment in a nice bold font and what I like about it is that it keeps things simple. No weird poetry or phrase, just a simple heartfelt statement.

The first thing I did was stencil in the background using the Leafy Delight stencil. After that stamped the sentiment and lastly, embellishments.

When you set out to make a sympathy card, here are a few pointers to keep in mind :

1. CAS is the way to go.
Clean and simple project should be your way to approach a sympathy card. The key word here is, understated.

2. Think about the colors.
In my project I've chosen the color pink because pink is associated with healing.

3. Go slow on embellishments.
Avoid overloading embellishments on a sympathy card.
A good idea would be to use matte / subtle gloss finish embellishments instead of the sparkly and attention-grabbing ones.
In my project here, I've used Enamel Dots from PABD.

Now, let's check out Project #2 :

Here's my second project. It's kinda like a blast from the past because this ATC features a prior release but in my defense, it's the very first time that I've used it! ^__^

As you can see this ATC depicts all of the things I love. It's bright, fun, happy and has oodles of glitter!

I've used the Summer Cooler stamp set by PABD for this project.

Tips :

1. In such a vibrant project, it is easy to neglect the sentiment. To avoid doing that, a good idea would be to mat it on another card base and give it some height using foam.

2. Don't be afraid of using a lot of color. As long as you remember which colors co-ordinate with each other (example : pink & blue, green & orange, pink & green etc.) you will always end up with a good result.

List of products from PABD :

I hope you liked my projects and learnt something new today.

Thank you so much for stopping by! *Hugs*


Posted via Blogaway

Tuesday, September 6, 2016

Sparkle & Shine.!!

Hi Friends...Its Vijaylaxmi here !! Today I am sharing three very simple cards so let's start -


 Card - 1


Steps -

1) Took a card stock (neenah classic ) ...Distressed it with three different DI to create ombre BG !!
2) Then using Peek-a-boo Indian Motif stamp set ..I heat embossed one of the Paisley in gold on the whole panel ..and filled the rest space with small stamps from the same set !! 
3) Then Cut the whole panel with Peek-a-boo Rectangular stitched die !!
4) Cut the word Celebrate in gold using September released Celebrate Word Die from Peek-a-boo Designs. Also added a heat embossed sentiment from Peek-a-boo Happy Deepawali Stamp set below this word to complete the greeting !!
5) Arranged  everything on a black card stock as a base and its finish !!
6) I just love this stamp set as it is so opt for our Indian festivals !!

Card -2 


Steps -

1) For this card I simply sponged the white card stock using some Distress inks & Peek-a-boo's September released Stencil .
2) Then used the Peek-a-boo's latest stitched  fishtale die to cut the vellum banner and Peek-a-boo scalloped  circle die with stitches to die cut the golden scalloped border !! 
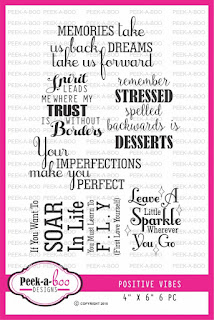
3) Heat embossed the sentiment in gold from previously released  Positive vibes Stamp set !! 
4) Placed everything together and the card is done !! Easy right !! ;)

Card - 3 


Steps - 

1) This card is completely made with previously released products ...;)
2) Took a white card stock ..stamped the circular images from Peek-a-boo's Circular fonts Stamp Set in different shades of Pigment inks !!
3) Die cut the whole Panel with Peek-a-boo Stitched Rectangular Die and also die cut the little star & heart from Peek-a-boo' s die !!
4) Placed all in right manner and layered a pattern paper for some interest on a pink top folding card and then placed the white stamped card panel over it !! Tadda ..we are done !! I just love the simplicity of this card !!

That's all for today ..meet you all soon with some more creations!! 
Thanks for stopping by and don't forget to check this month's challenge !!

Hugs.. 
Vijaylaxmi Siyal .

Sunday, August 28, 2016

Crafty sunday with Daksha popat

Hello ! crafty Friends,
Hope you all must be doing very well!...Today I, Daksha Popat, am sharing three projects with you ,keeping in mind this month's challenge...Colour Ispiration! Hope you all will like it and hope to see more and more of your entries for this month's challenge.To see more inspirations  and challenge post HERE..

MY FIRST PROJECT : CARD


 Its an oval diecut card,made using oval dual stictched die #PABD . For the top layer I have used Oval frame which I have cut  using oval dual stitched die. In the window of the oval frame I have used Graceful lattice die cut .Bottom of that window frame I have used oval piece of diecut which I have distressed with distress inks -Squeezed lemonade and rusty hinge...Finally used #PABD sentiment die INSPIRE and decorated with liquid pearls.
Flowers I have coloured with Altenew ink cosmos red and highlighted with wink of stella, For the leaves used cheerylynn leaf die cuts, which I have painted with peeled paint reinker n then used crackle paint

SUPPLIES USED :


MY SECOND PROJECT : CARD


For this card after cutting cardstock for my 1st project ,negative part of diecut left.,..I have used  that left out negative piece from my 2nd project.

SUPPLIES USED :


MY THIRD PROJECT : BOOK MARKS


These cute little bookmarks can be ideal gift for Teacher's Day!.Its very east to make . Used jumbo metal paper clips for these bookmarks . To stick two scallops circles diecuts I have used double sided foam tapes and hot glue gun (you can used red tacky tape also ). Stamped images are either stamped on pattern paper n fussy cutted and others stamped n coloured and then fussy cutted

SUPPLIES USED:


Thank you so much for stopping by...
Love n hugs 
Daksha

Friday, August 5, 2016

Color insperations and tutorial by Nadiya Bilovodenko

Hi PABD fans! Today me Nadiya Bilovodenko is here on the fabulous Peek-a-boo Designs  blog with my inspirations for  #9 Color challenge. The wide palette makes it possible to create miŃ…ed media projects and I made a tag. Hop on along with me to see what I have made.


 My tag is large. And I played with stamps and stencils.


 And some close up:


And now my master class:

1. Get your tag, stamps, watercolor paints, stencils.


2. In random order, apply watercolor paint on the tag. Once dry apply the stamps.


3. Put distress ink through a stencil.


 4. Apply any medium of your choice through some other stencil.


5. Cut the stamped mandala.


 6. Assemble the composition. Apply randomly stamps. Add splashes of white and black gesso.
 

Thank you for staying along with me !!


 Do hop one to our new Challenge #9 Color


In my projects I have used:
Arrow stencil 
Bold Butterflies
Bubbles stencil
Mandala
 Positive Vibes