Showing posts with label bold butterflies. Show all posts

Friday, August 26, 2016

Time for clear cards with Ria

Hi crafty people, 

With all the my love for transparent cards or clear cards and all the queries for the procedure of the same, I am (Ria) back with a couple of clear cards to share!

Without wasting much time I will jump into the steps to make one:


Following are some easy steps for making of this card:


Stamp some floral bunches fromFlower in a Jar set with gold and color it, here I have used distress inks, fussy cut them and adhere them on a patterned paper.


Using the first panel as a base, draw the outline on a separate blank card stock. I have avoided the buds as I dont want them to stick to the card, hence giving a 3D look.


Draw the outlines on two more pieces but this time not the floral outlines, only the arc.


Stamp any background design on an OHP or acetate sheet, here I have used Quilted Love and have embossed it with Enchanted gold from Ranger. Stick the floral base cut out on it with any glue.


As you see, the glue can be visible from the other side as the card base here is a transparent OHP sheet! So, this look is a total No No!!


Stick the copy of the first base cut out on the other side to cover any visible traces of glue.

Stick the other two arc shaped card stocks to the other side of the transparent sheet. and its done!
Take a look


Remember the card I had done last month! the same process for this also.


I have done an extra one to show it to you people about myriad possibilities with the concept of clear cards!!


Supplies used:


Isn't it so much fun! I hope to see your creations too and do not forget to post your creations to https://www.facebook.com/groups/peek.a.boo.designs.india/

Hope you like this post. 
Happy crafting
with love
Ria

Friday, August 5, 2016

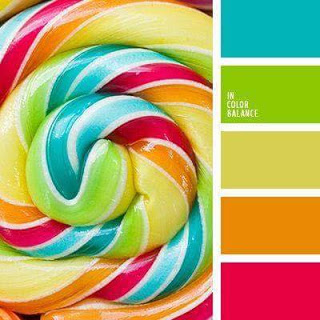
Color insperations and tutorial by Nadiya Bilovodenko

Hi PABD fans! Today me Nadiya Bilovodenko is here on the fabulous Peek-a-boo Designs  blog with my inspirations for  #9 Color challenge. The wide palette makes it possible to create miŃ…ed media projects and I made a tag. Hop on along with me to see what I have made.


 My tag is large. And I played with stamps and stencils.


 And some close up:


And now my master class:

1. Get your tag, stamps, watercolor paints, stencils.


2. In random order, apply watercolor paint on the tag. Once dry apply the stamps.


3. Put distress ink through a stencil.


 4. Apply any medium of your choice through some other stencil.


5. Cut the stamped mandala.


 6. Assemble the composition. Apply randomly stamps. Add splashes of white and black gesso.
 

Thank you for staying along with me !!


 Do hop one to our new Challenge #9 Color


In my projects I have used:
Arrow stencil 
Bold Butterflies
Bubbles stencil
Mandala
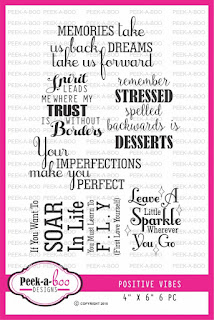
 Positive Vibes


Friday, July 22, 2016

Peek-A-Tute Friday with Ria

Hello Everyone,

This is Ria again on this side with some projects on your favorite Friday! I hope you all are enjoying the July release and I am already seeing fabulous projects by everyone.

Are you taking part in this month's challenge Challenge 8 - Onlylayers


I am here today with three new projects going with the month's challenge theme. Let us move onto the projects:

FIRST PROJECT:

My first project is an altered glass bottle. I have made the project in four easy steps:


Step 1: Using your distress inks, stamp the butterflies from Bold butterflies of every size on a paper (I have used scrap paper and I never throw scraps and better use for these tiny stampings). I have also cut some tiny butterflies using a paper punch.

Step 2: Fussy cut the butterflies, blend the same ink on it by which it was stamped and I have used some bling with Wink of Stella.

Step 3: Cover the body of the bottle with acrylic colors with a sponge. Let it air dry for few minutes.
Step 4: Apply the texture paste on it through Leafy Delight Stencil. Let it dry. And then cover partially the same acrylic colors on it.

I have finished it by sticking the butterflies on it- on an ascending order. Placed all the three word diecuts from July release and some sequins.


SECOND PROJECT:


I have come to know about the transparent cards last month and wanted to try this asap. I have made the night scene with Festive berries, Blue Chase & Grape vine from artistry inks; with some mist and white acrylic.
Stamped the fairies, colored the wings, fussy cut them and adhered them to the margins. The sentiment is also from the same set. I have stamped the stars from the solid shapes set and embossed them with Enchanted Gold. Its done!


THIRD PROJECT:


My third project is a card this time. Made the background with the BOX-tacular stencil with some mist and pearl effect on it. Stamped and colored the flourish from the Humming blossom Set. Cut it into an oval shape, adhered on a black foam and then on the background, finished with some enamel dots and sequins!


SUPPLIES USED


I hope I have done justice to the mixed media and the transparent card with my first trials. 

Do not forget to avail these awesome collection that too on a discount by applying the code RIA_10


Thanks for stopping by
Hugs
Ria


Tuesday, July 5, 2016

An array of Designs to start off July

Hello everyone,

This is Ria Banerjee here and this is the first post for the month in detail. I hope you have liked all the new designs of July, aren’t they just amazing? I am in love with all the designs and couldn’t resist myself from experimenting all the designs together in a post.

Without wasting much time moving directly to the projects-


First Project
My first project is related to the July Month challenge theme-Layers. 
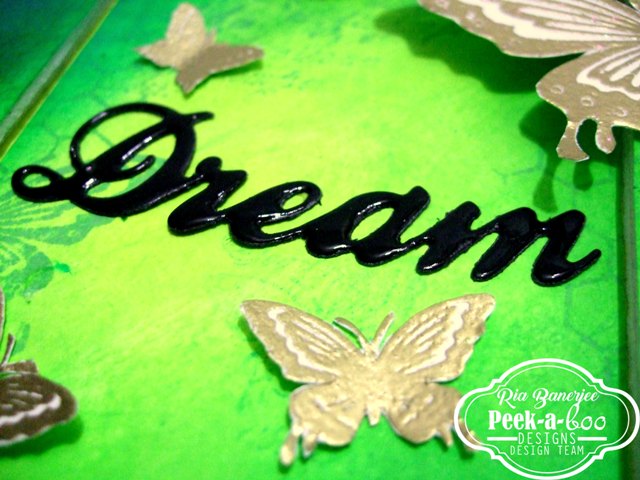
For this I have chosen Bold Butterflies stamp set. I have made the background with distress inks with various shades of blue, green and Lime yellow. Stamped the images from the set with distress inks again and embossed the butterflies with gold. I have used the die cut – Word - Dream and Graceful Lattice in bits and pieces. Finished the whole card by cutting the panel from between.


Take a closer look...


Second Project

My second project also is related to the Challenge theme. I have used Layered Dahlias and stamped the flowers finishing it with tinsel Gold embossed on it. I have placed die cuts of Graceful Lattice randomly on a wooden patterned paper and placed the flowers in between. I have also added the Dream die cut here, embossed it with tinsel Gold and Glossy accents.


Third Project

My third Project is a Shaker Card Which also goes with the challenge theme. I have stamped dahlias and leaves from Layered Dahlias, embossed it white and colored with distress inks. I have also colored the background with the inks and written the sentiment on it. I have used Dual Stitched Rounded Rectangle to cut the frame. I have added sequins to finish it up.


Fourth project

My fourth project is also layered one but this time I have used supplies of older releases. I have used the stencil Arrow and blended some blues on it, my favourite being the Ocean reef from Artistry inks which is really vibrant. I have added some water droplets to create the magical effect with distress inks. I have stamped and embossed the sentiment from Happy Birthday to You with white. Finished it with some glitter papers and wires.


Fifth Project


It’s a tag that I have made using Banner Alpha stamp set. I have only used the triangle outline to create a background, embossed it white and blended some red and pink to make a background. Embossed the sentiment DREAM from the same set by arranging it and one from the Magical Fairies set on a vellum. 


I hope you liked the projects and thanks for having such patience to go through all the six projects.

SUPPLIES USED:


An Important News:
There is a discount of 10% on all the items which is valid till 31st of July, 2016.

All you have to do is to apply the Discount Coupon code- RIA_10

So what are you waiting for!!!! Hop on to www.thepeekaboodesigns.com. I am pretty sure you dont wanna miss the awesome collection on such a discount! Place your orders ASAP.

Hugs
Ria