Showing posts with label Photopolymer stamps. Show all posts

Monday, January 22, 2018

Cards using Stamps, Stencils & Dies!

Hello and good afternoon dear friends!

I'm Halak and today I have 5 projects to share with you using the fantastic range of PABD cutting dies & stamps.


Let's get started!

Project #1


Steps:
1. Used Abstract Triangle stencil from PABD with Wilted Violet & Salty Ocean distress oxide inks and created a card mat.
2. Stamped image & sentiment from the Vet Me stamp set and colored using colored pencils.
4. Cut image using the Scallop Rectangle die. (Larger rectangle.)
4. Added sequins and matted onto stenciled mat. 
5. Lastly, matted the project onto white card base.

Project #2


Steps:
1. Stamped image & sentiment from the Vet Me stamp set and colored using colored pencils.
2. Cut image using the Stitched Ticket die. 
3. Adhered green polka dotted pattern paper to card base. 
4. Matted the colored piece onto the card base.
5. Finished the project by adding a piece of ribbon on top.

Project #3


Steps:
1. Created base using Abandoned Coral distress oxide ink.
2. Stenciled using Falling Triangles stencil with Candied Apple distress oxide ink.
3. Cut out Mr. & Mrs. from the die, added glitter to it and adhered to card base.
4. Cut out the base using Stitched Ticket die and splattered some white acrylic paint onto it to soften the background.
5. Added sequins and leaf punch outs.
6. Matted onto white card base and added clay hearts to corners.

Project #4


Steps:
1. Created base using Spiced Marmalade & Worn Lipstick distress oxide inks.
2. Splattered water onto background and let it dry.
3. Cut out the word Cherish from PABD die and colored it using Wilted Violet & Salty Ocean distress oxides, added glitter and adhered to card. 
4. Added washi tape pieces to the edges, a sticker sentiment and flourishes.
5. Cut up the card base using Stitched Ticket die.
6. Matted onto white card base and finished it off with two off-cut strips of gold foil from Dual Leaf die.

Project #5


Steps:
1. Created base using Wilted Violet & Salty Ocean distress oxide inks.
2. Splattered water onto background and let it dry.
3. Cut out Mr. & Mrs. from the die, and adhered to card base.
4. Cut up the card base using Stitched Ticket die.
5. Matted onto white card base and added white clay hearts.

Closeup:


I hope you liked my projects! Till next time! *Hugs*

PABD Products Used:


Tuesday, November 21, 2017

Crafty inspiration with stamps!

Hello dear friends!

I'm back over at PABD with a quick post featuring some of the fantastic stamps that you saw in the new release yesterday.

My first project is a card made using the Bookworms stamp set. It is such a versatile set because it has a boy image and a girl image. This would be a perfect  accompaniment to a present of some boks to an avid little reader.

The sentiment actually reads "Between the pages of a book is a lovely place to be" but since I was keeping the project CAS I decided to mix it up with a sticker as an embellishment.

Colored with Staedtler colored pencils, added some glitter to bows in her hair, some of that gorgeous washi tape (Rainbow Hues, also by PABD) to a side and finished the project with a tiny flower embellishment.

Let's check out the second set of projects:

I love making ATCs so a co-ordinating set was about to begin the moment I saw the Floral Direction stamp set.

This stamp set, without a doubt is my favorite from the new release.

How could I not use Blotchy set from the last release with this set! These two sets go together like peanut butter and jelly!

I created the background with Color Bursts and Brushos, stamped Blotchy using Distress Oxides and stamped Floral Direction using Versafine.
Colored the blooms with Sakura pens, added washi and glitter.

I have used the Rainbow Hues & Boho Feathers washis in the ATCs, simply cause I just can't get enough of these beauties!

Priced at just Rs. 135/- you definitely gotta check these out... the variety and colors will blow your mind!

To check out the complete range of PABD products, click : HERE

I hope you liked my work and that it inspired you!

P.S. PABD has a 15% off Black Friday sale coming up! (Wink wink)

Here's a closeup of one of the ATCs:

List of PABD products that I used:


Sunday, October 1, 2017

October Challenge


Hello hello! 

Welcome to PABD October 2017 Challenge post! 

I am sure you have checked out our fantastic array of new products and would be busy making a list of the new crafty goodness that you'd like to puchase. 

Here's the store link where you can check out our ENTIRE NEW RELEASE. Just click: HERE


Theme: Our Oct 2017 challenge theme is pretty simple. 

USE your favorite stamp OR cutting die along with your favorite embellishment. 


So easy, what say? 

To further help you out, let's check out the fabulous inspiration by our DT.

Preety Dutt

1. Floral Friendship Card


Process: 


For this floral card, she has used the PABD- Rococo Stamp which has gorgeous floral images.
The floral arrangement was stamped onto watercolor paper and then colored in using prisma color pencils.
The background was watercolored using zig markers and an aqua brush.
Then, this panel was die cut using the PABD- Scallop Rectangle die. 
For the sentiment, the PABD- Bold You Stamp was used. The word friend was stamped with Versamark Watermark Ink and heat embossed in white onto a strip of black cardstock. The card was assembled by adhering the white scalloped frame to the A2 sized black card base and then the watercolor panel was foam mounted.
Lastly, a strip of PABD Washi Tape - Lovey Dovey was used as an embellishment onto which the sentiment strip was foam mounted. 


2. Art Journal Spread: You are Awesome...


Process:


For this Art Journal Spread, she has used an old book, adhering a couple of pages together to lend it strength and then applying a wash of white gesso over the pages to prepare the surface.
After that she has added strips of PABD’s Rainbow Hues and Prickly Cuteness washi tapes to create the pattern.
Next, the gorgeous and traditional animal images from the PABD - Madhubani stamp were stamped onto printer paper and then glued onto the journal using mod podge.
After this was some watercoloring to add blue, green, yellow and black hues where the washi tapes acted as a good resist to the colors.
Towards the edges of the page, stencil work was done using black soot distress ink and the PABD Stencil- Dimensional. Further, the title was stamped using the PABD-Bold You stamp and the smaller sentiments were heat embossed in white onto black strips.
To add more interest, background stamping was done with a few sentiments using black archival ink. Then, some white dots were added using a white gel pen and white acrylic paint.
In the end, black and white splatter was created to bring the whole design together. 


Before we move forward to check out her fabulous work, let us hear what she has to say!

"Hello! This is my first post here and I am so excited! I would like to thank Vidushi for giving me an opportunity to work with PABD and also with such an awesome team."

Today she has 2 cards for the October challenge inspiration.

Card #1:


Process:

1) Stamped the cage from the PABD - Floral Cages stamp set and sentiment in black ink. 

2) Colored the flowers and leaves using copic markers.

3) Went over the cage with golden gel pen and fussy-cut it.

4) Adhered the PABD - Monochrome Beauty washi tape on an A2 white card and colored it with golden gel pen to match the cage.

5) Lastly, adhered the fussy cut cage and sentiment on the card.


Card #2:


The steps followed in this card are similar to card #1. The only difference is that she has colored the washi tape with golden and red gel pen.


Process:

To make this super cute project, she has used the lovely PABD - Panda Hugs stamp set.
First, she created the background using PABD - Arrows washi tape. 
Next she stamped a panda from the panda hugs stamp set, fussy-cut, colored and adhered it to an embossed panel.
After that, she stamped a sentiment from the same set and adhered it to project.
Finished it off with some star sequins and some glossy accents to the balloons and panda eyes. 


Halak Shah

Card #1:


Process:

For this project, the gorgeous PABD - Rococo
stamp set has been used with the PABD - Chevron Delight washi tape.
This stamp set makes for a fantastic colored piece.
Added washi tape to the background card panel over which the matted and colored stamped piece was added.
Some brown twine and a sentiment tile finished the piece.

Card #2:


Process:

For ths project the same washi (chevron delight) has been used to act as a frame for the feathers.
The feathers along with the sentiment are from PABD - Feathers stamp set, stamped using distress oxides + archival black ink and some sequins have been added to match the feather colors.
Also, the cardstock in that lovely wine color, is a former release by PABD.

So, this concludes our challenge post. We hope you liked our DT's inspirations and that you will play along!

Do leave a comment once you take part in our challenge!!

Have a lovely weekend and happy crafting!


Products used from our new release:


October Challenge - Peek-a-boo Designs Products
October Challenge - Other Brand's Products

Thursday, August 18, 2016

Teacher's Day Projects & Ideas

Hello and good morning dear friends!

I'm Halak and today it's a quick post showcasing some projects that I created using the Back To School stamp set by Peek-a-boo Designs (PABD).

It's a very versatile set that can help you create cards and projects not just for teachers but also for students!

How about a card for your art teacher? This set is perfect for it!

And that's not all, you can create tags, fun book-marks, decorative photo frames, graduation projects... really... the list is endless!

Special Offer :

Because Teacher's Day is just around the corner, PABD have a FLAT 10% OFF on this stamp set! (No coupon code needed)
So, instead of Rs. 550/- you can bring home this set for Only Rs. 495/- !!) How awesome is that!

Check it out >>> HERE

List of PABD products used in the projects :

Blocks And Blocks Stencil

Leafy Delight Stencil

That's that folks!

I hope my post inspired you!
Thank you so much for stopping by and have a lovely day!


Posted via Blogaway

Friday, August 5, 2016

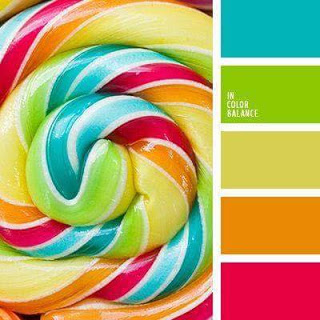
Color insperations and tutorial by Nadiya Bilovodenko

Hi PABD fans! Today me Nadiya Bilovodenko is here on the fabulous Peek-a-boo Designs  blog with my inspirations for  #9 Color challenge. The wide palette makes it possible to create miŃ…ed media projects and I made a tag. Hop on along with me to see what I have made.


 My tag is large. And I played with stamps and stencils.


 And some close up:


And now my master class:

1. Get your tag, stamps, watercolor paints, stencils.


2. In random order, apply watercolor paint on the tag. Once dry apply the stamps.


3. Put distress ink through a stencil.


 4. Apply any medium of your choice through some other stencil.


5. Cut the stamped mandala.


 6. Assemble the composition. Apply randomly stamps. Add splashes of white and black gesso.
 

Thank you for staying along with me !!


 Do hop one to our new Challenge #9 Color


In my projects I have used:
Arrow stencil 
Bold Butterflies
Bubbles stencil
Mandala
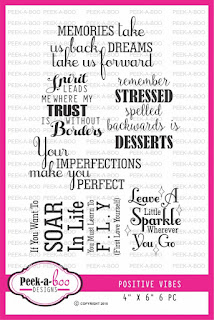
 Positive Vibes