- Stamp the Poppies Bunch using Versamark and Gold Embossing Powder.
- Stamp the sentiment from the stamp set Friends Forever.
- Apply Distress Ink over the stamped images using a bending tool. I used the Cracked Pistachio color.
- Take the small stitched rectangle and place over the card stock just like if you were to cut
- Replace the lower cutting plate in your big shot for a rubber mat. The correct sandwich will be: acrylic pad - rubber mat - card stock - die cut - acrylic pad.
- Pass your sandwich for the big shot
- Finalize your decoration adding some enamel dots or sequins.
Monday, December 19, 2016
TO FINALIZE SOMETHING SWEET
Sunday, October 30, 2016
Happy Diwali with challenge reminder!
Hello and good afternoon dear friends!
Here's wishing you all a very happy and prosperous Diwali from the entire Peek-a-boo Designs team!
I'm Halak and I'm here to remind you amidst the festivities that we have Challenge #11 - Recipe running wherein you can participate for a chance to win a voucher which you can use to pick up some PABD awesomeness!
Here are the challenge guidelines :
Main Ingredients :
1/4 cup of the color red
1/4 of gold as well
Number 1 - Since we celebrate our first birthday in October
Garnishing (the twist ) :
Use atleast one of the the following :
stenciling
3d Layered projects
Make your own background with stamps
dash of glitter
Directions :
Make a delicious project using all the ingredients above and adding at least one garnish (the twist) of your choice.
Participants with a project with an Indian touch since we celebrate Diwali and other festivals in this month will get some bonus points.
PABD cutting dies are very versatile and can be used to make some fantastic projects!
You can create fun cards, scrapbooks, invites.. the list is endless!
Today I'm sharing a card I created as per Challenge #11 specifications to welcome the new year.
Tip : Buying a number die is a great investment because you can use it to create custom birthday cards, new year greetings, save the date invites etc.!
For my project, the background was created using the abstract triangle stencil. Once I stenciled it in pink, I offset the stencil and stenciled it in yellow to give it that two-toned effect.
The dies that were used are :
Rounded rectangle dual stitched die
Numbers die and
Celebrate word die.
Apart from this, I used the gorgeous Rose Gold cardstock from PABD. (Seriously guys, this cardstock is a must. Absolutely gorgeous!)
So, what are you waiting for! Read the recipe of Challenge #11 and cook up a fun crafty project!
Last day to enter is 31st October 2016, so... hurry!
To participate, click >>> HERE
List of Peek-a-boo Designs (PABD) products used :
Thank you so much for stopping by! *Hugs*
Posted via Blogaway
Friday, October 21, 2016
Thank you cards, sending happy mail with Swapna
Here I am with my second DT post. To be frank I really struggled and liked the process of these 3 cards. At the end I am pretty happy with my cards.
I hope you are playing along with our October challenge which is a recipe. Please do read Guidelines carefully before linking your project.
Card #1
** First card is inspiration for our october challenge.
** I masked the card base (1"around the card base), placed the stencil diagonally on the base and secured with masking tape.
** I mixed candid apple distress ink with texture paste, applied it through stencil. Left it dry on its own.
** Die cut the scalloped frame (bigger) with same CS, few vellum fern flourishes and one white fern flourish.
** I double heat embossed the CS fern flourish with gold embossing powder to give it dimension. Die cut few Thank you, adhered them together and heat embossed with white embossing powder.
** To assemble the card, I foam mounted the frame on card base around the stencilled area. I put silver embroidery floss on top of which glued ferns. Added the sentiment.
Card #2
** This was real fun to make. I just kept die cutting stitched bubble die.
** Used distress inks in blue range to blend over them.
** I stamped the image towards bottom and coloured with Staedler water colour pencils.
** Stamped sentiment with black ink.
** Used stitched rectangle die to die cut these panels.
** I glued these panels with liquid glue leaving little space in between.
Card #3
** This is water colour card. I stamped the flourish image with versa mark ink and heat embossed with white embossing powder.
** Used zig markers to colour flowers and leaves.
** Die cut the panel and foam mounted it on a grey CS.
** For sentiment, I die cut 2 times with grey CS and once with water colour paper.
** I used Zig marker to add shade to the die cut sentiment.
** Added few sequins.
Closer look of die cut sentiment
Supplies
Thank you for your love..
Suggestions are always welcome..

Monday, August 29, 2016
2 Cards and a Tag
Aren't those colors just yummy :), well now onto my projects....
Project 1:
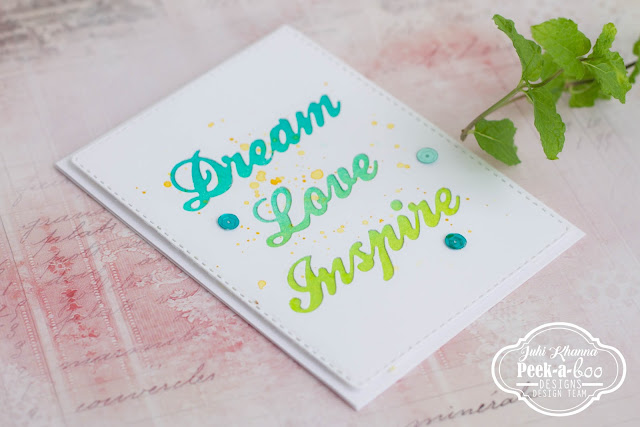
Negative diecutting is the focus of this card. This is my first attempt at negative diecutting and I love the results. I die cut the words "Inspire", "Love" and "Dream" on a piece of white cardstock and retained the negative of the die. Backed it with a piece of ink blended watercolor paper. I also added some splatters of paint and sequins to finish the card.
Project 2:
I've used the left over die-cut from my previous tutorial post on this card. You can check out how I used the negative pieces of the Graceful Lattice die-cut in this post.
The humming bird and flowers are stamped on watercolor paper and colored with watercolor markers and then fussy cut.
It's not visible in the photo but I added some clear shimmer on the humming bird.
Project 3:
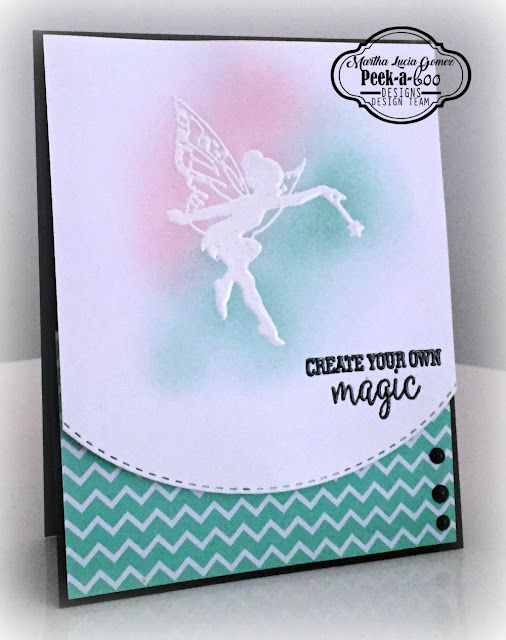
My 3rd project is a tag. I created an ink blended background using the colors from the color inspiration.
And then stamped the Fairy silhouettes and added some chunky glitter.
I hope you liked my projects and are inspired to created something for the August Challenge!
Thanks for visiting and have a great week!
Supplies Used:


