Showing posts with label Dual Stitched Oval Die. Show all posts

Monday, August 29, 2016

2 Cards and a Tag

Hello everyone, it's Juhi. Today I'm sharing 2 cards and a tag I made for August's challenge Challenge #9 Color Inspiration. In case you haven't already, there is still time to play. This month's challenge is a color inspiration. You can find all the details and enter here.
Aren't those colors just yummy :), well now onto my projects....
Project 1:
Negative Die Cutting with Peek-a-boo Designs Dies
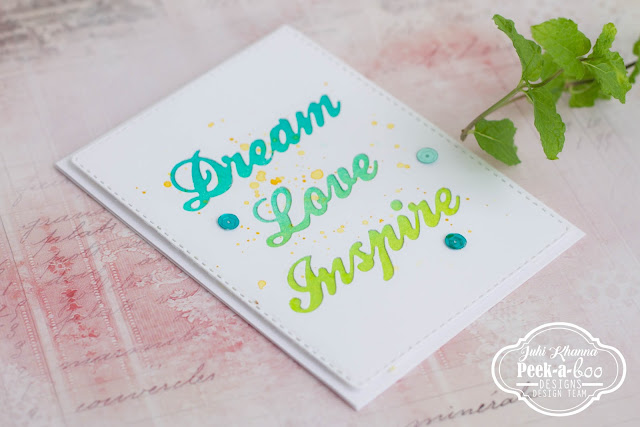
Negative diecutting is the focus of this card. This is my first attempt at negative diecutting and I love the results. I die cut the words "Inspire", "Love" and "Dream" on a piece of white cardstock and retained the negative of the die. Backed it with a piece of ink blended watercolor paper. I also added some splatters of paint and sequins to finish the card.
Negative Die Cutting with Peek-a-boo Designs Dies

Project 2:
Humming Blossom from Peek-a-boo designs
I've used the left over die-cut from my previous tutorial post on this card. You can check out how I used the negative pieces of the Graceful Lattice die-cut in this post.
The humming bird and flowers are stamped on watercolor paper and colored with watercolor markers and then fussy cut.
It's not visible in the photo but I added some clear shimmer on the humming bird.
Humming Blossom from Peek-a-boo designs

Project 3:

My 3rd project is a tag. I created an ink blended background using the colors from the color inspiration.
And then stamped the Fairy silhouettes and added some chunky glitter.
I hope you liked my projects and are inspired to created something for the August Challenge!
Thanks for visiting and have a great week!

Supplies Used:


Monday, August 22, 2016

CARD INSPIRATION IN DIFFERENT STYLES

Hello crafty friends, Martha Lucia here to share with you a few card inspirations in different styles using different techniques and elements. The first card that I want to show you uses our Challenge theme. If you don't remember what it is, you can refresh your memory HERE. Take a look at my card:

CARD INSPIRATION IN DIFFERENT STYLES

Creating this was very easy and quick:
1. Cut the card base using Melon Mambo card stock. The size is 4-1/4"x11" with score in 5-1/2". Round the corners with corner punch.
2. Using one of the Dual Stitched Rounded Rectangles, cut the second layer using a decorated or designer paper. Paste this layer directly over the card base.
3. Using the small oval from the Dual Stitched Oval Collection cut an oval using Very Vanilla card stock.
4. Stamp over the oval the sentiment included on the stamp set Humming Blossom using Versafine Onix.
5. Paste the oval over the decorated base using dimensionals or zapdots.
6. Sponge a separate piece of Very Vanilla card stock using three or four different colors of the distress ink. In my model I used three colors: Mustard Seed, Spiced Marmalade and Mermaid Lagoon.
7. Stamp the image of the big bird included on the stamp set Humming Blossom using Versafine Onix and then heat emboss it with clear embossing powder. 
8. Fussy cut the bird image with scissors and paste partially over the oval and the decorated base.

CARD INSPIRATION IN DIFFERENT STYLES

My second card is very different from the first. In this second model I used three different stamp sets. Take a look at my card:

CARD INSPIRATION IN DIFFERENT STYLES

This was very easy to make too, and if you have any tool like a Misti or Stamping Press, the process will be quick.
1. Cut the base of the card using Whisper White card stock. The size is 4-1/4"x11" with score in 5-1/2".
2. Using one of the images from the stamp set It's Plaid Time stamp two or three lines at the upper and lower part of the card base. You can use any color of ink. In my sample I used Basic Gray.
3. Rotate your card 90 degrees and use the same color of ink, stamp the same image across the whole surface keeping the same distance between the images.
4. Cut a layer of card stock of 4-1/4"x3-3/4" using a color of card stock that coordinates with  your design.
5. Cut a third layer of card stock whisper white of 4-1/4"x3-1/2" and stamp the dual flower image from the stamp set Flower in a Jar and the sentiment from the stamp set Friends Forever using Memento Tuxedo Black Ink over this piece.
6. Color the flowers using markers and paste the layers over the card base.
7. Finalize the decoration by tying a double loop of color trimming.

CARD INSPIRATION IN DIFFERENT STYLES

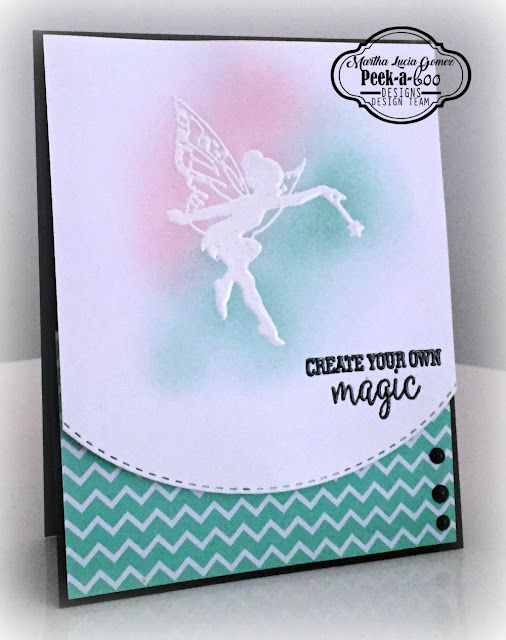
The third card is a Clean and Simple model. In this one, I used the stamp set Magical Fairies and the Dual Stitched Oval Dies. Take a look at my card:

CARD INSPIRATION IN DIFFERENT STYLES

The base of this card is Basic Black card stock and I combined it with Whisper White card stock and a piece of decorated paper.

1. Cut the base card. The size is 4-1/4"x11" with score in 5-1/2"
2. Cut the second layer out of decorated paper. The size is 4-1/8"x2-3/4" and paste it directly over the card base.
3. Cut a third layer in whisper white card stock. The size is 4-1/8"x5-3/8".
4. Put the white layer partially inside of the one of the Dual Stitched Oval Dies to create the lower border. Leave enough space to stamp your images and pass it through the big shot.
5. Stamp one of the fairies included on the stamp set Magical Fairies using Versamark and then heat emboss it with white embossing powder. 
6. Sponge around the fairy using two different colors of ink. In my sample I used Brushing Bride and Pool Party.
7. Stamp one of the messages included on the same stamp set using Versafine Onix and then heat emboss it with clear embossing powder.
8. Finalize the decoration by adding some dots with Black Crystal Dots on the lower part.

CARD INSPIRATION IN DIFFERENT STYLES

I hope my projects inspired you. These are three different styles of cards using stamping techniques like emboss resist, double stamping and blending with distress ink. In addition, you can see how to use the die cuts in a normal way and alter the original designs. You only need to let your imagination fly and fall in love with your stamps to create what you love.

These are the products that I used for your inspiration:


See you soon!

Monday, August 8, 2016

Stencil mania by Swapna

Hi... Crafty folks...

Here I am with my first post for this month. We loved to see your active participation in our July challenge and  hope you all are playing along our challenge this month which is  colour inspiration.

Read the rules carefully before linking the project.


Use 3 or more colours from the inspiration picture and link in the challenge post. We would love to see your creations with Peek-a-boo designs for the challenge.

Now coming to my post for the day. I am sharing 3 cards with stencils which released last month. Tried to make Masculine cards which are hard to make (as people say) .


Card #1 - 

* I used BOX-tacular stencil. 
* I used few distress inks to blend. 
* I placed the stencil and blended orange shade colours first then off set the stencil to blend next set of colours. 
* Heat embossed the sentiment. Kept the background pretty simple.


Card #2

Men play the role of angel in our life. As father, as brother and as husband then why can't we give them an angle card?

* Its a double fold card.  
* I die cut a blue CS with the large stitched oval die and white CS with second largest stitched oval die. 
* I placed the white oval on regular card base and blended distress inks very lightly for subtle background. 
* Glued the smaller oval die cut on navy blue oval and glued it on open side of the card base. Stamped a fairy in black ink. 
* Die cut the word with white and heat embossed it with gold UTEE for more dimension, backed it with black diecut word and glued on the card front.


Card #3

Its a simple one layer card and sneak peek of my next post.

* I liked this stencil but i wanted only little portion of the stencil. 
* I selected the area i want on the card, placed it on card front and masked off the remaining area with masking tape/low tacky tape/washi tape. 
* Blended distress inks from darker green to yellow.
* Stamped the sentiment with grey ink so that it doesn't over power the leaves.


I hope you liked these cards..

All the supplies are listed bellow.. You can shop for these on Peek-a-boo designs site


Thank you for stopping by...

See you in next post...

Swapna Patil


Sunday, July 31, 2016

LOVE, INSPIRE AND CREATE!

Hello everyone! Martha Lucia here to share with you three fun card ideas that I made using our stamps and die cuts. Here is my first card:


To create this I used the watercolor faux technique. I inked an acrylic block with Pool Party classic ink and then I sprayed with water before placing the block over the whisper white layer of paper. When the paper was totally dry I pasted over it three Word Love in different colors and positions. I completed the message using parts of two images from the stamp set Friends Forever, stamped with Versafine Onix over the same color of the card base. As final touch I added a few rhinestones over the watercolor background. 


For my second card I used the stamp set It's Plaid Time. I stamped each line alternating three different colors of ink and cross the lines on the center. Then I cut the center using the small oval from the Dual Stitched Oval Die Cut Set, to create the inlaid technique. 


Also I cut the same oval in fun foam to get more dimension and I pasted the decorated oval over the foam. I pasted the decorated layer over the card base and pasted the oval exactly in the same place. To finalize the decoration I cut the Word Inspire in Pink Pirouette and Pool Party card stock to paste over the oval with a little movement. 


For my third card I chose neutral colors and vellum card stock. The base is crumb cake and the second layer is early espresso. I stamped two flowers from the stamp set Peonies Love over vellum using VersaMark and White Embossing Powder. I melted the powder with the heat tool and colored the flowers on the back using pearlescent.


I cut the second layer of the card using early espresso card stock and one of the die cuts from the Dual Stitched Rounded Rectangle. I stamped a sentiment over this using VersaMark and White Embossing Powder. Then I pasted some loops of pink thread, the vellum flowers and some sequins. As final touch I colored the front of the flowers with Clear Wink of Stella.


Products Used:


I hope my projects inspire you to use the new stamps and now I have a special news for you! You can buy all the new releases with a 10% off using my 
discount code MARTHA_10 . So run and don't let the stamps and dies run out of the store! Today is the last day of this promotion!!!

See you soon!!!