Showing posts with label Stringy Text. Show all posts

Wednesday, December 7, 2016

Challenge #12 Inspiration

Hello everyone! It's Juhi with some more inspiration for challenge #12 which is a color challenge.

Create a project with at least 2 colors from this image. Here's what I made
I used the gorgeous Mandala stamp set to create my watercolor cards. I first stamped the mandalas on watercolor paper and colored them in with Gansai Tambi watercolors.  Coloring them was like coloring adult coloring pages, I really enjoyed it!
Go here to enter the challenge, we would love to see what you create!
Supplies Used:


Monday, November 7, 2016

Inspirations for Challenge # 12

Hello friends Hope you all had great Diwali Celebration ! Pooja here with inspiration for Current Challenge.Which has this wonderful photo as inspiration.


For my first card I used the Hearts Butterfly die-cut released last month.


I loved the colors in the challenge photo so much that I used all of them on this card.Started by applying texture paste through Grid stencil on the cardbase.I was inspired by my teammate Swapna's card while creating the water-colored panel.


Heat embossed the  butterfly die-cut and placed it in a glittery frame and finished off with few enamel dots .The sentiment is from Stringy Text.


On this card I combined three colors from the photo with the Floral Blooms stamp set.A glittered Stitched scallop rectangle frame to jazz up the card .


Heat embossed the sentiment from Floral Fantasy on vellum and finished off with few sequins.

PABD Products used are :

Monday, October 24, 2016

Lots of gold and some glitter - October Release Inspiration

Hello everyone! It's 
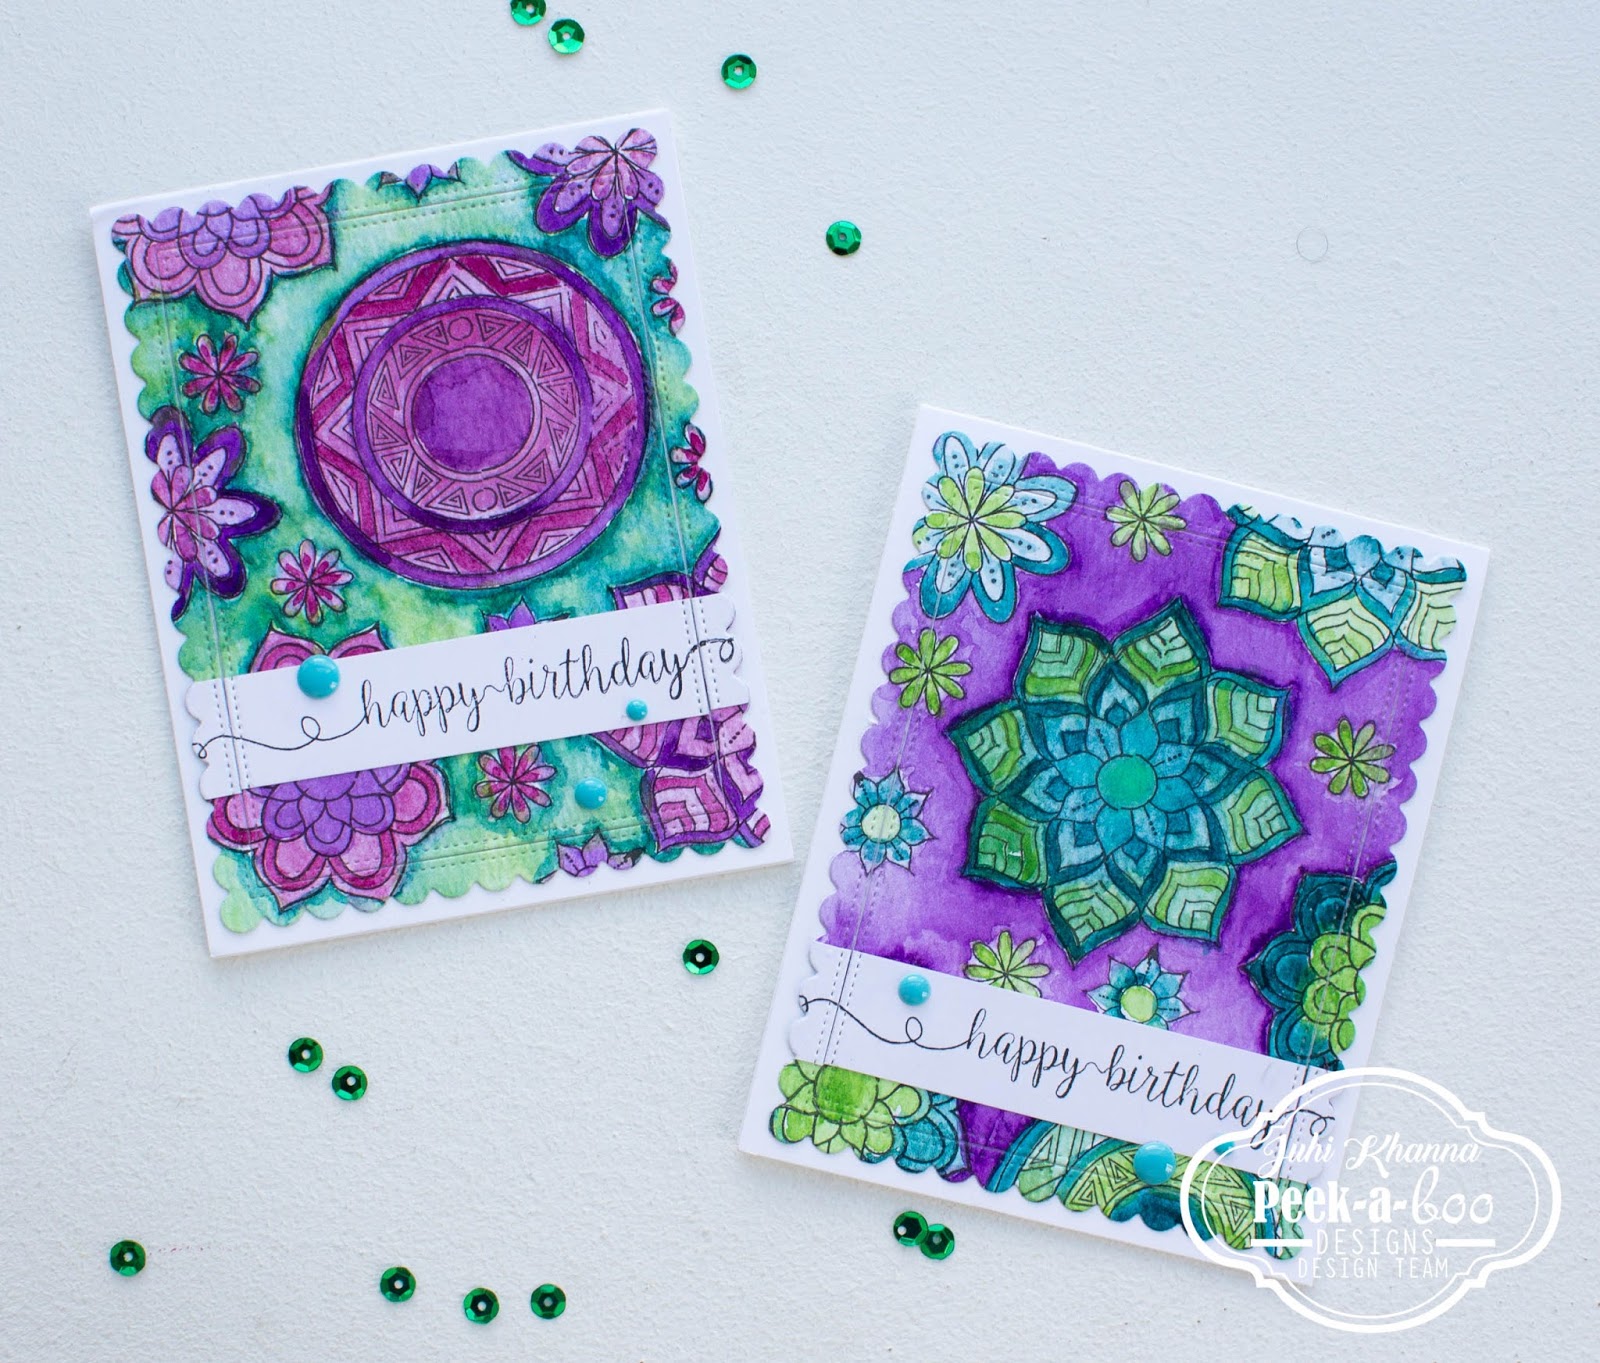
Juhi with my second post for October. My first card is a birthday card for my daughter who is turning 5 in December.
Watercolor card with Pee-a-boo stamps and Dies by Juhi
To created the watercolor background, I cut out the number dies on masking paper and stuck them randomly on watercolor paper, leaving some space in the middle for the number '5'.
I then painted the background in pink and orange Gansai Tambi watercolors.
I peeled off the digits once the watercolor dried, some paint did seep under the digits giving the background a beautiful watercolor wash effect! I finally cut out the '5' in gold and stuck it along with some gold thread and sequins and also heat embossed the sentiment in gold.
I hope my daughter likes the card :)

I followed exactly the same process to make the watercolor background of this Thank you card.
watercolor thank you card with Peek-a-boo designs stamps and dies
Don't you just love the gold against the turquoise? I just love how this one turned out!

I used my favorite "Border Frenzy" die from the month's release. I just can't get enough of this die.....love how it lets you add interest without extra bulk, perfect for CAS cards.
I created the background by stamping the broad stripes from the "It's Plaid Time" set in white followed by red inks. I then added the fancy stitches with the "Border Frenzy" die.
For the glitter heart I used the "Shaker Love" Die.
Well that's it from me for now, I hope you find inspiration in my projects! Thank you so much for stopping by today.

Supplies Used:


Chess Pieces


Saturday, October 22, 2016

Cards using October release

Hello Friends Pooja here with second batch of inspirations for this month. I have gone soft and subtle with first card.The background is created using beaded Stencil and layered stitched bubble die-cut over it.


 The butterflies are from Doodled Butterfly set and so is the sentiment.


For my next card I used the negative of fern flourish die (By now you must have known I love using negative of die-cuts more than the positives).


 Its a clear shaker card. I have stitched two acetate sheets together with some sequins sandwiched between them. You can see some the sequins inside the ferns in this picture


Third and the final card for October is simplest.Created the texture by applying texture paste through abstract triangles stencil.


I wanted all the focus to be on fern die-cut so kept the design very clean.The sentiment is from Stringy text set.


I hope you enjoyed the post and loved my cards .

PABD Products used are  :

Monday, August 29, 2016

2 Cards and a Tag

Hello everyone, it's Juhi. Today I'm sharing 2 cards and a tag I made for August's challenge Challenge #9 Color Inspiration. In case you haven't already, there is still time to play. This month's challenge is a color inspiration. You can find all the details and enter here.
Aren't those colors just yummy :), well now onto my projects....
Project 1:
Negative Die Cutting with Peek-a-boo Designs Dies
Negative diecutting is the focus of this card. This is my first attempt at negative diecutting and I love the results. I die cut the words "Inspire", "Love" and "Dream" on a piece of white cardstock and retained the negative of the die. Backed it with a piece of ink blended watercolor paper. I also added some splatters of paint and sequins to finish the card.
Negative Die Cutting with Peek-a-boo Designs Dies

Project 2:
Humming Blossom from Peek-a-boo designs
I've used the left over die-cut from my previous tutorial post on this card. You can check out how I used the negative pieces of the Graceful Lattice die-cut in this post.
The humming bird and flowers are stamped on watercolor paper and colored with watercolor markers and then fussy cut.
It's not visible in the photo but I added some clear shimmer on the humming bird.
Humming Blossom from Peek-a-boo designs

Project 3:

My 3rd project is a tag. I created an ink blended background using the colors from the color inspiration.
And then stamped the Fairy silhouettes and added some chunky glitter.
I hope you liked my projects and are inspired to created something for the August Challenge!
Thanks for visiting and have a great week!

Supplies Used: