Showing posts with label Peonies Love Stamp. Show all posts

Tuesday, August 16, 2016

HIDDEN DIE CUT TUTORIAL

Hello crafty friends, Martha Lucia here to share with you a technique that I love to create with my die cuts. Today I am using the stamp set Peonies Love composed of four beautiful flowers and three sentiments but you can use any stamp set because the most important in this tutorial is the use of the die cut, and the Dual Stitched Rounded Rectangle. Take a look at my card:


Creating this card is a very simple process. Let me tell you how to make this:

1. Cut the base of the card. The size is 4-1/4"x11" with score in 5-1/2". I used Whisper White card stock.

2. Cut a second layer using the same color of the card base. The size is 4-1/4"x5-1/2".

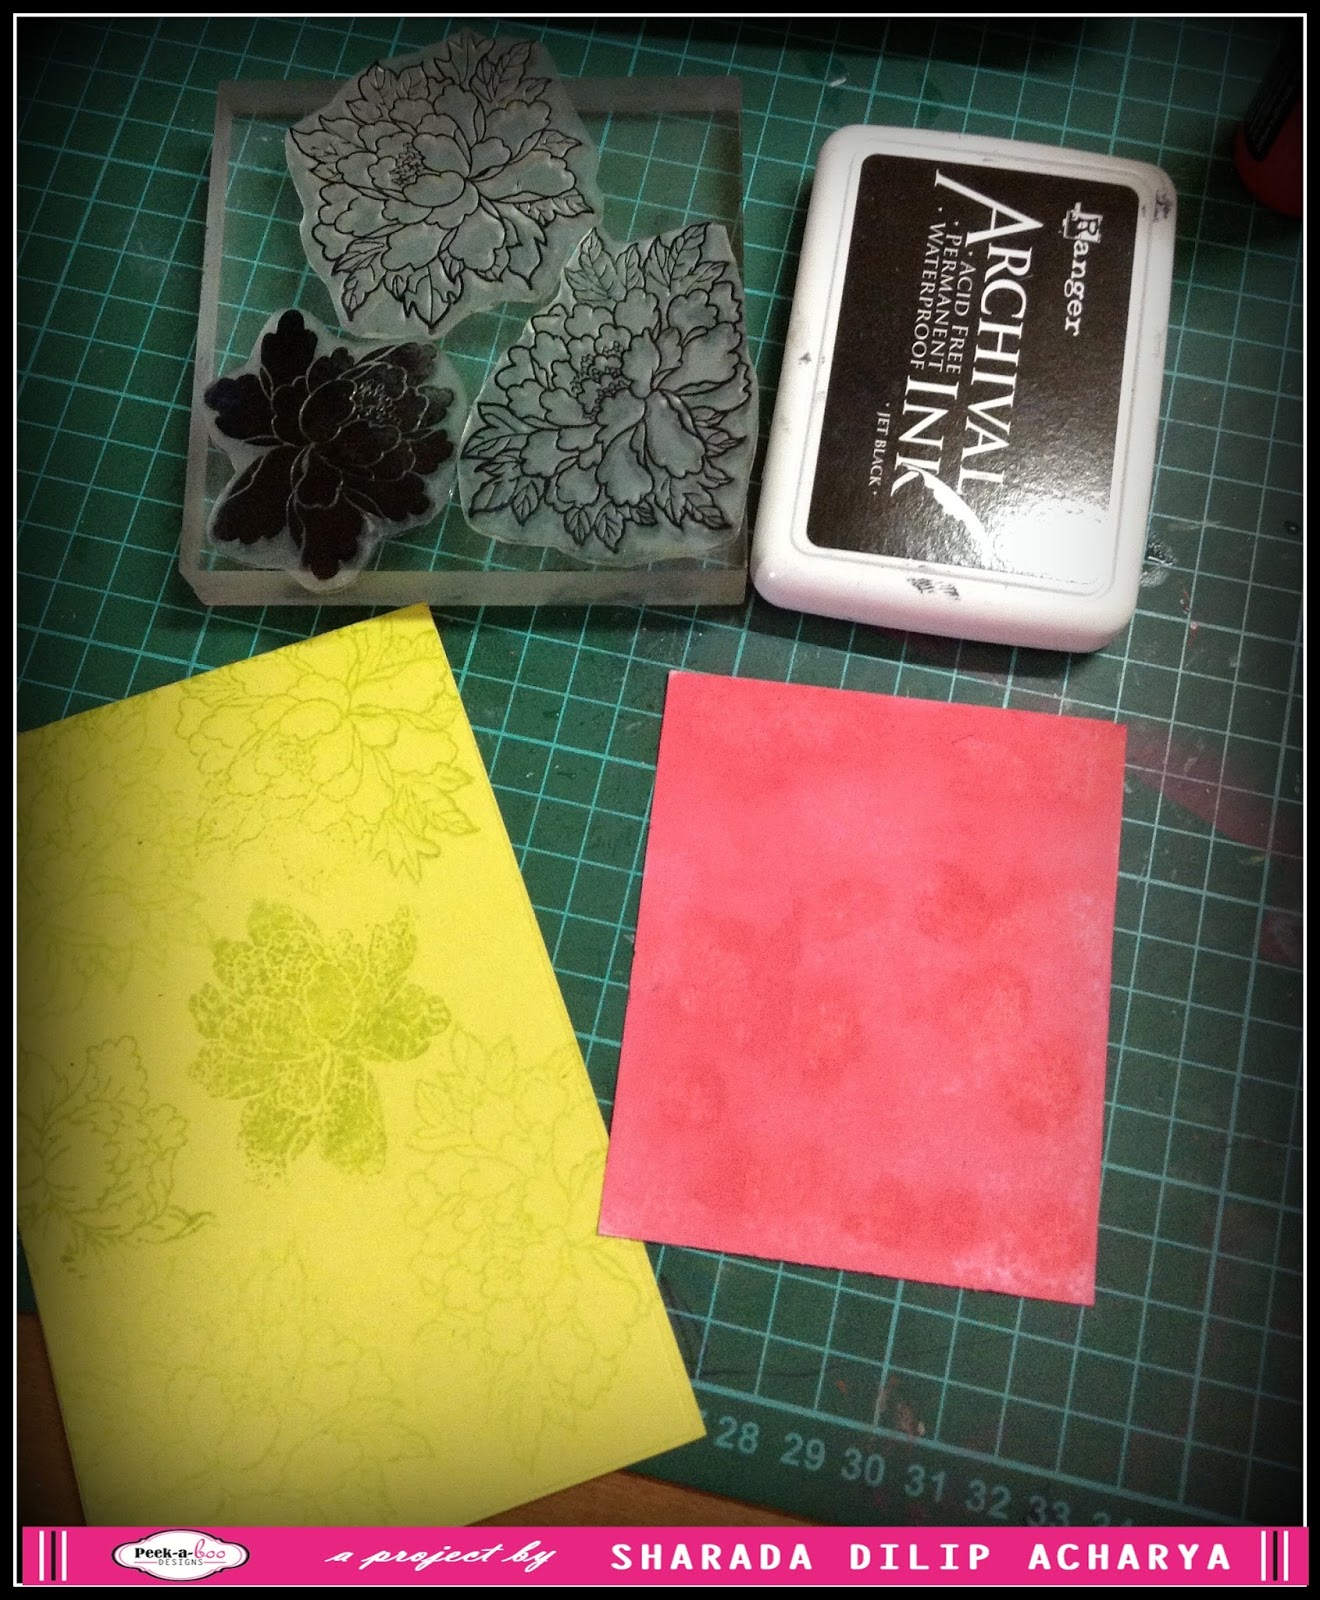
3. Arrange and stamp the images over the card base using Versafine Onix. 


You are noticed that I only stamped three of the flowers included in the stamp set Peonies Love. These flowers are perfect to color inside.

4. Cover your stamped images with Clear Embossing Powder and melt the powder with the heat tool.


5. Continue with the stamping process but this time, take the die cut that you want to hide and put it in place where you want it. Use this as reference and arrange the other stamps to finalize the stamping and embossing steps.


6. Using the Dual Stitched Rounded Rectangle die cut that you selected in the step before, cut the frame in your stamped layer.


7. Cut the same frame over a piece of fun foam.


8. Now is time to paint the flowers. I only paint the flowers that are inside the die cut part. For this I used color pencils. I always apply the light colors before and then the dark colors. Paste the large frame with the embossed flowers directly over the card base.


9. Paste the painted rectangle over the fun foam rectangle and then this piece over the card base. You will get a little dimension with this piece. Complete the decoration by adding some details of Crystal drops under the sentiment.


Here are the products that I used in this project. You can find these in our Peek-a-boo store.

I hope my project inspired you. You can use any stamp set and any die cut with this technique and, if you want, you can change the color of the die cut piece to create a dramatic contrast.

See you soon!!!

Tuesday, August 9, 2016

Fairy Canvas by Shilpa

Hello Everyone,
Shilpa here,

I am sharing with you another mixed media canvas using Peek-a-boo designs stamps, stencil and dies.

 
Peek-a-boo designs have so many wonderful stamps, I just love to incorporate them differently on my different creations.


For the background, I used Peek-a-boo designs' Graceful Lattice Die cut.


For next layer of texture I used Bubbles Stencil with modelling paste. 
When it dried completely I spritzed Lindy's stamp gang teal, Pink and Purple inks randomly on the surface.


For the focal point I die cut oval  from Dual Stitched Oval. Colored the oval with inks.
Stamped fairy from Magical Fairies stamp set on  it.  
 Flowers are Peonies Love Stamp set. I stamped them with black Archival ink and colored with watercolor markers.

After adding lace and pearls, my canvas was ready.

Do try different stamps, stencil and die designs on your creations.. it is total fun!! 

Thanks so much for stopping by.

Products used from Peek-a-boo Designs


Sunday, July 31, 2016

LOVE, INSPIRE AND CREATE!

Hello everyone! Martha Lucia here to share with you three fun card ideas that I made using our stamps and die cuts. Here is my first card:


To create this I used the watercolor faux technique. I inked an acrylic block with Pool Party classic ink and then I sprayed with water before placing the block over the whisper white layer of paper. When the paper was totally dry I pasted over it three Word Love in different colors and positions. I completed the message using parts of two images from the stamp set Friends Forever, stamped with Versafine Onix over the same color of the card base. As final touch I added a few rhinestones over the watercolor background. 


For my second card I used the stamp set It's Plaid Time. I stamped each line alternating three different colors of ink and cross the lines on the center. Then I cut the center using the small oval from the Dual Stitched Oval Die Cut Set, to create the inlaid technique. 


Also I cut the same oval in fun foam to get more dimension and I pasted the decorated oval over the foam. I pasted the decorated layer over the card base and pasted the oval exactly in the same place. To finalize the decoration I cut the Word Inspire in Pink Pirouette and Pool Party card stock to paste over the oval with a little movement. 


For my third card I chose neutral colors and vellum card stock. The base is crumb cake and the second layer is early espresso. I stamped two flowers from the stamp set Peonies Love over vellum using VersaMark and White Embossing Powder. I melted the powder with the heat tool and colored the flowers on the back using pearlescent.


I cut the second layer of the card using early espresso card stock and one of the die cuts from the Dual Stitched Rounded Rectangle. I stamped a sentiment over this using VersaMark and White Embossing Powder. Then I pasted some loops of pink thread, the vellum flowers and some sequins. As final touch I colored the front of the flowers with Clear Wink of Stella.


Products Used:


I hope my projects inspire you to use the new stamps and now I have a special news for you! You can buy all the new releases with a 10% off using my 
discount code MARTHA_10 . So run and don't let the stamps and dies run out of the store! Today is the last day of this promotion!!!

See you soon!!!


Saturday, February 13, 2016

A Love Layout Tutorial

Hello and good evening!

I'm Halak and on behalf of our dear DT member Vijaylaxmi, I present to you a beautiful layout created by her.

Before we begin the tutorial, please bear in mind that I had only the images to go by and figure out the process which I did to the best of my abilities through reverse engineering.

So, let's get to it!

Here is a picture showing the basic stuff that you'll be needing for this :

The Peek-a-boo Designs stamp sets used in this project are :

1. Peonies Love
2. It's Plaid Time
3. Blackboard Love
4. Bold You

The material (roughly needed) apart from stamps required for this project is :

1. Cardstock / base
2. Inks (Distress Inks are used here)
3. Gesso (Sakura Gesso used here)
4. A photograph / image (Image used here is from a Tim Holtz pack)
5. A paint brush
6. A small water mister to spray water
7. Pieces of pattern paper
8. Decorative elements, embellishments etc.

Steps :

1. First, take the image and position it where you would like to frame your layout. Once that is determined make a border around the image. (A border of approx 1 cm is made here.)

2. Now remove the photo, take Peonies Love stamp and emboss the flowers in white around the border outline that was made in step 1 and at the right hand side bottom corner of the base.

This is what it it will look like post step two.

3. Once this is done, smoosh some distress inks onto an acetate / transparency, mist it with some water, dip the paint brush and add a little color to the piece.

Also, build up base for the placing of photograph by adding pieces of paper and give it a little texture with some gesso + twine.

The stamping around the edge of the layout is done using It's Plaid Time stamp set.

Do note that when I say twine, it is not exactly one string, it resembles the net made of twine that is usually found in green cloth envelopes.

4. Step three was major and once that's done, you can place your photograph and frame it with an mdf embellishment. Also seen here is a ticket on which a stamp from the Blackboard Love set is used.

5. Take a heart shaped die-cut embellishment.

Both the outline heart and the inner solid heart are taken for this project.

6. Color the hearts to give them an antique look and adhere to project.

Another quote from Blackboard Love set is stamped onto the right hand side corner, a bloom with leaves from Peonies Love set is added to the top left hand side and the entire piece is embellished with flowers, gold colored sequins, mdf pieces and butterflies.

7. Lastly, some more embossing onto black cardstock is done using the set Bold You, and that is adhered to the piece.

And there you have it folks! One super pretty layout that is sure to impress that special someone in your life!

Hope you enjoyed reading and will give it a try!

Till next time! *Hugs*


Posted via Blogaway

Wednesday, February 10, 2016

Pictorial with Peonies Love stamp

Hello Friends, 
 Sharada Dilip here today with a  new creation  and I'm sure you must have seen the new FEB launch by Peek-A-Boo Designs.

This month's launch has some really nice stamps, I decided to create a card using this cool stamp set called Peonies Love . It has both solid and outlined images and I thought it has a lot of depth and interest. 


Check out the pictorial below to see how I create today’s card. It is quiet fun!


I decided to mix and match and use all the stamps  both solid and outlined images and create a background .


For the second layer on the card I colored the background with distress paint  


Again on the second layer I stamped the images as a cluster but this time with archival black ink !


And since the main image is really bold and pretty, I wanted to keep the sentiments pretty simple. The look for simple and clean sentiment can also help the center piece to get a full attention.


I hope you liked my cards and do play along with the FEB months challenge- Tic-Tac-toe!!


Read all about the challenge here


Happy Crafting!


Monday, February 8, 2016

Have a nice Day !

Its me again and this time with my take on the challenge. With the new Plaid Design Stamps from Peek-a-boo you can do wonders and specially the variety of background you can create.

So today my first card is completely out of the Border Stamps from the store. I have used all the designs to create the background with my new altenew pigment ink.

Used a strip of vellum and gold embossed the sentiments and fussy cut the bold "Love" sentiments.


For this card I have used the following

For my second card I used the beautiful Peonies Stamp set from the February Collection. Embossed with white embossing powder and then water colored with distress ink.

Gold embossed the sentiments and then finished with some pearls.


For this card I have used the following grid:


Hope this will inspire to add your creation in the challenge. Also Please read all challenge rule here.

Thanks for stopping by!
See you soon at the next blog!


Monday, February 1, 2016

Challenge # 3 : Tic-Tac-Toe !!

    Hello Lovely Crafters ...Vijaylaxmi here...!! Welcome to the blog with new challenge and some awesome prizes to win !!

        We are so overwhelmed with your fantastic response for our previous Challenge # 2 !! All entries are so so beautiful & gorgeous that its gonna tough time for us to pick the winners from all of you guys..but we loved all the entries & off course love you all so we would like to see you again & again  with your wonderful entries..!!

  Since this is the Month of Love & we are celebrating Valentine's Day in this month !!
So here goes our Challenge # 3 : Tic - Tac - Toe

>> As you can see, there are 3 rows & 3 columns in the grid & total 9 elements to choose from . All you to do is create a valentine/ love themed project ( A Card/ A Tag/ A Layout/ An Album or anything ) , but keep in to use at-least 3 elements form a particular row / column or a diagonal. 

>> Also make sure you use some STAMP in your creation.  

Here are the inspiration cards created by Our Creative Team-mates using our new release stamp for February--

 ( Used Diagonal Elements D1 - Flowers+ Gold +Heat Embossing &
C1 + R3 - Sequins+Gold+Pink+Striped Element+Heat Embossing)
(Stamps - Peonies Love, Its Plaid Time & Bold Hugs n Love)


 ( Used R1 - Flowers+ Blings +Punch Out)
(Stamps - Peonies Love & Bold Hugs n Love)


 ( Used Diagonal Elements - Flowers+Gold+Heat Embossing)
(Stamps - Peonies Love , It's Plaid Time & Bold You )


( Used C1 - Flowers+ Twine +Red/Pink & R2- Twine+Gold /silver +Bold sentiments )

(Stamps - Peonies Love & Bold Hugs n Love & It's Plaid Time)


( Used C2 - Sequins+Silver+Striped Elements & R3 - Red/Pink+Striped Elements+Heat Embossing  )

(Stamps - It's Plaid Time & Bold Hugs n Love)


Here are the challenge rules :


  1. Be a FOLLOWER of our blog
  2. Like/Follow us on Facebook and Instagram.
  3. Create a new project for the challenge. No back links please. Altered art, ATCs, cards, scrapbook pages, or any other craft projects are acceptable as long as they adhere to the month’s challenge. You may enter as many projects as you like.
  4. USING STAMP IS A MUST ****
  5. Please link to the exact post on your blog - not the home page URL of your blog - using the in-linkz icon at the bottom of the challenge.
  6. You MUST mention our blog in your post AND link back to our blog or your entry will not be counted.
  7. Display the challenge topic and our logo prominently on your blog.
  8. You may enter a card, a page layout, an altered item, a mixed media item, a mini album.. anything that fits the challenge, unless the challenge states that a specific type of project must be created. Please , no 100% digital projects. A part of the project can be digital.
  9. No restriction on the number of challenges you can take part in - As long as your project matches our challenge, you may "pile on" the other challenges to your heart's content.
  10. We will accept a maximum of three entries per person. Please add -2 and -3 next to your name for subsequent entries.
  11. A Winner will be chosen on their merits. So submit your most creative projects. And that's all there is to it! International Crafters are welcome to participate in our challenges but their prizes would only be sent to an Indian address due to high shipping cost.
Stamps Of the Month February Used here are -


We will pick one winner and  gets to choose any one stamp from our entire range as the winning prize. With that they get to become the guest designer for the month of April. 

So start crafting !!