Showing posts with label layered dahlias. Show all posts

Tuesday, December 6, 2016

Challenge Inspiration - Swapna

Hi.. Friends...
I am here with two cards for our challenge inspiration.

Our November challenge is beeing extended to December end so you have some more days to play along our colour pallet. Hope to see your wonderful creations.


Card #1
* I used the Arrow stencil, I placed the stencil on strip of white CS and applied distress inks.
* I trimmed it to a strip, glued it on another black strip.
* Foam mounted it on a top folding card base.
* Stamped sentiment in black onyx ink.
* Scattered few sequins.


Card #2
* I stamped flowers and images and fussy cut them out.
* I placed scalloped rectangle die (bigger one) and scalloped circle (smaller one) on a card panel and die cut them.
* Foam mounted this panel on top-folding card base.
* Stamped sentiment and arranged flowers and leaves.


Supplies


Dont forget to link your creations..

Thank you for your time..

Tuesday, September 6, 2016

Sparkle & Shine.!!

Hi Friends...Its Vijaylaxmi here !! Today I am sharing three very simple cards so let's start -


 Card - 1


Steps -

1) Took a card stock (neenah classic ) ...Distressed it with three different DI to create ombre BG !!
2) Then using Peek-a-boo Indian Motif stamp set ..I heat embossed one of the Paisley in gold on the whole panel ..and filled the rest space with small stamps from the same set !! 
3) Then Cut the whole panel with Peek-a-boo Rectangular stitched die !!
4) Cut the word Celebrate in gold using September released Celebrate Word Die from Peek-a-boo Designs. Also added a heat embossed sentiment from Peek-a-boo Happy Deepawali Stamp set below this word to complete the greeting !!
5) Arranged  everything on a black card stock as a base and its finish !!
6) I just love this stamp set as it is so opt for our Indian festivals !!

Card -2 


Steps -

1) For this card I simply sponged the white card stock using some Distress inks & Peek-a-boo's September released Stencil .
2) Then used the Peek-a-boo's latest stitched  fishtale die to cut the vellum banner and Peek-a-boo scalloped  circle die with stitches to die cut the golden scalloped border !! 
3) Heat embossed the sentiment in gold from previously released  Positive vibes Stamp set !! 
4) Placed everything together and the card is done !! Easy right !! ;)

Card - 3 


Steps - 

1) This card is completely made with previously released products ...;)
2) Took a white card stock ..stamped the circular images from Peek-a-boo's Circular fonts Stamp Set in different shades of Pigment inks !!
3) Die cut the whole Panel with Peek-a-boo Stitched Rectangular Die and also die cut the little star & heart from Peek-a-boo' s die !!
4) Placed all in right manner and layered a pattern paper for some interest on a pink top folding card and then placed the white stamped card panel over it !! Tadda ..we are done !! I just love the simplicity of this card !!

That's all for today ..meet you all soon with some more creations!! 
Thanks for stopping by and don't forget to check this month's challenge !!

Hugs.. 
Vijaylaxmi Siyal .

Wednesday, August 31, 2016

A FLOWER SELECTION OF CARDS

Hello crafty friends, Martha Lucia here to share with you a complete selection of cards created with flowers. All of these are flowers from our stamp sets and you can combine, cut and edit these to create your own designs. Let me show you my first card:


For this card I used the stamp set Humming Blossom and a watercolor technique. Creating this was very easy:
1. Cut a layer of watercolor paper. 
2. Ink an acrylic blog with four different colors of classic Ink. I used Wild Wasabi and Pear Pizzaz for the upper part and Blue Sky and Pool Party for the lower part. 
3. Spray the block with water and put the watercolor paper over the acrylic block.
4. Remove the paper and let it dry. If you want to speed up the process, you can use the heat tool.
5. Take the branch flower image from the stamp set Humming Blossom and ink it with markers. I used the colors Crushed Curry, Garden Green and Rose Red.
6. Spray the stamp with water and stamp over the watercolor background. Let it dry.
7. Stamp your sentiment with Paris Dusk Memento Tuxedo Ink.
8. Decorate with a die cut from the Funky Shapes Die Set. I used gold glimmer paper for this purpose.
9. Cut the base of your card and assemble it.


My second card is a Clean and Simple model that I made using the Dahlias Layered stamps and coordinating die cuts. These flowers are totally gorgeous and this is definitely one of my favorites sets.


Creating this card was very easy. This is a one layer card created in Whisper White card stock.

1. Stamp the solid images of dahlias, large and small, using Sky Blue and Bermuda Bay Classic Ink.
2. Use Stamp-a-magic to stamp over some dahlias from the previous step to make some corresponding flower with lines using Night of Navy Classic Ink.
3. In another piece of card stock, stamp the solid image of the dahlias using Pool Party Classic Ink, and the detailed images with Night of Navy and Island Indigo Classic Ink.
4. Cut the flowers stamped in the previous step using the corresponding die cut and paste over the stamped background using dimensionals or zapdots.
5. Stamp the sentiment from the stamp set Fiends Forever using Night of Navy Classic Ink.
6. Finalize the decoration by adding some silver sequins.


My last card is a combination of elements: decorated paper, word die cut and a little flower. This flower is from the stamp set Flower in a Jar. Take a look at my card:


The base of this card is Rose Red and the second layer is Whisper White. Creating this was very fun:
1. Cut the second layer using whisper white card stock and stamp the rose from the stamp set Flower in a Jar several times in diagonal lines using three different colors of Memento Ink. I used Grape Jelly, Lilac Posies and Lulu Lavender. 
2. Cut the third layer using decorated paper and create a diagonal angle. 
3. Match the border and cover it with a tiny piece of rose red card stock.
4. Tie several loops of natural twine and create a bow.
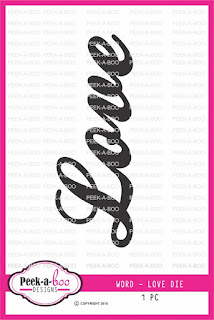
5. Cut the Love die word in a coordinating color and paste over the tiny border.


These are the products that I used in today's creations:


All of these are available in our store in you will find a lot of more to use these ideas in your own way!

See you soon with our new release!

Tuesday, July 26, 2016

3 Layered Cards

Hello everyone, its Juhi with my final post for July. Today I'm sharing 3 layered cards keeping with this month's challenge theme - Challenge # 8 - Only...Layers!!! There is still time to play along in case you haven't already done so!
layered stamped card with peek-a-boo designs stamps
For my first layered card I created layers with the Graceful Lattice Die and Rounded Stitched Rectangle Die, I then layered lots of Layered Dahlia blooms on top of it. I love to make stamped CAS cards, so this card is not my usual style but I love how it turned out.

My second card is a one layered card. Instead of adding layers with die cuts I did some masking and layered stamping to create the illusion of depth and perspective.

I did some spotlight stamping and die cutting to create layers in my third card.

I hope my cards have inspired you to create. There is still time to avail a discount of 10% on all the items at the Peek-a-boo Designs website. This discount is valid till 31st of July, 2016.


All you have to do is to apply the Discount Coupon code- JUHI_10
Supplies used:


Tuesday, July 19, 2016

JULY INSPIRATION

Hello dear friends, Martha Lucia here sharing with you my first post with Peek-a-boo Designs! I am so happy and proud to be part of you!

Today I have three cards to share with you using the July Release. Oh my God, did you see the entire release? It is amazing and I didn't know where to start but let me show you my first card:


I created this card using the stamp set Layered Dahlias and the Funky Shapes Die Cuts released this month. I combined these beautiful flowers with a sentiment from the stamp set Friends Forever


The Layered Dahlias are a beautiful flowers that come in three layers that you can stamp to create a great contrast. In this project I only used two of the layers and one of the flowers. I used the base that I stamped in a light color and the details in dark color. I didn't stamp the outside petals. 

Of the Funky Shapes I only used the stars, that I cut using metal gold sheets and I pasted over the stamped area.

From the Friends Forever stamp set I took the banner Friends that I stamped with VersaFine Onix and covered with clear embossing powder that I melted with the heat tool and fussy cut with my scissors and pasted over the stamped base using zapdots or dimensionals.

My second card is totally different. For this I used other colors and other stamp sets and die cuts.


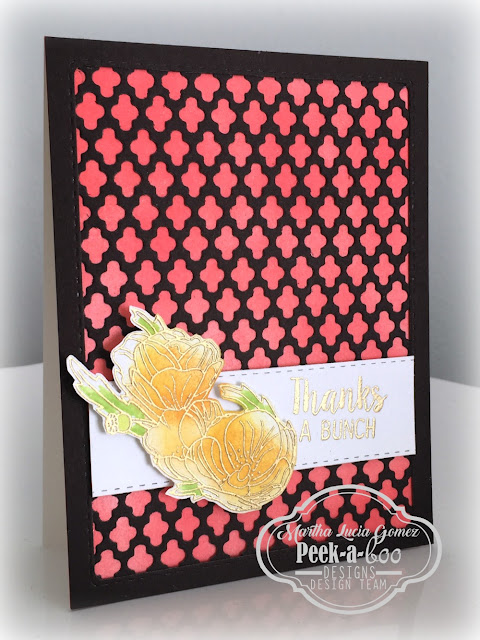
The base of this card is Whisper White card stock and I sponged the top side of the base with Abandoned Coral Distress Ink. Then I cut a second layer using the Graceful Lattice Die Cut with card stock Early Espresso. I pasted this die cut over the inked base and for decorate the borders I cut a stitched border using the Dual Stitched Rounded Rectangles Die Cut


Using the same die cut cut I created a stitched border over a piece of whisper white card stock and I stamped on it the sentiment Thanks a bunch that is included on the stamp set Flower in a Jar using VersaMark and Gold Embossing Powder. I melted the powder with the heat tool. Finally I decorated the left side using the image of the Poppies Bunch stamp released this month. I stamped this on whisper white card stock and colored with distress ink and fussy cut with scissors.

My last card is a Clear and Simple model that I made using a Word - Dream Die and two images of the stamp set Magical Fairies.


I created this card cutting several times the Dream die cut in Very Vanilla card stock and pasted these over the layer of the same color to create the background. Then I stamped individually the fairy and the sentiment over vellum using VersaMark the Blueberry Cheescake WOW Embossing Powder and I pasted these over the decorated layer.


On the photos you are seeing the embossing images a little distressed it is a light effect because this embossing powder is a marbling color but when you have the card in your hands this is simply amazing!

Products Used:


I hope my projects inspiring you to use the new stamps and now I have a special news for you! You can buy all the new releases with a 10% off using my 
discount code MARTHA_10 . So run and don't let the stamps and dies run out of the store!

See you soon!!!


Monday, July 11, 2016

Layered cards - With Peek-a-boo dies

Hi... Crafty friends...

I am Swapna from The Dream Pages . 

Here I am with my first post in detail and second post for Peek-a-boo designs. Peek-a-boo designs have introduced cutting dies this month, do check them out they are awesome. They come on magnetic sheet so no need to worry about dies falling off . Easy to store.

  As I had planned I am focusing on dies in my post. 

This month's challenge is about LAYERS


Hope you will play along with us..

Now coming to my Take on the challenge (first two cards)  and my projects for Peek-a-boo designs.

CARD 1

This card is white on white with pop of colour.
I stamped layered images (two big flowers, two small and few leaves ) from Layered dahlias with altenew inks and die cut them with matching dies. Then die cut an oval frame with Stitched oval dies, i used two larger dies. Die cut a piece from background die. I backed the oval frame with die cut background, trimmed it along the edges. Mounted it with foam stripe on white card base. Adhere remaining bits of background die cut to accent corners of the card. Then i arranged and glued flowers. Die cut the word - Love from silver glitter paper and glued it beside flower arrangement. 

Thats pretty much my card.


Supplies


__________________________________________

CARD 2

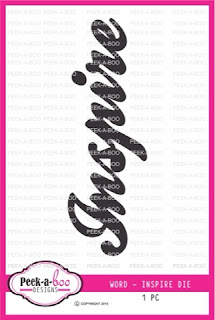
This card is simple. I placed the stencil on the orange CS and applied embossing paste, kept it aside to air dry. Die cut the the word - Inspire from black CS, applied black wink of stella, glossy accent n left it dry.
I die cut the card base with large oval from the set in orange CS. Used third larger oval to cut a black CS. Used smaller die to cut the stenciled CS. Assembled the card with foam sheet for dimension. Added few drops of glossy accent as embellishments. 


Supplies


 ______________________________________


CARD 3

Its a very simple card. I used few pearlescent colours and applied on a water colour CS, left it to air dry. Die cut the word dream. Prepared the card base, stamped poppy stamp with white pigment ink. Glued the die cut word n stamped IT on corner.


Supplies


__________________________________


CARD 4

I stamped the flourish image with versafine ink on water colour CS. Then coloured with Zig markers and wink of stella. Stamped sentiment with versafine ink.


Supplies


_____________________________________


Guess what we have DISCOUNT of 10% on your purchase through the month of July. So do visit the Peek-a-boo Designs site.

The copoun code is SWAPNA_10 .


Suggestions are always welcome..

Thank you for your time..

Swapna
The Dream Pages