Showing posts with label watercolor. Show all posts

Friday, November 25, 2016

A summery set of cards

I know it's almost winter in a lot of places but it's always summer here in Singapore! So why not make some fun summer themed cards? I've used the awesome "Summer Cooler" Stamp Set to create 3 bright and summery cards today.
Water Color Background with Ken Oliver Color Bursts and Peek-a-boo designs stamps
I created the watercolor backgrounds for all the cards with Ken Oliver Color Burst powders. I first sprinkled a little yellow, orange and crimson pigment powders on a piece watercolor paper and then sprinkled water on it. Following this I placed the second piece of watercolor paper on top of the first to pick up color from the first piece. This creates a beautiful smooshed effect.
I stamped the images onto watercolor paper, colored them with Zig Clean Color Real Brush Markers and fussy cut them.
I finally finished the cards by adding sentiments appropriate for the stamps. The sentiments in this set are so witty and go perfectly with the images. Don't you think so?
Thanks so much for stopping by today!

Supplies Used:


Wednesday, November 9, 2016

1 Design colored 3 ways

Hello everyone! Juhi here, today I am sharing 3 cards with the same design but colored with different mediums. It's amazing to see how you can get completely different looks just by changing the coloring mediums.

For my first project I stamped the gorgeous humming bird and flower images with Memento Tuxedo black ink (copic marker friendly ink) on Neenah Solar White 330gsm cardstock (copic maker friendly paper) and colored the images with Copic Markers. I am still learning how to blend copic colors, I tried to add a couple of patches of purple. I need to practice more to get it right!
Peek-a-boo designs humming bird colored with copic markers

My second card features the same design, this time stamped on Ranger Watercolor Cardstock and colored with Zig Real Brush Water Color Markers.
Peek-a-boo Designs Humming Bird colored with zig real brush markers

For my third and final card, I stamped the design in white ink on Kraft Cardstock and added a few highlights with a white Derwent Inktense Watercolor pencil.
Peek-a-boo designs Humming Bird stamped in white on Kraft Cardstock


I hope you like my projects! Why don't you try to use different coloring mediums to color the same stamp? Remember to use the stamping surface in accordance with the coloring medium!
Thank you so much for stopping by today!

Supplies Used:

Saturday, September 3, 2016

Mixed Media Panels with PABD latest release

Hello Everyone,
Shilpa here, I am back with my next installment of mixed media creations !!


I've created this mixed media panel using Peek-a-boo Designs new Gears stencil and Keys and Locks Stamp set.


In the background, I created texture using white crackle texture paste and Gears stencil. When it dried completely, I used various shades of blue, grey and yellow acrylic paints to get this effect.


Lock image is from Peek-a-boo's Keys and Lock stamp set. I stamped it with black archival ink and colored with watercolors.

My next panel is mixed media watercolor panel.


Watercolor resist Matte Gel medium, and I've used same technique here.
I stamped Flowers from Peek-a-boo Designs The Floral Fantasy on the watercolor paper. Next, texture is created with Matte Gel Medium and Grid Stencil.
When everything dried, I used watercolors, which highlighted flowers and grid background.

It is always fun to play with new crafty goodies and Peek-a-boo designs's September release are must try.

Thanks so much for stopping by...see you soon!

Gears stencil


Keys and Locks stamp set


Grid Stencil


Floral Fantacy


Wednesday, August 31, 2016

A FLOWER SELECTION OF CARDS

Hello crafty friends, Martha Lucia here to share with you a complete selection of cards created with flowers. All of these are flowers from our stamp sets and you can combine, cut and edit these to create your own designs. Let me show you my first card:


For this card I used the stamp set Humming Blossom and a watercolor technique. Creating this was very easy:
1. Cut a layer of watercolor paper. 
2. Ink an acrylic blog with four different colors of classic Ink. I used Wild Wasabi and Pear Pizzaz for the upper part and Blue Sky and Pool Party for the lower part. 
3. Spray the block with water and put the watercolor paper over the acrylic block.
4. Remove the paper and let it dry. If you want to speed up the process, you can use the heat tool.
5. Take the branch flower image from the stamp set Humming Blossom and ink it with markers. I used the colors Crushed Curry, Garden Green and Rose Red.
6. Spray the stamp with water and stamp over the watercolor background. Let it dry.
7. Stamp your sentiment with Paris Dusk Memento Tuxedo Ink.
8. Decorate with a die cut from the Funky Shapes Die Set. I used gold glimmer paper for this purpose.
9. Cut the base of your card and assemble it.


My second card is a Clean and Simple model that I made using the Dahlias Layered stamps and coordinating die cuts. These flowers are totally gorgeous and this is definitely one of my favorites sets.


Creating this card was very easy. This is a one layer card created in Whisper White card stock.

1. Stamp the solid images of dahlias, large and small, using Sky Blue and Bermuda Bay Classic Ink.
2. Use Stamp-a-magic to stamp over some dahlias from the previous step to make some corresponding flower with lines using Night of Navy Classic Ink.
3. In another piece of card stock, stamp the solid image of the dahlias using Pool Party Classic Ink, and the detailed images with Night of Navy and Island Indigo Classic Ink.
4. Cut the flowers stamped in the previous step using the corresponding die cut and paste over the stamped background using dimensionals or zapdots.
5. Stamp the sentiment from the stamp set Fiends Forever using Night of Navy Classic Ink.
6. Finalize the decoration by adding some silver sequins.


My last card is a combination of elements: decorated paper, word die cut and a little flower. This flower is from the stamp set Flower in a Jar. Take a look at my card:


The base of this card is Rose Red and the second layer is Whisper White. Creating this was very fun:
1. Cut the second layer using whisper white card stock and stamp the rose from the stamp set Flower in a Jar several times in diagonal lines using three different colors of Memento Ink. I used Grape Jelly, Lilac Posies and Lulu Lavender. 
2. Cut the third layer using decorated paper and create a diagonal angle. 
3. Match the border and cover it with a tiny piece of rose red card stock.
4. Tie several loops of natural twine and create a bow.
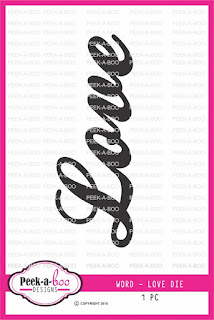
5. Cut the Love die word in a coordinating color and paste over the tiny border.


These are the products that I used in today's creations:


All of these are available in our store in you will find a lot of more to use these ideas in your own way!

See you soon with our new release!

Friday, August 19, 2016

Peek-Tute Friday with Juhi: Die-cutting with a twist

Hello everyone! It's Juhi. I am so excited to share my first tutorial for Peek-a-boo Designs. The focus of today's tutorial is die-cutting. I will show a fun and easy way to use the tiny negative die cut pieces of the Graceful Lattice die.
Here's the card I created.
I was inspired by this month's challenge theme, which is a color inspiration, you can find the details here.


To make the card:
I started with a piece of watercolor paper painted in colors of the rainbow. I stuck the watercolor panel onto a piece of same sized cardstock with some repositionable glue and ran it through my die cutting machine with the Graceful Lattice Die. The die only cut through the top watercolor paper layer, leaving the bottom cardstock layer intack. Then I peeled off the die-cut watercolor paper leaving the tiny negative pieces stuck on the cardstock panel. I made a start to finish video of how I made this card.
I hope you enjoyed watching the video! This technique will work with most background dies. I would  love for you to have a go at it!

Supplies used:
Graceful Lattice Die

Double Stitched Rounded Rectangle Die

Dream Word Die
Thanks for visiting!

Saturday, August 13, 2016

Delightful Lotuses!

Hello everyone! It's Juhi with my first post for August. For today's post I'll be sharing 3 cards using the same stamp set, Lotus Delight. This is one of my favorite sets, there are endless possibilities with this set.........so without further ado lets check out the cards...

Card 1:
Card using Peek-a-boo Lotus Delight Lotus stamp set
Totally inspired by Swapna's post about stretching your stamps I used the Lotuses from the Lotus delight set and used them as succulents. The pots are hand drawn, I created the background with gold shimmer washi tape. I'm no artist, but ever since I joined a course on Visual Communication I've let go of my inhibtitions of picking up the pencil and drawing! I know what you are thinking, a flower pot is not really a big deal right? But for me it is :)
Card using Peek-a-boo Lotus Delight Lotus stamp set


Card 2:
For my second card I stamped and the water colored the lotuses with distress inks and drew some leaves to create a lotus pond

Card 3:
For my third and final card I created a night scene with distress inks on watercolor paper, onto which I stamped and heat embossed the lotuses in black.

I had so much fun making these cards, why not create a some gorgeous cards with one stampset and to step up the some fun you could enter this month's Peek-a-boo Challenge and stand a chance to win some awesome goodies.
This month's challenge is a colour inspiration, you can find the details here. Please read Guidelines before linking your project.
Looking forward to seeing your awesome creations.
Supplies Used:


Wednesday, July 27, 2016

Distress Ink watercoloring with Peek-a-boo stamps

Hello Everyone,
Shilpa here,

Watercoloring with different paints and inks is one of my favourite technique.


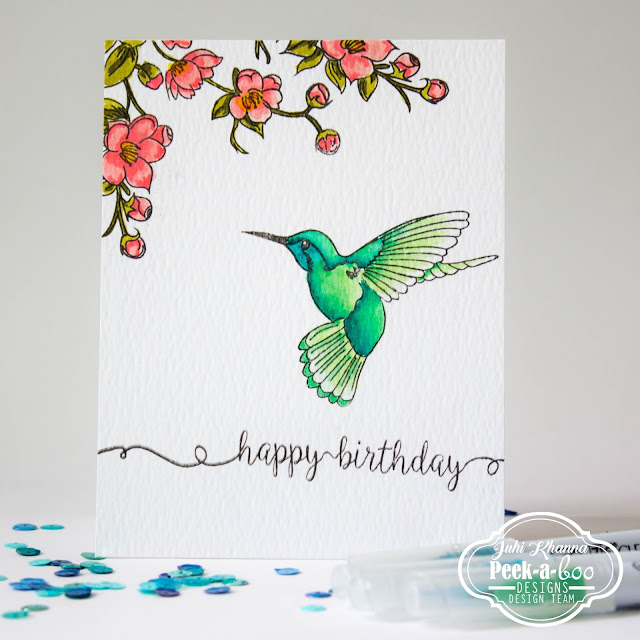
I've created a card today using  Peek-aboo Design's Humming Blossom Stamp set.


First I stamped the images using Archival inks- Black and Blue on watercolor paper. And further using different colors of distress inks and water brush pen I colored them.


Peek-a-boo has lots of beautiful mages for watercoloring, do try them!


Humming Blossom stamp set


Thanks so much for stopping by today.
Don't forget to avail 10% discount on Peek-a-boo store this month using Coupon code SHILPA_10

See you again in two weeks!