Showing posts with label water colouring. Show all posts

Tuesday, January 23, 2018

Playing with 'Floral Zen' Stamp!

Hey there!!
This is Ruchi from Ruchi's Crafeteria..! 

This is my last post as PABD DT. It was a great time I've spent here along with my fellow crafters and all team members. Totally fun spending 3 months here. :)

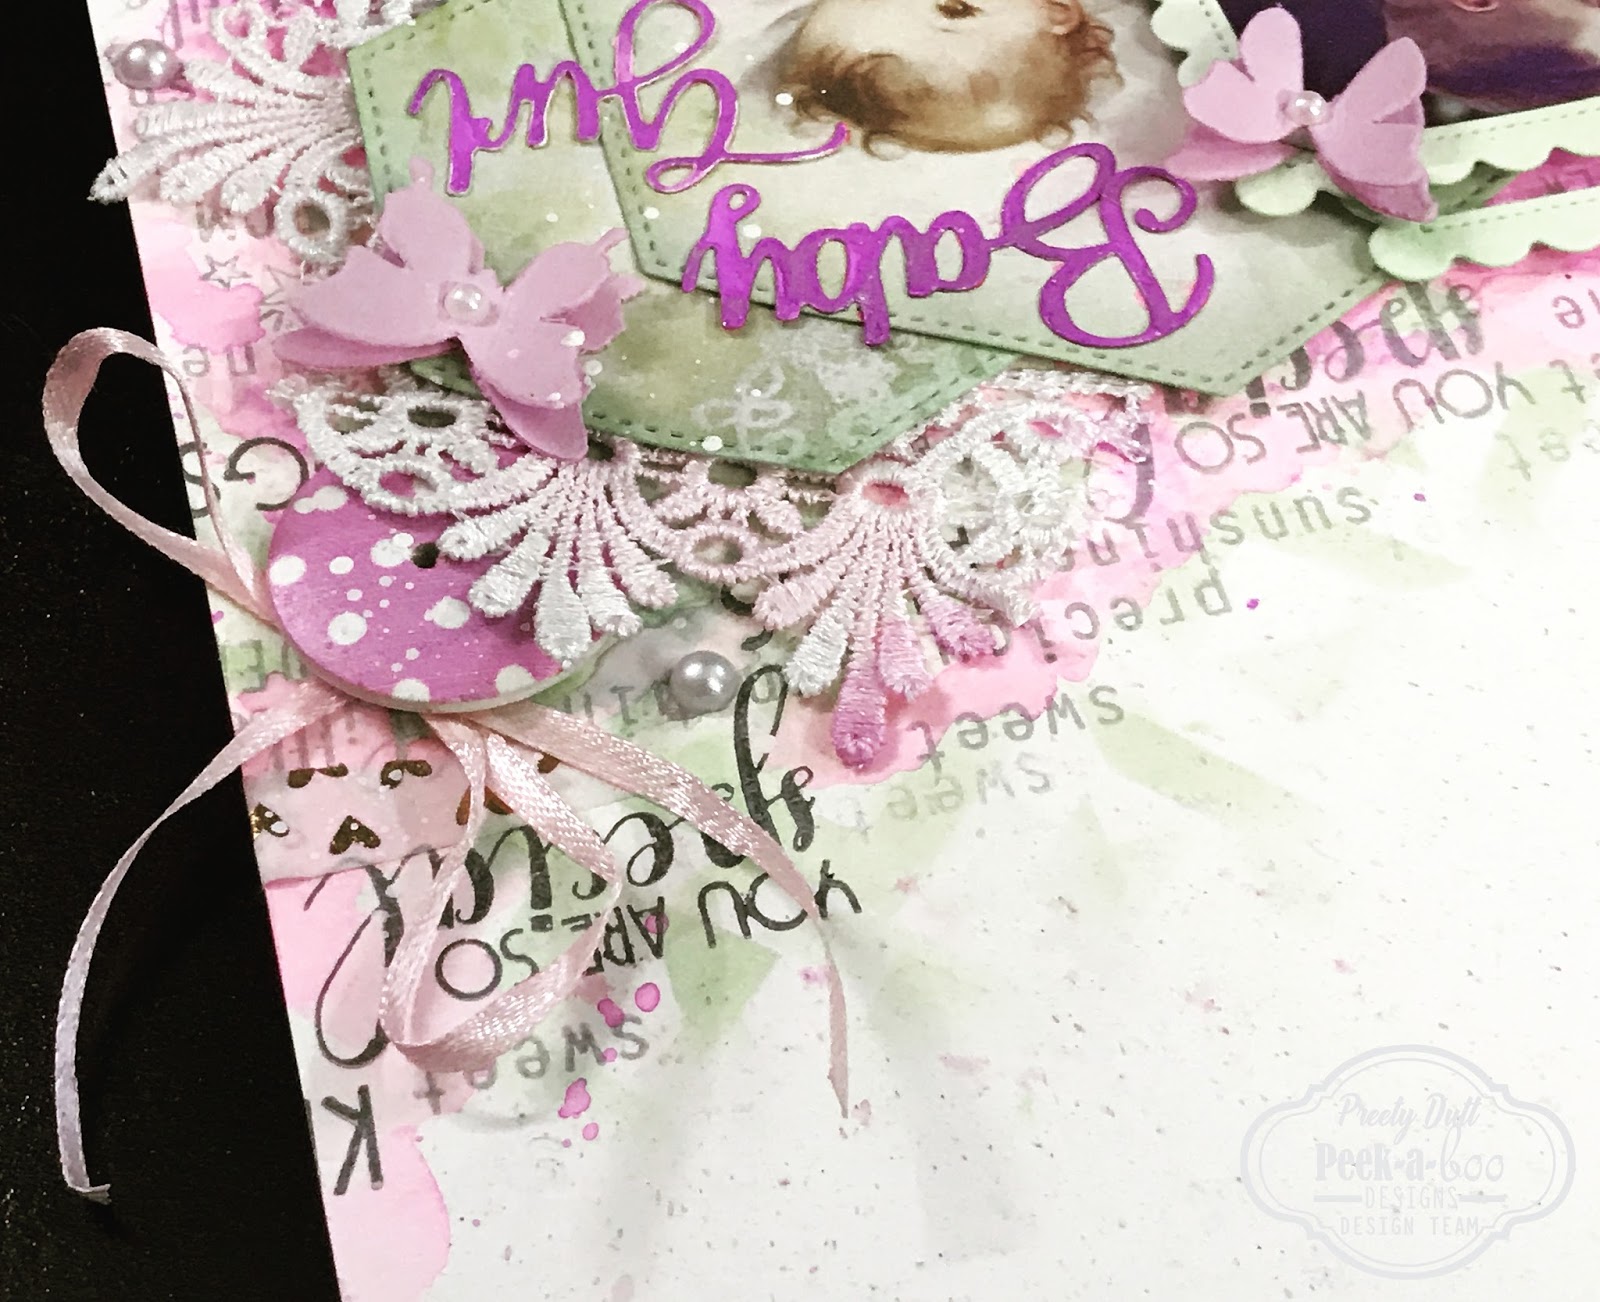
Today sharing an article about a Greeting Card which I've created using my designed stamp PABD- ' Floral Zen'. You can find all the new release HERE

Here is my Card...


It's an immense pleasure to do craft with your own designed products. I'm one lucky girl who got this opportunity to design for Peek-a-Boo Designs. So very happy with the outcome of this set.  Hope you all are liking this stamp set as its very close to my heart.! :)

So let's start the procedure of this card. I've created a video too and tried to capture all the coloring in that. :) You can find the link below.
First I've taken watercolor paper and heat embossed this floral image using white embossing powder. Started coloring using my all time favorite Zig Clean Color Real Brush Markers. After finishing all the coloring, stamped the sentiment 'Thanks A Million' using black ink. Put that aside and took my card base and adhered golden strips both the side of my cardstock. Then adhered my colored panel on the card base. Added ribbon and some sequins here n there to finish my card. 

Here is a close up look of my coloring..


You can find the video HERE. Though the coloring is presenting the image vertically as I later decided to make a horizontal card... ;-)

Dedicating this card to Vidushi :)..... Thanks a million Sweetie for selecting my design for your stamp and having faith in me. Sending lots of love & hugs!! <3 

Hope you like my crafty project today and don't forget to participate in our current challenge 'Anything Goes'


Here is the pic of my designed stamp set...


You can shop all the products HERE 

That's it for today. Thanks for stopping by! :)
Happy Crafting!
Ruchi..

Monday, November 27, 2017

Crafting with Preeti D.- Part 3

Hello Dear Crafty Friends!

Hope you had a blessed Thanksgiving and had fun shopping during the Black Friday weekend :)

Today, I have 1 Mixed Media Layout and 2 CAS cards to share with you.

1. Mixed Media Layout: Baby Girl


Here are some close-up photos of the layout:


Process:

1. Created the background by first adding color to the 12 by 12 piece of white cardstock using sprays 
2. Did background stenciling with the Abstract Triangle Stencil & Cracked Pistachio Distress Oxide. 
3. Then did background stamping with grey archival inks using apt words from these stamps: Ampersand, With Love Daisy, Bold You & Little Wonder
4. Die cut frames with the Scallop Rectangle die, a few cute baby patterned papers with the new Stitched Hexagon Dies & the title using the new Baby Girl Word Die. Then Colored the die cuts with distress oxides/sprays.
5. Layered and adhered all the elements including the die cuts & embellishments (buttons, ribbon bows, laces, pearls, butterflies) using foam tape and tacky glue. 
6. In the end, did some additional stamping, added a few strips of Lovey Dovey Washi tape & created splatter with white gesso 

2. CAS Card: Shine & Sparkle


Process:

1. Heat embossed the sentiment in Gold on Navy Blue Cardstock using the Ampersand Stamp
2. Die cut the "&" in white using the Ampersand Trilogy Die set  & adhered it 
3. Die cut the navy blue cardstock using the new Stitched Hexagon Die set 
4. Adhered the die cut to an A2 sized white cardbase, added a strip of glittery gold washi tape & Golden Days Washi Tape at the top
5. Finished the card with a few gold sequins. 

3. CAS Christmas Card


Process:

1. Heat embossed the pretty flower from the new Poinsettia Stamp in gold on watercolor paper
2. Colored the image with Festive Berries Distress Ink Refill, then fussy cut it
3. Die cut chocolate brown cardstock using the Dome Tower Die & heat embossed the sentiment from the Poinsettia stamp onto the die cut.
4. Assembled the card by foam mounting the die cut & flower onto a cream cardbase 
 5. To embellish the card used gold sequins, a bit of washi tape at the bottom and a few dots of red stickles.

PABD Supplies Used:


Baby Girl Die- New Release
Hexagon Die- New Release

Poinsettia Stamp


That’s all for today.

In case. you'd like to see more of my projects using the beautiful PABD supplies, 
you can check out my first two posts---> Part 1 & Part 2

Remember, all the PABD supplies can be bought from the online store here

Hope you have a pleasant week ahead. 

Thanks a lot for your precious time :) 
Stay Blessed!

Sunday, August 28, 2016

Crafty sunday with Daksha popat

Hello ! crafty Friends,
Hope you all must be doing very well!...Today I, Daksha Popat, am sharing three projects with you ,keeping in mind this month's challenge...Colour Ispiration! Hope you all will like it and hope to see more and more of your entries for this month's challenge.To see more inspirations  and challenge post HERE..

MY FIRST PROJECT : CARD


 Its an oval diecut card,made using oval dual stictched die #PABD . For the top layer I have used Oval frame which I have cut  using oval dual stitched die. In the window of the oval frame I have used Graceful lattice die cut .Bottom of that window frame I have used oval piece of diecut which I have distressed with distress inks -Squeezed lemonade and rusty hinge...Finally used #PABD sentiment die INSPIRE and decorated with liquid pearls.
Flowers I have coloured with Altenew ink cosmos red and highlighted with wink of stella, For the leaves used cheerylynn leaf die cuts, which I have painted with peeled paint reinker n then used crackle paint

SUPPLIES USED :


MY SECOND PROJECT : CARD


For this card after cutting cardstock for my 1st project ,negative part of diecut left.,..I have used  that left out negative piece from my 2nd project.

SUPPLIES USED :


MY THIRD PROJECT : BOOK MARKS


These cute little bookmarks can be ideal gift for Teacher's Day!.Its very east to make . Used jumbo metal paper clips for these bookmarks . To stick two scallops circles diecuts I have used double sided foam tapes and hot glue gun (you can used red tacky tape also ). Stamped images are either stamped on pattern paper n fussy cutted and others stamped n coloured and then fussy cutted

SUPPLIES USED:


Thank you so much for stopping by...
Love n hugs 
Daksha