Showing posts with label arrow. Show all posts

Wednesday, July 6, 2016

Easel Shaker Card

Hello! crafty friends
I am Daksha Popat and I am very excited as this is my first post as DT for Peek-A-Boo designs. This month's challenge theme is : LAYERED PROJECTS!!!
     Before showing you my project for this month's challenge , I want you to check our this month's challenge  and its Rules ,and keep in mind that for this special challenge we have an additional Rule:Using STAMP,STENCIL OR DIE is a must.


You can see amazing creations from our DT'S HERE..


Now with no further delay my take on for this month's challenge..


This is a pretty easel card and has a shaker center. This Magical Fairies set is adorable. And the sentiments with the set help you create cute and adorable birthday and anniversary cards. 

- I used the newly launched Oval Dual Stitched dies which are Proudly Made in India to make the base of my card.
-  Distressed the base of my card to give it a little magical colour. I avoided used a plain black CS to create this affect.
- I stamped the fairies from the Magical Faries stamp set on Iris Paper and then coloured their wings and sprinkles Rock Candy Glitter. 
- Created one more distressed background for the inner portion of the shaker card.
-Stamped a sentiment from the same set.
- Added foam tape around the base created using the oval dual stitched dies 
- Added sequin and adhered a piece of clear film.
- assembled the entire card and tada the card was ready.

Supplies Used :


My second take on for this month challenge:
I have made 3 tags 


In this first tag I took iris paper n distress it with DI using scattered straw ,shabby shutter,peeled paint,n chipped shappire
after drying with heat gun I misted with water to get fine water effect on my paper again dried then misted with perfect pearl to get fine pearl mist look...finally decorated using #PABD stamps,dies,mulberry flowers, pearl stickers,etc...did matting with black card stock.


In this 2nd tag I have used DI..tattered rose n worn lipstick half n half...then using Arrow stencil I have used fired bricks,used vintage photo n black shoot on the edges to give vintage look...then my tag was looking little dull so to brighten up a little I have used scattered straw in the middle..decorated using Bold butterflies stamp set..n did matting with black card stock,finally highlighted one butterfly with fussy cutting the image


In this 3rd tag first I have used Bubble stencil n distress the paper using worn lipstic n peocock feather...then through the stencil on bubble part I have used dotty line mini stamp set ...DI fired brick lightly..then after removing the stencil I dried the paper and again distress with scatterd straw n tumbled glass...edges distressed with distress tool finally decorated using # PABD stamps ,rhinstones n did matting with black card stock...


Supplies used:


And guess what .. We have a discount codefor you .. Hop on to our store
   and avail 10% discount on- Peek-a-boo Designs store for this month..valid till 31st July 2016.
Discount coupon code - DAKSHA_10

     Looking forward for your crafty take on our this month's challenge...

Love n Hugs
Daksha

Tuesday, June 28, 2016

Guest Designer - Zalak Mandal

Hello Crafters,

I am one of your crafty fellow Zalak A Mandal, I blog at handmadecardsbyzalak.wordpress.com. When Vidushi Saraf shoot me an email about guest designing, without a second thought I immediately replied her and I am really happy to guest designing here at Peek-a-Boo designs. I would like to thank Vidushi Saraf and the current design team memebers to give me this opportunity.
I also want to thank to all DT memebers for inspiration and great projects. And Hope to see new creations from new DT memebers.

So now lets head over to my projects I created using my Guest Designing Kit. It was really surprised moment when I received this stamp and Stencil.


Wow...... I really love this stamps and Stencil, don't you? Let me tell you this stamp and Stencil are made in India. So crispy and detail images, can absorb ink very smoothly. And clears all your ink from stamps using baby wipes.

So I have made 4 CAS cards and 1 layout (my first try). Here is what I made using this. 


This is my first card using Back to School stamp set. I did smooshing technique here, using Festive Berries, Picked Raspberry and Craved Pumpkin distrees ink. I colored winner cup with zig brush marker. To finish my card I embellish with sequin and twine.


This is my second card using same stamp set. I blend peacock feathers,  salty ocean, dusty concord and seedless preserve. Then I stamp owl, books and rule on watercolor paper and then colored it with zig brush marker. For stars I stamed with versamark ink and heat Embossed with white embossing powder. Last for sun I blend mustered seeds and Craved Pumpkin then applied glossy accents and sprinkled some diamond dust. ( I hope you can see effect in pictures) 


This is my third CAS card using Splitter Spatter stamp. I stamped umbrella which has heart images using picked raspberry then from that stamp only there is cute little hearts so I stamped them randomly using spun sugar and picked raspberry. I also stamped sentiment inside card and heat Embossed with gold embossing powder. 


This is my last, 4th card using same stamp set. I again stamp umbrella and colored it with zig brush marker and applied Glossy Accents over it and sprinkle diamond dust and randomly arrange it and embellish it with sequins.


This is my first Layout that I made using two stamp and Stencil. And tried to give Back to School theme. Used distress ink, heat Emboss, fuzzy cut stamped images, some of sentiment from my recollections papers(which is already heat emboss, you just need to color).

I hope you all like my projects. Thanks for stopping by. 

Happy Crafting
Zalak

Tuesday, June 14, 2016

Stencil Frenzy !!

Hi every one !! 
This month we released an small array of stencils which is a great add to our line !! 

Our Dts have taken the opportunity to make a stencil intensive project !! 


Here are the projects that they made !! 


Halak beautifully   used all three stencils from the collection and made this gorgeous project !! She used them to ink up her project and can you see the crispness the inking has with sharp edged !! This stencil is fantastic for ink blending !!


Our DT Piyanki Biswas made these ultra elegant gift tags. She had firstly distressed the background and used a darker colour of the same to stencil. These matching set of tags are so pretty and quick to make !!


This uber mixed media project with this grundge tiles cum wall background is so pretty .. The textures created using tbe tecture paste is to die for .. The use of flowers and sentiment enhance the background !!


 Wooow .. Bubbles looks so fantastic !! The dept of the tecture paste can be easily seen in this project !! Which enhances the entire project three folds !! 


The last mixed media project for the post has some really pretty textures with loads of spraying and texture paste !! The backgrounds stand out so nicely !! 

Supplies used :


Hope you enjoyed our take by the DTs .. Hoping to see some awesome work by our  fellow crafters using Peek-a-boo Designs stencils .. 

Loves and hugs 
Vidushi 

Wednesday, June 1, 2016

June Release

Hi Peek-a-boo Design Friends,
Its Vidushi here and like every month I'm here to reveal the new release for the month June 2016.. It's a big day here! 
Let's get right to what's new in store this month so that we can enjoy the creations from ALL of our amazing and talented Design Team Members shortly in the next post.

First Up is this adorable set we're calling BABY'S JOURNEY which is written by our vey own DT Member PIYANKI BISWAS.. This set is so dear to our heart. Designed keeping  in mind all the lovely scrapbooks and cards that we make for the adorable newborn babies, this set gives you a simple way to add a charm to those pages but keeps everything looking clean and cute..


Next up is a set that I am super in love with which we're calling Mandala. This stamp set contains a series of Semi Mandalas which you could stamp twice and make them full ones.. Yep we did that intentionally so that you get more in less .. The biggest Mandala when complete will be almost 2.8" in diameter .. 

When using this set and seeing what the Design Team does with them you will be amazed as to all the different pattern possibilities this set has! Loads of potential here!

And not to forget this set is designed by Purvi Gadewar ..


After that we have a set which all the crafters who have kids in school or send cards to their teachers as a note of thanks occasionally .This is a perfect Stamp set to create Teachers Day cards !!Or a Congratulations card for your children performing well in class .. the possibilities are endless..

This set is designed by Diljeet Kaur


The next stamp set is a seasonal stamp set .. With the onset of Rainy season in major parts of the country .. this was the right time to get this stamp out .. This is a stamp which can be used for the rainy season .. for making love cards and even encouragements/ support cards .. This is a beautiful set and im sure your would love it..


This set is one of those set which is would fit into number of projects from mixed media projects to motivational cards ..


This cute little stamp set is designed by Deepti Stephens,, It is a cute little mini stamp which has a bunny and a sentiment ..


This love in paris stamp set is an Exclusive membership stamp set .. and has the famous Eiffel tower and other elements to give it a vintage feel .. this stamp set again has endless possibilities .. make cards .. mixed media projects or  even use individual elements on  scrapbook pages .. 


And now for the new product that we are adding to our kitty .. Yes many of you people out there guessed it right they are STENCILS .. and to start with we are launching three very basic stencils which are a must have for all the card makers , scrapbookers, mixed media artists.. 

These stencils have a large working area of 7.75" by 7.75" and is perfect for making those huge 5-7" cards even when you rotate the stencil a bit .. Even after this big size they wont make a big hole in your pocket .. they are just for Rs. 200 each .. And not to forget they have a hole on the top for easy management and storage of your stencils .. Just attach Binder Rings and your stencils are good to store .. together .. none of them would be misplaced.. 

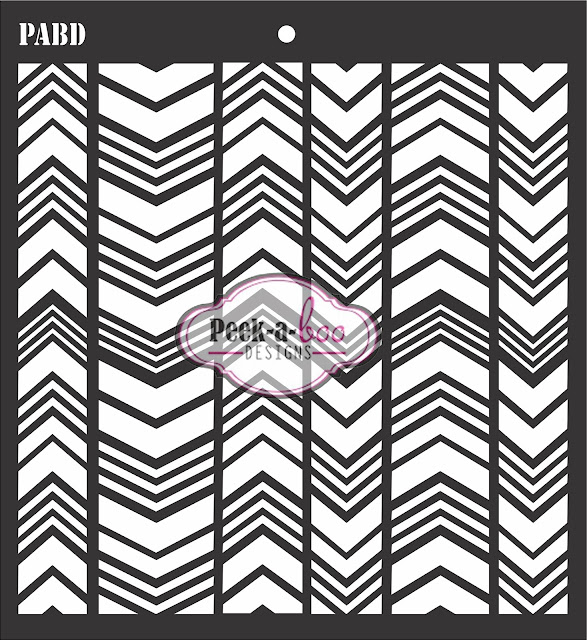
Arrows


Bubbles


Tiles


Hope you liked our new collection .. the collection would soon be available at www.thepeekaboodesigns.com

Cya
Hugs and Love
Vidushi