Thursday, June 16, 2016

A trio of ATCs!

Hello and good morning! ^__^

I'm Halak and today I have three ATCs that I made to share with you.

These may be tiny, but quite a few stamps and stencils went into the making of these so stay with me, here's the complete list :

Stencils :

1. Tiles


2. Bubbles


3. Arrows


Stamps :


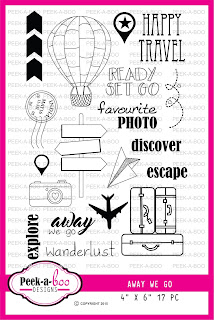
I've used small elements from various stamp sets (images above) to co-ordinate with the sentiments from Positive Vibes set which was my focal stamp on the ATC.

Here's a look at the ATCs individually :

And that's that! ^__^

What do you think? Which one is your favorite? I'd love to know!

All of these ATCs are made as per our ongoing Challenge #7 theme i.e. something new + something old from stash so don't forget to check it out and participate by clicking >>> HERE

Thank you for stopping by and have a lovely day! *Hugs*


Posted via Blogaway

Wednesday, June 15, 2016

Welcome To Our New Design Team - 2016 !!

Good Morning crafty friends!
Today we are so pleased to announce a new Design Team for July - December 2016 and also a farewell to those that are moving on.

Peek-a-boo Designs has had some remarkable & talented designers on our team and we are thrilled to be able to continue in this tradition with these new team members aswell.

What an amazing design team call we just finished. Peek-a-boo Designs received applications from so many talented designers all over the world! Thank you to each and every one of you that took the time to submit your work, it is truly appreciated.

We are happy to announce the new Design Team that will finish off 2016 with us are:
Daksha Popat (India)


Halak Shah (India)


Juhi Khanna (Singapore)


Martha Lucia Gomez (Florida)


Swapna Patil (India)


Congratulations to all of you ladies! We are looking forward to all of your creativity. 

We would also like to sincerely THANK YOU to those DT members who are  finishing up their term with Peek-a-boo Designs in June and we wish them well with their future crafty adventures.  

Manu Gupta
Piyanki Biswas 
Sharada Dilip Acharya

Please stay tuned for our Design Team Introduction coming soon.
Happy Crafting !! 

Tuesday, June 14, 2016

Stencil Frenzy !!

Hi every one !! 
This month we released an small array of stencils which is a great add to our line !! 

Our Dts have taken the opportunity to make a stencil intensive project !! 


Here are the projects that they made !! 


Halak beautifully   used all three stencils from the collection and made this gorgeous project !! She used them to ink up her project and can you see the crispness the inking has with sharp edged !! This stencil is fantastic for ink blending !!


Our DT Piyanki Biswas made these ultra elegant gift tags. She had firstly distressed the background and used a darker colour of the same to stencil. These matching set of tags are so pretty and quick to make !!


This uber mixed media project with this grundge tiles cum wall background is so pretty .. The textures created using tbe tecture paste is to die for .. The use of flowers and sentiment enhance the background !!


 Wooow .. Bubbles looks so fantastic !! The dept of the tecture paste can be easily seen in this project !! Which enhances the entire project three folds !! 


The last mixed media project for the post has some really pretty textures with loads of spraying and texture paste !! The backgrounds stand out so nicely !! 

Supplies used :


Hope you enjoyed our take by the DTs .. Hoping to see some awesome work by our  fellow crafters using Peek-a-boo Designs stencils .. 

Loves and hugs 
Vidushi 

Saturday, June 11, 2016

Peek-A-Tute Day : Desktop Quotation Display !!

Hello Crafty souls.. ..Its Vijaylaxmi here & today i am sharing a Tutorial on making a "Desktop Quotation Display"


Steps on How to make this -


  • Stamps i used here - (From Previous & Latest Releases)


  • Material Needed - Chipboard, Pattern Paper, Card Stock, Paper Cutter, Binder Rings, Glue, Embellishments to Decorate.
  • Cut A Window with the help of cutter on two chipboard pieces.


  • Like this. You can cut as per your size requirement.


  • So after cutting & punching ..the chipboard will be like the same as in below picture -


  • Now cover the Chipboard pieces with 12*12" Pattern Paper of your choice. I took a neutral colored background paper. 


  • Cut a "X" slit in the window so that we can fold the paper backward & window can appear neatly. (See the above pic)
  • Now the whole stand will look like this.
  • As we already punched the Chipboard so now its easy to poke holes again after covering with Pattern paper. 


  • I stamped the Gorgeous Nysaa on different pattern papers to form its beautiful dress & colored the upper body with water color pencils.
  • Put this pretty girl on side panel of this desktop stand with the help of 3D foam Tape. I just love the way she is blushing ;)
  • Then added a mdf fence.


  • Decorate it as per your choice ..i used Mulberry Flowers & handmade Flowers (RAK From Pooja ).
  • Also used Pie Lane butterflies & Some Sequins.
  • Then with the help of binder Rings i added my quotations .
  • All the quotations are from "Positive Vibes Stamp Set" ..Our latest Release & a Must have stamp set..:)


  • You can add as many quotations you want & can flip it on daily basis for your daily motivational dose :p


Yay..we are done !!


Have a great day !!
Thanks for stopping by & Check out this month's Challenge with a Blog Hop # Anything Goes...!! Yes its anything goes so don't forget to link up your beautiful creations for more fun & prizes.

Hugs ..
Vijaylaxmi Siyal