Hello and good morning dear friends! ^__^
I'm Halak and on this lovely Sunday morning, I bring to you a mini tutorial on how to use your layered stamps + a fun giveaway!
Before we move onto the projects, let's check out the stamped images :

Tip
Always use the right ink. The image you see above is a perfect example of that.
The flower on the left is two layered with 1 distress ink and 1 dye ink combination, whereas the flower on the right is all three layers with 2 distress inks and 1 dye ink.
When I tested out layered flower ink combinations, I found out that using more than 1 distress ink leads to a blurred image.
So, if you don't have a lot of colors, use distress inks by all means, but, don't use more than one distress ink for a flower or it will end up looking like the right hand side flower.
Trick to getting the flower layered perfectly
There are two ways to stamp a layered set.
1. You can go from light to dark ink or,
2. You can progress from dark to light ink.
I personally prefer the progression from dark to light by using a dark color as outline first so that getting the next layers is easy because I can see the image outline while positioning my next stamp.
Note
Peek-a-boo Designs Layered Dahalias stamp set is constructed in such a way that you can use just two layers and create beautiful dimensional flowers.
If you want added depth in your stamped image, there is always the option to use all three layers from the stamp set, but I feel, for the folks just starting out, it's a great idea to practice with two layers first.
Let's check out the projects :
Project #1

First up is this CAS project featuring the Layered Dahlias stamp set and cutting die.
Steps :
Stamped and die-cut the flowers.
Fussy-cutting is such a pain sometimes and I was so glad to have the die for this set. It helped me cut out the flowers in a jiffy!
Stenciled the RHS of the white card base using the Leafy Delight stencil and adhered a silver strip of cardstock.
Matted Wine Cardstock onto white card base and adhered flowers.
Adhered sentiment that I die-cut using the Word - Inspire Die and gave it a coat of glitter.
Finished it off with some white and clear sequins.
Project #2

I went a little mixed media on this one.
Tip
Apart from the layered leaves in the stamp set, for added dimension, once you stamp and die-cut / fussy-cut the flowers, you can pair them up with mulberry leaves like I did in this project.
Steps :
For my background, I first layered woodgrain design pattern paper and some washi tape.
Die-cut background using the third largest rectangle from the Rounded Rectangle Dual Stitched Die
Used Arrows and BOX-tacular stencils to create textured look.
Also used a die-cut from the Graceful Lattice Die as a stencil in the background.
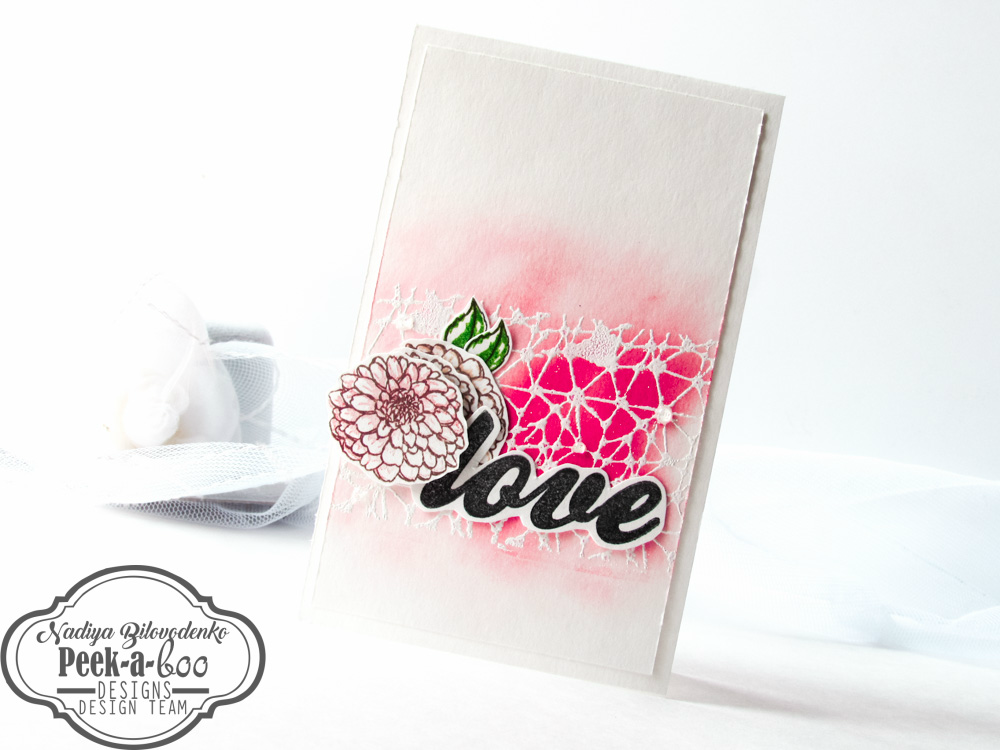
Adhered the Word - Dream Die as the sentiment and the flower from the Layered Dahlias set with a mulberry leaf.
Finished it off with some sequins and a tiny heart shaped sticker.
So that's how I did these projects and I hope these tid-bits of information helped clear some of the doubts and queries on layered stamp sets.
Now it's time for the Giveaway! ^__^
I gotta ask....
Are you on the fence about PABD cutting dies?
Don't know what PABD cardstock is like?
Want to see what the PABD die-cut layered flowers look like in person?
No problem!
Participate in our giveaway and get an opportunity to win an assortment of die-cuts, cut from PABD cardstock in the following colors :
1. Gold
2. Silver
3. Rose Gold
4. Wine and,
5. Black

Not just that, you will be getting a dozen of these die-cut layered flowers to use onto your projects along with a card made by me and a little surprise! ^__^
To participate, you only gotta do two things :
1. Follow Peek-a-boo Designs blog.
2. Join Peek-a-boo Designs facebook group.
To join group, click >>> HERE
Once you are done doing both the things, just leave a comment on this blog post and you are good to go!
Giveaway closes on 31st July 2016 (midnight).
Winners will be announced on 1st August 2016.
List of PABD products used in the projects :
To shop, click >>> HERE


Thank you so much for stopping by! *Hugs*
Posted via Blogaway


 if you have at least one distress ink, you're in luck!
 These cards can given to friends and acquaintances)))
 Its really hard to choose a favorite )))

 Magic Bird, is not it?
 All my projects for today are made in the same technique.

 I've made for you step by step video tutorial with my projects. Enjoy watching! If you have questions please write in the comments.
 Awesome mini
 humming blossom
 messy lines